8Crafter's Server Utilities & Debug Sticks v1.42.0 (1.26.0 UPDATE!)
 Go to files
This add-on does almost everything. It is one of the most powerful bedrock add-ons that currently exists.
This is an add-on that adds the debug stick, as well as an editor stick, which lets you see block info when you crouch and can be used on a block to change the block type (you can even change it to blocks that normally require NBT editors to obtain), change some of the block states of the block, change the raw text of a sign, change the color of the liquid in a cauldron (even for lava and powdered snow), change the potion in a cauldron, set whether or not the block is waterlogged, etc. It also allows you to have chat ranks, change your name in the chat, and have custom colors and formatting codes automatically applied to your messages, it also adds some custom chat commands, it also adds three different debug menus, one for the world details, one for player details, and one for entity details, it also adds a player controller that lets you do things like change a player's name tag, active selected hotbar slot, change whether or not they have operator permissions, start cooldowns on their items, apply knockback to them, kill them, despawn them, apply damage to them, add effects or tags to them, remove effects or tags from them, teleport them, set them on fire for a certain amount of time, set their spawn point to a very specific point in a specified dimension, etc. Then there is also an entity controller that does a lot of the same stuff as the player controller (except for the stuff that can only be used on the players) but also has a few other features too. Then there is an item modifier that lets you change the lore and name of an item (you can even use multiple lines of text in the lore too), you can also have multiple lines of text in the item names, you can also set the components of an item (like lock in slot, lock in inventory, can destroy, can place on, and also keep on death), you can also trigger item events for custom items, you can also transfer items in between players inventories. Then there is also a world controller that lets you do stuff like send internal client messages, set the weather in a specific dimension, send /tellraw messages to all players without needing to type out the /tellraw command, you can also set the world spawn, absolute world time, current time of day, spawn entities, spawn items, spawn particles with specified molang values (so you can use particles that are normally broken with the /particle command), etc. There is also an explosion creator that lets you create custom explosions at specified coordinates with a specified radius, and you can also specify whether or not it causes fire, whether or not it destroys blocks, whether or not it can explode underwater, and also which entity has caused the explosions.
Main Features:
- WorldEdit
- 100% Customizable Chat Ranks. Including the option to have colors and formatting codes automatically applied to your chat messages, and even optionally having chat ranks show up on players' name tags. It even optionally can include timestamps in chat, and each user can even configure their time zone to be used for those chat timestamps.
- Allows you to add ANY ENCHANTMENT of ANY LEVEL on to ANY ITEM. For example, you could make a nether reactor core with sharpness 113, fire aspect 113, fortune 2, and knockback 15.
- Allows you to change players' and entities' name tags.
- Script REPL/Script Eval/Allows you to run JаvaScript code/scripts with commands.
- Debug Sticks
- An entire main menu with a ton of admin utilities.
- A map art generator.
- Allows you to get blocks and items that normally require an NBT Editor to obtain, such as Nether Reactors and Cameras.
- Allows you to get stacks of items that are larger than are normally possible, such as a stack of 255 wooden swords.
- Add and change translation strings on signs.
- Wax/Unwax Signs.
- Change the liquid color of water cauldrons, lava cauldrons, potion cauldrons, and even powdered snow cauldrons.
- Waterlog/Unwaterlog blocks.
- A TON of extremely usefull custom commands.
- Allows you to create your own custom commands using minecraft commands and/or JаvaScript.
- Set item names and item lore (allows for newline characters)
- Get a lot of debug information of players, entities, and blocks.
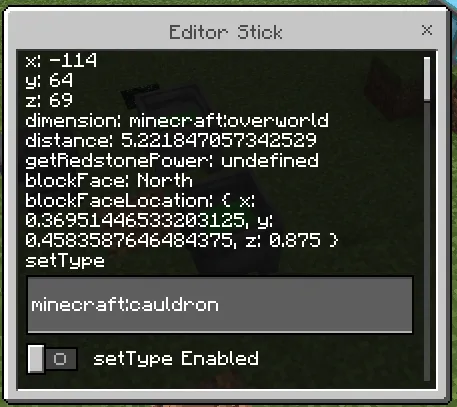
- An editor stick that gives you debug info about blocks when you sneak while holding it and facing the block. Some of this info includes:
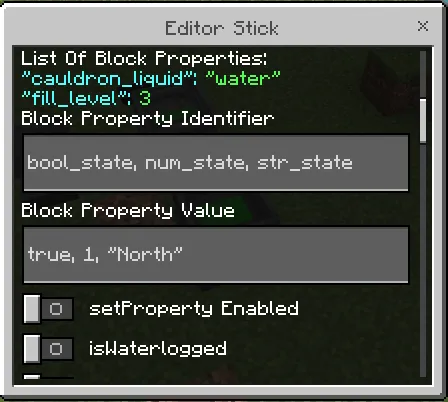
- Block States
- Block Tags
- Block ID
- Redstone Power Level
- Container size and fullness.
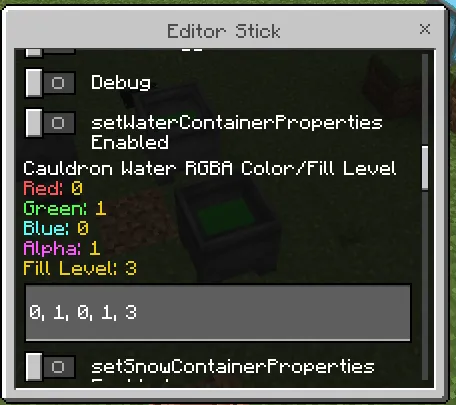
- Exact cauldron liquid color.
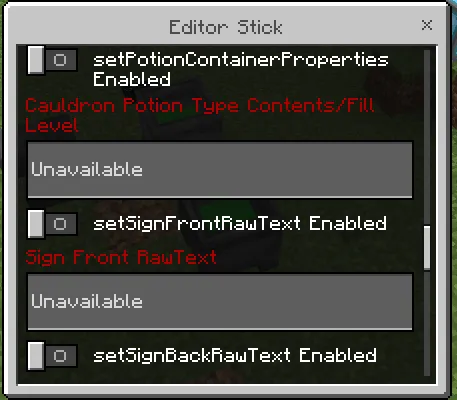
- Cauldron liquid/potion type and fill level.
- Piston State
- The ability to see inside other players inventories with the custom \invsee command. You can even see inside the inventories of offline players with the \offlineinvsee command.
- Spawn Items
- Spawn particles with specified molang values (so you can use particles that are normally broken with the /particle command)
- Explosion creator that lets you create custom explosions at specified coordinates with a specified radius, and you can also specify whether or not it causes fire, whether or not it destroys blocks, whether or not it can explode underwater, and also which entity has caused the explosions.
- Ban System
- Anti-Spam System
- Notifications System
- Teleport Request/TPA System
- Home System
- Customizable World Border System
- Customizable Server Shop System
- Customizable Player Shop System
- Customizable Player Menu with many features, including:
- A homes system UI.
- A TPA system UI.
- A warps system UI.
- A bounty system UI.
- A leaderboards UI.
- A button to access the Server Shops UI.
- A button to access the Player Shops UI.
- A money transfer system UI.
- A code redemption system UI. You can create codes that players can enter into this menu that give them a specific item when they enter it, and each person can only enter each code once.
- Hotbar Presets
- Fully Customizable Spawn Protection System. It can optionally prevent block placing, block breaking, interacting with blocks, interacting with entities, explosions, etc. You can even make it so that specific players (like admins) can bypass the spawn protection.
- Allows you to spawn Simulated Players, Simulated Players are fake players that the game treats just like real players. They show up in the player list in the pause menu, they show up in the autofill for commands, you can op/deop them, they show joined game messages in the chat, you can change their game modes, etc.
- Allows you to spawn entities with no AI.
- You can view the tags, dimension, position, inventory, and even game mode of any player even if they are offline.
- Allows you to see inside players ender chests, clear players ender chests, and even clear specific spots of players ender chests.
- Fully re-program any non-stackable item with JаvaScript.
- Run commands on item use.
- Full compatibility with other chat rank add-ons.
- Full compatibility with other chat commands add-ons.
- Allows you to fully re-program it in-game with commands. You can even add other add-on that just use the script api into this add-on in-game with commands. (Note: This last feature is EXTREMELY technical, and unless you are really good at jаvascript, you won't be able to use it).
A lot more detailed information can be found on the wiki for this add-on: https://wiki.8crafter.com/andexdb
Note: The wiki is currently in early development, while it has several completed pages with more accurate and easier to understand information than this ModBay page, most of the pages are still empty, but they are actively being filled out.
Debug Sticks
Debug Stick
The debug stick works identical to the java edition one, you use to go to the next possible value of that block state, and sneak while using to go to the previous one, you hit the block to select the next block state type, and sneak while hitting the block to select the previous block state type, you can see a demonstration of this in the trailer video. The liquid clipped version allows you to also target liquid blocks.
Item Id: andexdb:debug_stick or andexdb:liquid_clipped_debug_stick
Editor Stick


Item Id: andexdb:editor_stick
Editor Stick Type B
This is the same as the editor stick except it can't show you block info by sneaking and when you use it you can select which block to edit by entering its coordinates.
Item Id: andexdb:editor_stick_b
Editor Stick Type C
This is the same as the editor stick except it can't show you block info by sneaking and when you use it you can select filtering options for which block that you are looking at will actually be selected.
Item Id: andexdb:editor_stick_c
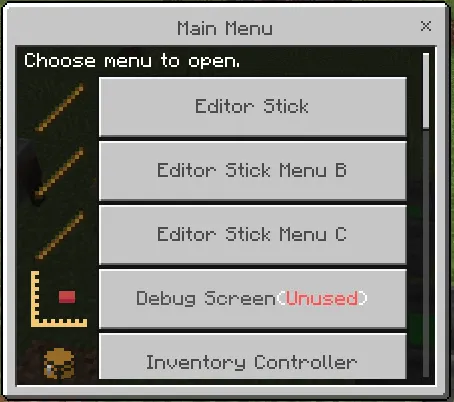
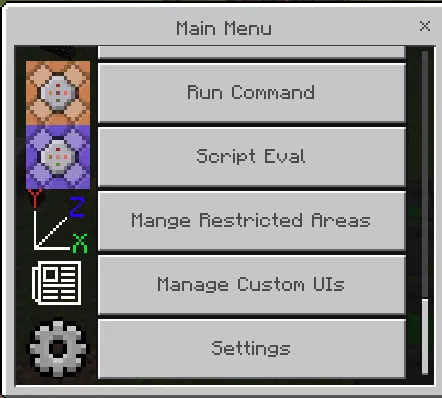
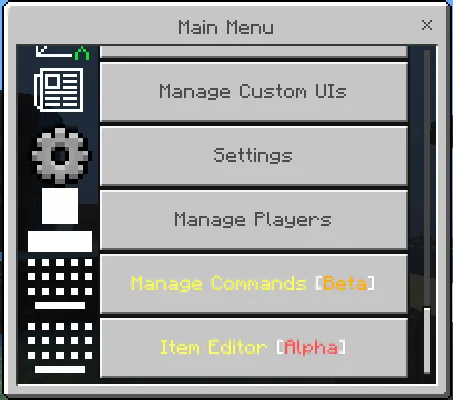
Main Menu
This opens up the main menu GUI (THESE IMAGES ARE OUTDATED!).
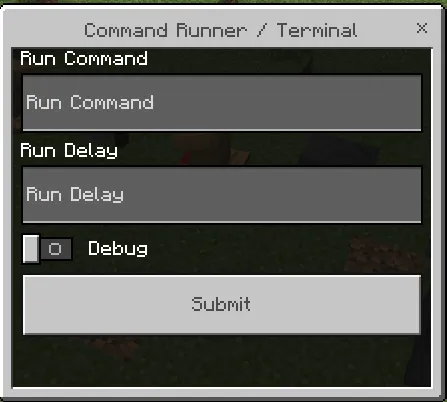
Command Runner
This allows you to enter a command into the GUI to run it, this can run commands that normally you would need to use an npc to run it, such as the /agent command.
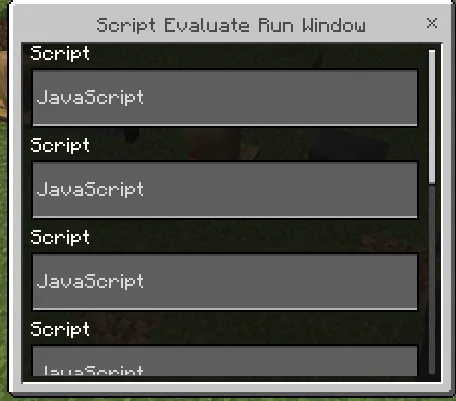
Script Runner
This allows you to enter some JаvaScript code into the GUI to run it, this can run any JаvaScript/Script API code.
Player Controller
This opens up the player controller GUI.
Item Id: andexdb:player_controller
Entity Controller
This opens up the entity controller GUI.
Item Id: andexdb:entity_controller
Player Debug
This lets you get debug info about a player.

Item Id: andexdb:player_debug_stick
Entity Debug
This lets you get debug info about an entity.
Item Id: andexdb:entity_debug_stick

Main Menu
The Main Menu can be opened either with the main menu debug stick, the mainmenu chat command, or the andexdb:editorMenusAndLists /scriptevent command.
Buttons:
- Editor Stick: Opens the editor stick UI. (More info in the editor stick section of the debug sticks section)
- Editor Stick Menu B: Opens the Editor Stick B UI. (More info in the Editor Stick B section of the debug sticks section)
- Editor Stick Menu C: Opens the Editor Stick C UI. (More info in the Editor Stick C section of the debug sticks section)
- Debug Screen: Unused
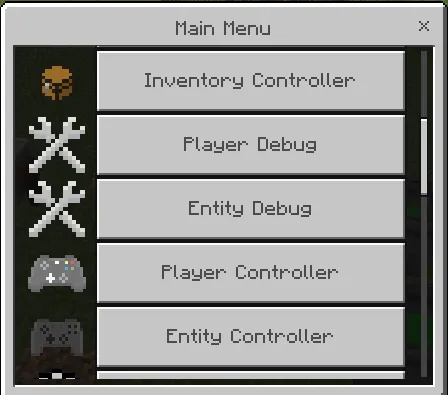
- Inventory Controller: Opens the item modifier UI where you can do things such as modify the name and lore of an item, modify its components etc. (More info in the Item Lore and Name Modification section)
- Player Debug: Opens the player debug info UI. (More info in the player debug section of the debug sticks section)
- Entity Debug: Opens the entity debug info UI. (More info in the entity debug section of the debug sticks section)
- Player Controller: Opens the player controller UI. (More info in the player controller section of the debug sticks section)
- Entity Controller: Opens the entity controller UI. (More info in the entity controller section of the debug sticks section)
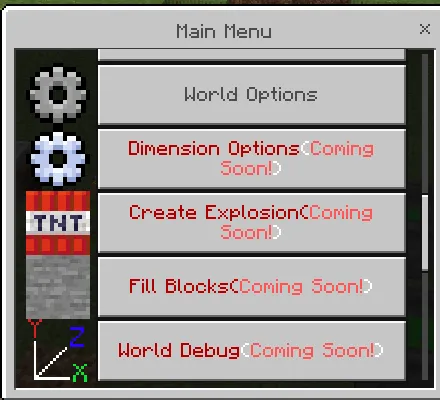
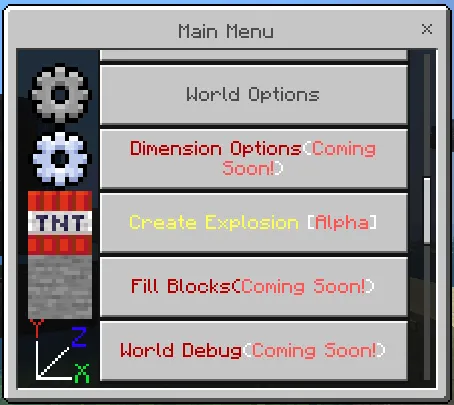
- World Options: Opens the world options sub-menu.
- Dimension Options: Opens the dimension options sub-menu. (COMING IN FUTURE UPDATE!)
- Create Explosion [Alpha]: Opens the create explosion sub-menu.
- Fill Blocks: Opens the fill blocks sub-menu. (COMING IN FUTURE UPDATE!)
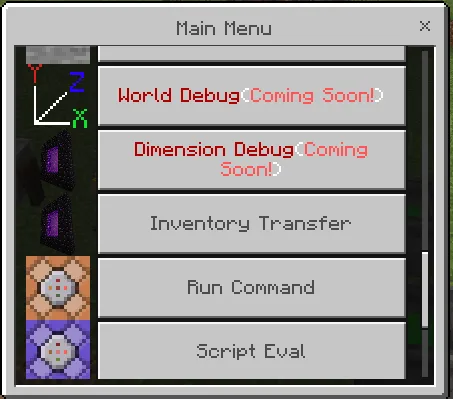
- Inventory Transfer (DEPRECATED!): Opens the inventory transfer sub-menu.
- Run Command: Opens the command runner UI. (More info in the command runner section of the debug sticks section)
- Script Eval: Opens the script runner UI. (More info in the script runner section of the debug sticks section)
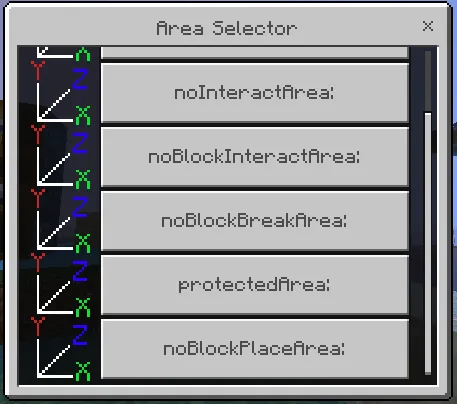
- Manage Restricted Areas: Opens the spawn protection management sub-menu.
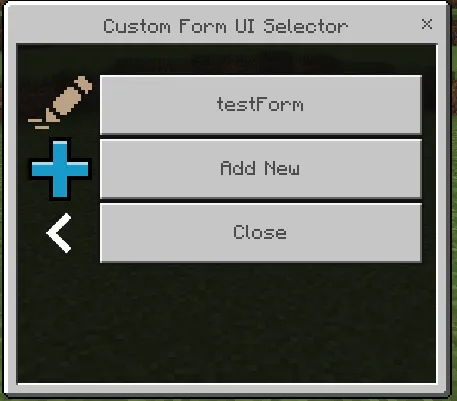
- Manage Custom UIs: Opens the custom UI manager sub-menu.
- Settings: Opens the add-on settings sub-menu.
- Moderation [Alpha]: Manages bans, anti-spam, and other moderation systems.
- Manage Players: Manages bans and saved player data.
- Manage Commands [Beta]: Manages built-in and custom commands.
- Map Art Generator [Alpha]: Generates Map Arts
- Java NBT Structure Loader [Alpha]: Loads a java edition structure from the inputter NBT data.
- Item Editor [Alpha]: Edits items.
Sub-Menus

This allows you to do things like swap the inventories of a block container and an entity, two entities, or two block containers, as well as manage your hotbar swap presets. WARNING!: This menu section has been deprecated and will soon be removed. It has been deprecated because I had made it a long time ago when my code was much more inefficient and buggy, as a result of this I will be removing this menu and replacing it with a new menu that will be completely rewritten.
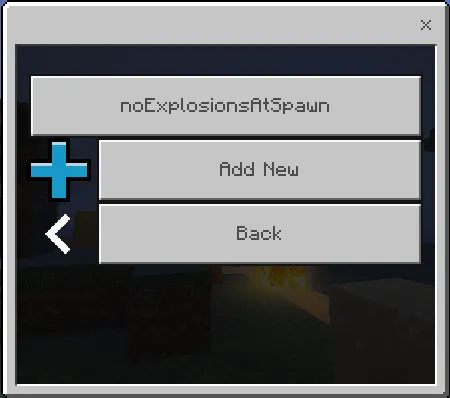
This allows you to manage the list of protected areas for each type of spawn protection. The types are spawn protection are: no explosion areas, protected areas, no block break areas, no block place areas, no block interact areas, and no interact areas.


This allows you to manage your custom UIs. If you have already made a custom UI then you can click on it to either view it, edit the elements of it, edit the code of it, or delete it. If you don't have any custom UIs yet or you just want to create a new one then you can just click on create new to create a new custom UIs. To pull up a custom UI that you have made for a specific player then just do this command: /execute as <playerName or targetSelector for the player> run /scriptevent andexdb:showCustomUI <UIID: id of the UI>
Options for editing an existing form:
- Edit Code Form Menu.
- Edit Elements Form Menu.
- Form Deletion Warning Pop-Up Menu.
- Add New Form Menu.
This is the menu for the add-on settings. OUTDATED!
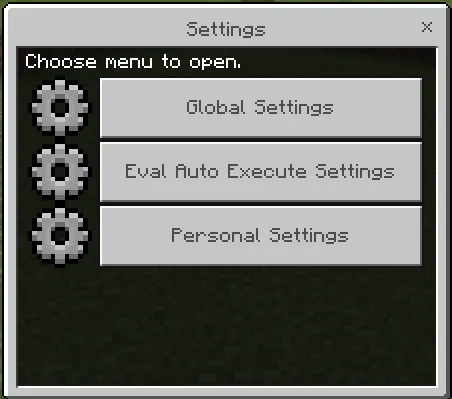
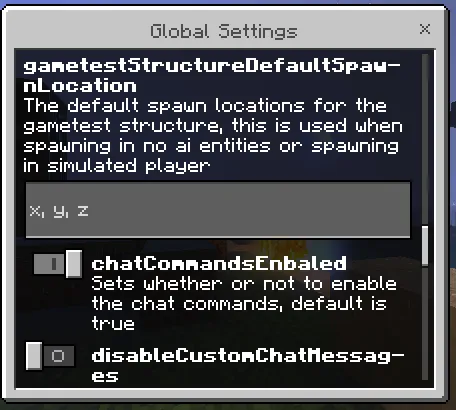
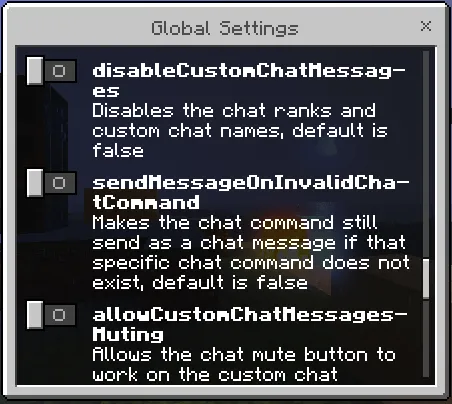
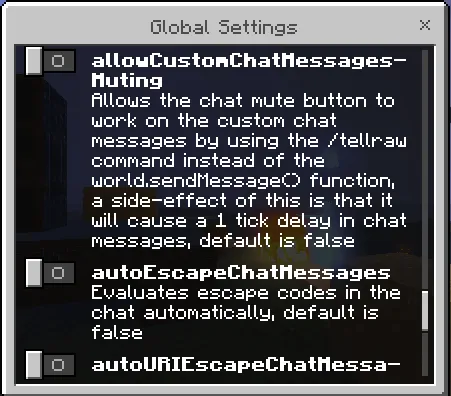
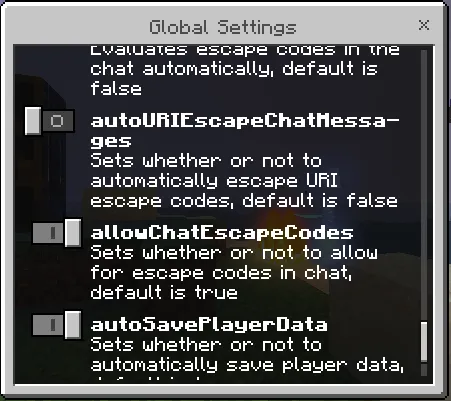
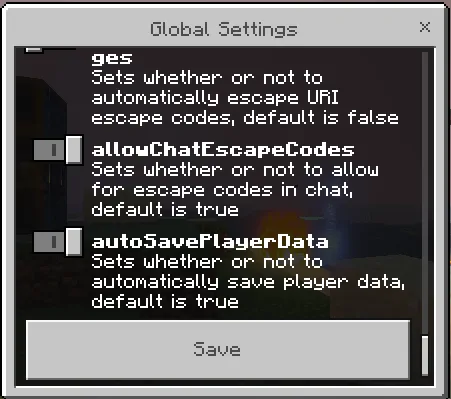
This is the menu for the global add-on settings.

This lets you manage the JаvaScript/Script API code that executes when certain game events are fired.
Script API/JаvaScript/Script Eval
With this add-on you can run your own Script API/JаvaScript Scripts with the Script Eval functions. This can allow you to make way more advanced command than are normally possible in bedrock edition. There are multiple ways to do this, some work a little differently than other, there are contexts in which these can be run, in beforeEvents, or in afterEvents, beforeEvents are executed during the current tick, the tick does not finish until the beforeEvent code is done with executing, before events can allow you to also artificially lower the TPS of a server if you need to do that for testing purposes, they can also be used to forcefully crash the server by using an insanely large arrayBuffer object to exceed the scripting memory (RAM) limit, which will cause the world or server to immediately just shut down, with beforeEvents there is one problem some things can not be executed during before events and to execute them you would have to use system.run(()=>{}), using system.run(()=>{}) turns the code inside of the {} form a beforeEvent into an after event, the code inside of the {} is executed the next tick instead of the current one, afterEvents are not able to lower the TPS or crash the server or world, they are also executed asynchronously (in the next tick). Here is a list of teh methods to execute script eval and whether they are beforeEvents of afterEvents:
andexdb:scriptEval scriptevent: afterEvent
eval chat command: beforeEvent
${se} or ${scripteval} chat escape codes: beforeEvent
GameTests: beforeEvent
AutoEval for world afterEvent triggers: afterEvent
AutoEval for world beforeEvent triggers: beforeEvent
Script Runner: afterEvent
To use the andexdb:scriptEval scriptevent you just use this /scriptevent command: /scriptevent andexdb:scriptEval <ScriptAPICode: JаvaScript>
To use the eval chat command you must first add the canUseChatCommands and canUseScriptEval tags to yourself, then you use this chat command: eval <ScriptAPICode: JаvaScript>
To use the ${se} or ${scripteval} chat escape codes you must first add the canUseChatCommands and canUseScriptEval tags to yourself, then put either ${se} or ${scripteval} somewhere in your chat message, then the rest of your chat message will be executed as the code.
The GameTest script eval is still a work in progress and is not fully functional yet.
For the AutoEval you can set the dynamic property for it and it will be executed when that event is triggered, the dynamic property id is either formatted like "evalAfterEvents:(event type)" or "evalBeforeEvents:(event type)" depending on whether it is an afterEvent or a beforeEvent, for example the entityDie world after event executes the code in the dynamic property "evalAfterEvents:entityDie". The data of these events can be accessed with the event property. Here are links with all of the different event types:
System AfterEvents: minecraft/server.SystemAfterEvents Class | Microsoft Learn
System BeforeEvents: minecraft/server.SystemBeforeEvents Class | Microsoft Learn
World AfterEvents: minecraft/server.WorldAfterEvents Class | Microsoft Learn
World BeforeEvents: minecraft/server.WorldBeforeEvents Class | Microsoft Learn
The Script Runner can be accessed either through the main menu or the script runner debug stick.
This can be very useful for doing things such as running more advanced commands with JаvaScript variables and conditions or running commands with JаvaScript escape codes (for example to put multiple lines of text in the name of an entity or use special Unicode characters in commands without needing to copy and paste them into your game). (Note: The names of the server modules are mcServer for the minecraft/Server module, mcServerUI for the minecraft/ServerUI module, and GameTest for the minecraft/GameTest module). Here are some examples:
Send a tellraw command message:
world.sendMessage("Example messagenNew LinenSender's Name: " + player.name + "nToken Emoji: uE105")
Give all players health boost with the level equal to their XP level:
world.getAllPlayers().forEach((p)=>{p.addEffect("health_boost", 200, {amplifier: player.level, showParticles: false}); })
Summon a sheep with multiple lines of text in its name:
/scriptevent andexdb:scripteval sourceEntity.runCommand("/summon sheep ~~~~~ test Sheepn§aMinecoin SheepuE105nnnnnn§c§oSupernTallnSheepnNameTag. §r§f")
Give all players a player head with their name instead of player:
/execute as @a run /scriptevent andexdb:scriptEval let player = sourceEntity; player.runCommand(`/replaceitem entity @s slot.weapon.mainhand 0 skull 1 3`); player.getComponent("inventory").container.getSlot(player.selectedSlot).nameTag = `§r§f${player.name}'s Head§§`;
Particle Customization
With this add-on you can also customize particles by setting their molang variables, this allows for a lot more particle customization then is currently available with the /particle command. To do this you must use the andexdb:createParticle /scriptevent command.
Command format: /scriptevent andexdb:createParticle <x: float|~>|<y: float|~>|<z: float|~>|[action: action]...
[action: action]
<actionType: actionType>:<molangVariable>:<newValue: float|R:G:B|R:G:B:A|x:y:z>
Action Types:
setFloat: / f:
newValue format: <float: float>
setColorRGB: / rgb:
newValue format: <r: float>|<g: float>|<b: float>
setColorRGBA: / rgba:
newValue format: <r: float>|<g: float>|<b: float>|<a: float>
setVector3: / v3:
newValue format: <x: float>|<y: float>|<z: float>
This add-on also has some custom particles that are made specifically to be used with this command:
andexdb:block_destruct_2
Molang Variables:
- variable.emitter_intensity: the cube root of the amount of particles
- variable.emitter_texture_coordinate_u: the horizontal position of the uv
- variable.emitter_texture_coordinate_v: the vertical position of the uv
- variable.emitter_texture_size_u: the horizontal size of the uv
- variable.emitter_texture_size_v: the vertical size of the uv
- variable.color.r: the red color tinting
- variable.color.g: the green color tinting
- variable.color.b: the blue color tinting
- variable.color.a: the alpha color tinting
andexdb:custom_block_texture_billboard
Molang Variables:
- variable.emitter_intensity: the cube root of the amount of particles
- variable.uv_u: the horizontal position of the uv
- variable.uv_v: the vertical position of the uv
- variable.uv_size_u: the horizontal size of the uv
- variable.uv_size_v: the vertical size of the uv
- variable.uv_range_u: the range of horizontal position of the uv
- variable.uv_range_v: the range of vertical position of the uv
- variable.uv_size_range_u: the range of horizontal size of the uv
- variable.uv_size_range_v: the range of vertical size of the uv
- variable.color.r: the red color tinting
- variable.color.g: the green color tinting
- variable.color.b: the blue color tinting
- variable.color.a: the alpha color tinting
- variable.color_range_r: the range of red color tinting
- variable.color_range_g: the range of green color tinting
- variable.color_range_b: the range of blue color tinting
- variable.color_range_a: the range of alpha color tinting
- variable.direction_x: the x facing direction
- variable.direction_y: the y facing direction
- variable.direction_z: the z facing direction
- variable.size_x: the x size
- variable.size_y: the y size
- variable.size_range_x: the range of x size
- variable.size_range_y: the range of y size
- variable.emitter_offset_x: the x emitter offset
- variable.emitter_offset_y: the y emitter offset
- variable.emitter_offset_z: the z emitter offset
- variable.emitter_radius_x: the x emitter radius
- variable.emitter_radius_y: the y emitter radius
- variable.emitter_radius_z: the z emitter radius
- variable.emitter_direction_x: the emitter x facing direction
- variable.emitter_direction_y: the emitter y facing direction
- variable.emitter_direction_z: the emitter z facing direction
- variable.max_lifetime: the amount of time before the particle disappears
andexdb:custom_block_texture_billboard_2
Molang Variables:
- variable.emitter_intensity: the cube root of the amount of particles
- variable.uv_u: the horizontal position of the uv
- variable.uv_v: the vertical position of the uv
- variable.uv_size_u: the horizontal size of the uv
- variable.uv_size_v: the vertical size of the uv
- variable.color.r: the red color tinting
- variable.color.g: the green color tinting
- variable.color.b: the blue color tinting
- variable.color.a: the alpha color tinting
- variable.direction_x: the x facing direction
- variable.direction_y: the y facing direction
- variable.direction_z: the z facing direction
- variable.size_x: the x size
- variable.size_y: the y size
- variable.emitter_offset_x: the x emitter offset
- variable.emitter_offset_y: the y emitter offset
- variable.emitter_offset_z: the z emitter offset
- variable.emitter_direction_x: the emitter x facing direction
- variable.emitter_direction_y: the emitter y facing direction
- variable.emitter_direction_z: the emitter z facing direction
- variable.max_lifetime: the amount of time before the particle disappears
andexdb:custom_item_texture_billboard
Molang Variables:
- variable.emitter_intensity: the cube root of the amount of particles
- variable.uv_u: the horizontal position of the uv
- variable.uv_v: the vertical position of the uv
- variable.uv_size_u: the horizontal size of the uv
- variable.uv_size_v: the vertical size of the uv
- variable.color.r: the red color tinting
- variable.color.g: the green color tinting
- variable.color.b: the blue color tinting
- variable.color.a: the alpha color tinting
- variable.direction_x: the x facing direction
- variable.direction_y: the y facing direction
- variable.direction_z: the z facing direction
- variable.size_x: the x size
- variable.size_y: the y size
- variable.emitter_offset_x: the x emitter offset
- variable.emitter_offset_y: the y emitter offset
- variable.emitter_offset_z: the z emitter offset
- variable.emitter_direction_x: the emitter x facing direction
- variable.emitter_direction_y: the emitter y facing direction
- variable.emitter_direction_z: the emitter z facing direction
- variable.max_lifetime: the amount of time before the particle disappears
andexdb:custom_item_texture_billboard_2
Molang Variables:
- variable.emitter_intensity: the cube root of the amount of particles
- variable.uv_u: the horizontal position of the uv
- variable.uv_v: the vertical position of the uv
- variable.uv_size_u: the horizontal size of the uv
- variable.uv_size_v: the vertical size of the uv
- variable.color.r: the red color tinting
- variable.color.g: the green color tinting
- variable.color.b: the blue color tinting
- variable.color.a: the alpha color tinting
- variable.direction_x: the x facing direction
- variable.direction_y: the y facing direction
- variable.direction_z: the z facing direction
- variable.size_x: the x size
- variable.size_y: the y size
- variable.emitter_offset_x: the x emitter offset
- variable.emitter_offset_y: the y emitter offset
- variable.emitter_offset_z: the z emitter offset
- variable.emitter_direction_x: the emitter x facing direction
- variable.emitter_direction_y: the emitter y facing direction
- variable.emitter_direction_z: the emitter z facing direction
- variable.max_lifetime: the amount of time before the particle disappears
andexdb:custom_text_ascii_sga_texture_billboard_2
Molang Variables:
- variable.emitter_intensity: the cube root of the amount of particles
- variable.uv_u: the horizontal position of the uv
- variable.uv_v: the vertical position of the uv
- variable.uv_size_u: the horizontal size of the uv
- variable.uv_size_v: the vertical size of the uv
- variable.color.r: the red color tinting
- variable.color.g: the green color tinting
- variable.color.b: the blue color tinting
- variable.color.a: the alpha color tinting
- variable.direction_x: the x facing direction
- variable.direction_y: the y facing direction
- variable.direction_z: the z facing direction
- variable.size_x: the x size
- variable.size_y: the y size
- variable.emitter_offset_x: the x emitter offset
- variable.emitter_offset_y: the y emitter offset
- variable.emitter_offset_z: the z emitter offset
- variable.emitter_direction_x: the emitter x facing direction
- variable.emitter_direction_y: the emitter y facing direction
- variable.emitter_direction_z: the emitter z facing direction
- variable.max_lifetime: the amount of time before the particle disappears
andexdb:custom_text_glyph_E0_texture_billboard_2
Molang Variables:
- variable.emitter_intensity: the cube root of the amount of particles
- variable.uv_u: the horizontal position of the uv
- variable.uv_v: the vertical position of the uv
- variable.uv_size_u: the horizontal size of the uv
- variable.uv_size_v: the vertical size of the uv
- variable.color.r: the red color tinting
- variable.color.g: the green color tinting
- variable.color.b: the blue color tinting
- variable.color.a: the alpha color tinting
- variable.direction_x: the x facing direction
- variable.direction_y: the y facing direction
- variable.direction_z: the z facing direction
- variable.size_x: the x size
- variable.size_y: the y size
- variable.emitter_offset_x: the x emitter offset
- variable.emitter_offset_y: the y emitter offset
- variable.emitter_offset_z: the z emitter offset
- variable.emitter_direction_x: the emitter x facing direction
- variable.emitter_direction_y: the emitter y facing direction
- variable.emitter_direction_z: the emitter z facing direction
- variable.max_lifetime: the amount of time before the particle disappears
andexdb:custom_text_glyph_E1_texture_billboard_2
Molang Variables:
- variable.emitter_intensity: the cube root of the amount of particles
- variable.uv_u: the horizontal position of the uv
- variable.uv_v: the vertical position of the uv
- variable.uv_size_u: the horizontal size of the uv
- variable.uv_size_v: the vertical size of the uv
- variable.color.r: the red color tinting
- variable.color.g: the green color tinting
- variable.color.b: the blue color tinting
- variable.color.a: the alpha color tinting
- variable.direction_x: the x facing direction
- variable.direction_y: the y facing direction
- variable.direction_z: the z facing direction
- variable.size_x: the x size
- variable.size_y: the y size
- variable.emitter_offset_x: the x emitter offset
- variable.emitter_offset_y: the y emitter offset
- variable.emitter_offset_z: the z emitter offset
- variable.emitter_direction_x: the emitter x facing direction
- variable.emitter_direction_y: the emitter y facing direction
- variable.emitter_direction_z: the emitter z facing direction
- variable.max_lifetime: the amount of time before the particle disappears
andexdb:custom_text_glyph_E3_texture_billboard_2
Molang Variables:
- variable.emitter_intensity: the cube root of the amount of particles
- variable.uv_u: the horizontal position of the uv
- variable.uv_v: the vertical position of the uv
- variable.uv_size_u: the horizontal size of the uv
- variable.uv_size_v: the vertical size of the uv
- variable.color.r: the red color tinting
- variable.color.g: the green color tinting
- variable.color.b: the blue color tinting
- variable.color.a: the alpha color tinting
- variable.direction_x: the x facing direction
- variable.direction_y: the y facing direction
- variable.direction_z: the z facing direction
- variable.size_x: the x size
- variable.size_y: the y size
- variable.emitter_offset_x: the x emitter offset
- variable.emitter_offset_y: the y emitter offset
- variable.emitter_offset_z: the z emitter offset
- variable.emitter_direction_x: the emitter x facing direction
- variable.emitter_direction_y: the emitter y facing direction
- variable.emitter_direction_z: the emitter z facing direction
- variable.max_lifetime: the amount of time before the particle disappears
andexdb:custom_text_texture_billboard_2
Molang Variables:
- variable.emitter_intensity: the cube root of the amount of particles
- variable.uv_u: the horizontal position of the uv
- variable.uv_v: the vertical position of the uv
- variable.uv_size_u: the horizontal size of the uv
- variable.uv_size_v: the vertical size of the uv
- variable.color.r: the red color tinting
- variable.color.g: the green color tinting
- variable.color.b: the blue color tinting
- variable.color.a: the alpha color tinting
- variable.direction_x: the x facing direction
- variable.direction_y: the y facing direction
- variable.direction_z: the z facing direction
- variable.size_x: the x size
- variable.size_y: the y size
- variable.emitter_offset_x: the x emitter offset
- variable.emitter_offset_y: the y emitter offset
- variable.emitter_offset_z: the z emitter offset
- variable.emitter_direction_x: the emitter x facing direction
- variable.emitter_direction_y: the emitter y facing direction
- variable.emitter_direction_z: the emitter z facing direction
- variable.max_lifetime: the amount of time before the particle disappears
Here are some examples of this command (these are the ones that are showcased in the YouTube trailer video):
/scriptevent andexdb:createParticle minecraft:block_destruct|~~2~2|overworld|setColorRGBA:color:0.5:0.25:0:1|setFloat:variable.EmitterTextureCoord.u:32|setFloat:variable.EmitterTextureCoord.v:32|setFloat:variable.EmitterTextureSize.u:32|setFloat:variable.EmitterTextureSize.v:32|setFloat:emitter_radius:0.2|setFloat:emitter_intensity:10 /scriptevent andexdb:createParticle andexdb:custom_block_texture_billboard|~0.5~1.5~0.5|overworld|setColorRGBA:color:1:1:1:1|setFloat:variable.uv_u:0|setFloat:variable.uv_v:0|setFloat:variable.uv_size_u:5000|setFloat:variable.uv_size_v:5000|setFloat:variable.direction_x:0.0|setFloat:variable.direction_y:0.0|setFloat:variable.direction_z:1.0|setFloat:variable.max_lifetime:1000.0|setFloat:variable.size_y:0.5|setFloat:variable.size_x:1 /scriptevent andexdb:createParticle andexdb:custom_item_texture_billboard|~0.5~1.5~0.5|overworld|setColorRGBA:color:1:1:1:1|setFloat:variable.uv_u:0|setFloat:variable.uv_v:0|setFloat:variable.uv_size_u:1000|setFloat:variable.uv_size_v:1000|setFloat:variable.direction_x:0.0|setFloat:variable.direction_y:0.0|setFloat:variable.direction_z:1.0|setFloat:variable.max_lifetime:1000.0|setFloat:variable.size_y:1|setFloat:variable.size_x:0.5 /scriptevent andexdb:createParticle minecraft:note_particle|~0.5~1~0.5|overworld|setColorRGBA:note_color:1:0.5:1:1 /scriptevent andexdb:createParticle minecraft:note_particle|~0.5~1~0.5|overworld|setColorRGBA:note_color:1:1:1:1
All of these examples could also be written as:
/scriptevent andexdb:createParticle minecraft:block_destruct|~~2~2|overworld|setColorRGBA:color:0.5:0.25:0:1|setFloat:variable.EmitterTextureCoord.u:32|setFloat:variable.EmitterTextureCoord.v:32|setFloat:variable.EmitterTextureSize.u:32|setFloat:variable.EmitterTextureSize.v:32|setFloat:emitter_radius:0.2|setFloat:emitter_intensity:10 /scriptevent andexdb:createParticle andexdb:custom_block_texture_billboard|~0.5~1.5~0.5|overworld|rgba:color:1:1:1:1|f:variable.uv_u:0|f:variable.uv_v:0|f:variable.uv_size_u:5000|f:variable.uv_size_v:5000|f:variable.direction_x:0.0|f:variable.direction_y:0.0|f:variable.direction_z:1.0|f:variable.max_lifetime:1000.0|f:variable.size_y:0.5|f:variable.size_x:1 /scriptevent andexdb:createParticle andexdb:custom_item_texture_billboard|~0.5~1.5~0.5|overworld|rgba:color:1:1:1:1|f:variable.uv_u:0|f:variable.uv_v:0|f:variable.uv_size_u:1000|f:variable.uv_size_v:1000|f:variable.direction_x:0.0|f:variable.direction_y:0.0|f:variable.direction_z:1.0|f:variable.max_lifetime:1000.0|f:variable.size_y:1|f:variable.size_x:0.5 /scriptevent andexdb:createParticle minecraft:note_particle|~0.5~1~0.5|overworld|rgba:note_color:1:0.5:1:1 /scriptevent andexdb:createParticle minecraft:note_particle|~0.5~1~0.5|overworld|rgba:note_color:1:1:1:1
Item Lore and Name Modification
With this add-on you can also modify the name and lore of an item (you can even use multiple lines of text in it too). To do this you have to open up the inventory controller menu or the item command.
You can access the inventory controller through the main menu, once you open up the UI you just enter the slot number of the item, then select the player who has the item, and the player to pull UI the second UI for, then it will open up the item modifier menu where you can modify a lot of properties of the item, such as its name, lore, amount, the keepOnDeath, canBreak, canDestroy, and itemLock components of the item, you can also transfer the item to another player's inventory, move it to another inventory slot, replace it with a new item that can be any type and any amount (even if the item types normally requires an NBT Editor to obtain, or if the amount is more than the max stack size of the item, so if you wanted you could get a stack of 127 nether reactor cores), etc.
To use the item command you must first give yourself the canUseChatCommands tag. Then use the following command.
Command Formats:
item name <itemName: escapableString>
item lore <itemName: JSON[type=array]>
item amount<itemAmount: int[min=0,max=255]>
item slot <slotId: int> name <itemName: escapableString>
item slot <slotId: int> lore <itemName: escapableString[]>
item slot <slotId: int> amount<itemAmount: int[min=0,max=255]>
Examples:
item name "item name line 1nitem name line 2"
item lore ["item lore line 1", "item lore line 2"]
Simulated Players
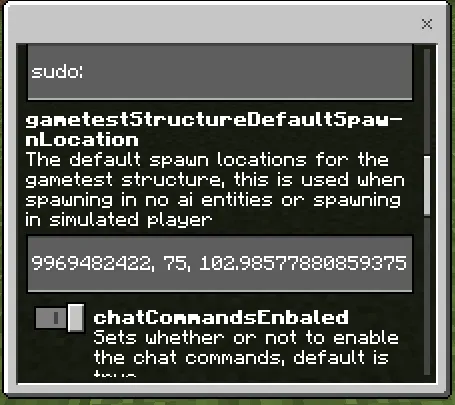
With this addon you can also spawn in simulated players, these simulated players work just like real players, they can be spawned using the /gametest command, just like real players they appear in the player list and show up in the /list command. They also show up in the target selector suggestion just like real players. You can also use player-only commands on them too. To get rid of them you either have to reload the world or do /gametest stopall. You can spawn infinite of these simulated players, even if it exceeds the max players limit, even on realms too, and it does increase the player count of the world, server, or realm. Another way to spawn them in is with this /scriptevent command: /scriptevent andexdb:spawnSimulatedPlayer [playerName: string]|[location: location]|[dimensionId: string]|[gametestStructureSpawnLocation: location]
No AI Entities
With this add-on you can also spawn entities with no AI. With this you can also create the old pre-1.14 villagers. When the world is restarted, any entities with no AI will get their AI back, though with the villagers even when they get their AI back, they will still be the old type of villagers if they were spawned in with no AI.
You can use this command to spawn in the no ai entities: /scriptevent andexdb:spawnWithNoAI <entityType: string>|[location: location]|[dimensionId: string]|[gametestStructureSpawnLocation: location]
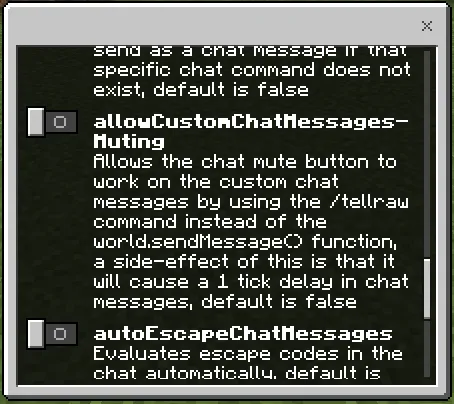
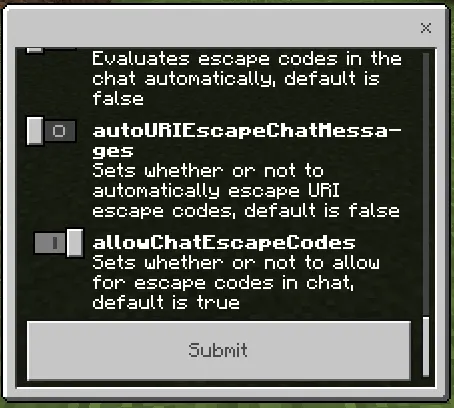
Chat Escape Codes
With this add-on you can also use escape codes in the chat (you can disable this by going into the main menu, then go to settings, then go to global settings, then scroll down to the bottom and turn off the toggle for allowChatEscapeCodes). These are very useful for things such as typing any Unicode character or emoji into the chat without needing to use a computer to be able to copy and paste it in, and even using those Unicode characters and emojis in chat messages, here is an example that gives you the tag "testtag" but with a Minecoin emoji at the end of it: ${se}player.runCommandAsync('/tag @s add "testtague105"'). To use the escape codes, you must put one of the codes specified below somewhere in your chat message (you can use multiple different ones too, and the codes do get removed from the message):
${ea} or ${escapeall}: does JаvaScript escape codes, such as n or ue105.
${ei} or ${escapeuri}: does URI escape codes such as %20 or %50.
${se} or ${scripteval}: executes the chat message as Script API/JаvaScript code (the chat message is not sent). Note: This one requires you to have the canUseScriptEval tag in order to use it. It is also not disabled when you turn off the allowChatEscapeCodes toggle. Also, with ${se} or ${scripteval} any part of the code that is inside of ``, "", or '' will automatically have the JаvaScript escape codes in it, so ${se}player.runCommandAsync('/tag @s add "testtague105"') will replace ue105 with a token emoji (which has a Unicode code value of U+E105).
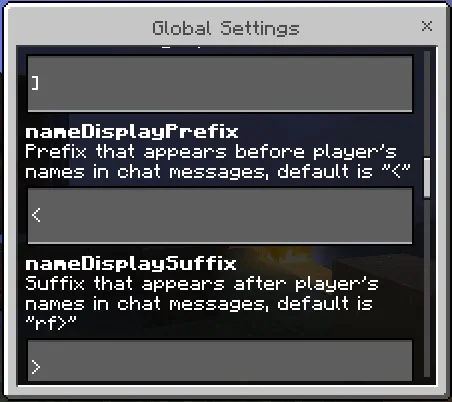
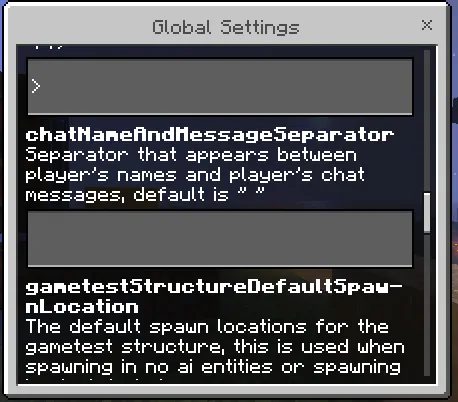
Chat Ranks
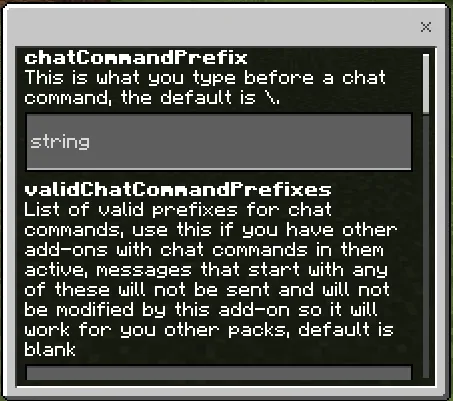
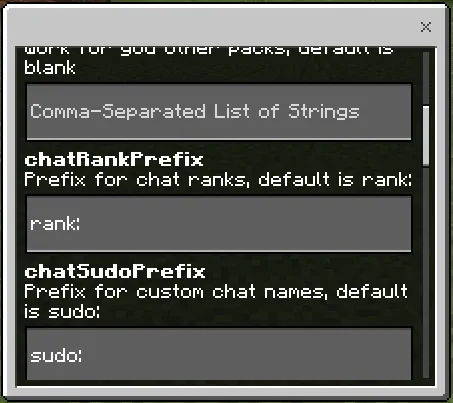
With this add-on you can also have chat ranks. To give yourself a chat rank you have to use tags. The format of the tag is "rank:(rank)". Note: the brackets [] are not on the chat rank by default, this is so that you can add your own custom brackets, for example to add the rank [Moderator] to yourself you would give yourself the tag "rank:[§6Moderator§f]". You can also have multiple chat ranks as well. You can also change your name in the chat, you can set it to use your nameTag instead of your username with the tag chatUseNameTag, and to give yourself a custom chat name you would use a tag in the format of "sudo:(name)", these tags work the same as the chat rank one, if you want it to look like a vanilla one but just with the name Herobrine instead of just your username then you would give yourself the tag "sudo:<Herobrine> ". If you want to change the prefix that the rank and sudo tags use, you can do that is the settings at "Main Menu>Settings>Chat Ranks", and you can just change the chatRankPrefix and chatSudoPrefix settings options, by default they are set to rank: and sudo: respectively.
/scriptevent Commands
andexdb:blockExplosion
Creates a custom explosion with the specified explosion options.
Command format: /scriptevent andexdb:blockExplosion <dimensionId: dimensionId>|<x: float>|<y: float>|<z: float>|<radius: float>|<allowUnderwater: bool>|<breaksBlocks: bool>|<causesFire: boolean>
andexdb:editorMenusAndLists
Pulls up the main UI menu of the add-on.
Command format: /scriptevent andexdb:editorMenusAndLists <anything: anything>
andexdb:itemLoreInventoryModifier
Command format: /scriptevent andexdb:itemLoreInventoryModifier <anything: anything>
andexdb:inventoryTransfer
andexdb:inventoryTransferB
Unused.
andexdb:playerController
Command format: /scriptevent andexdb:debugStickMenuC <anything: anything>
andexdb:entityController
Command format: /scriptevent andexdb:debugStickMenuC <anything: anything>
andexdb:playerDebug
Command format: /scriptevent andexdb:debugStickMenuC <anything: anything>
andexdb:entityDebug
Command format: /scriptevent andexdb:debugStickMenuC <anything: anything>
andexdb:debugStick
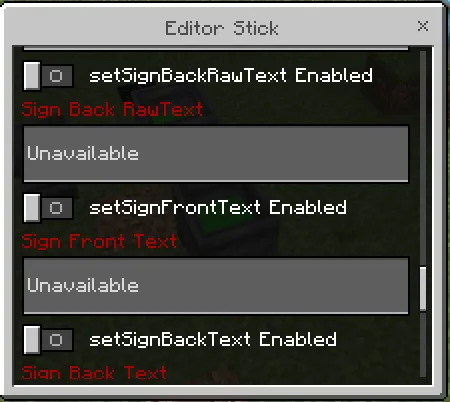
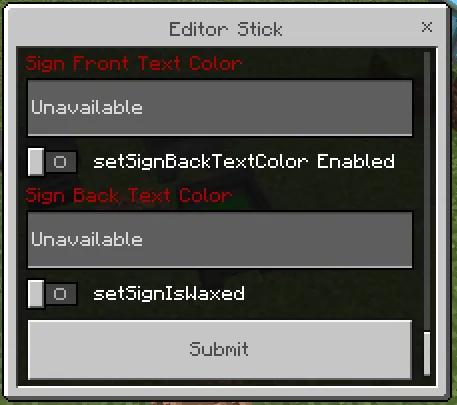
The UI for the editor stick, it allows you to change things like the block type (it can be set to any valid block, even ones that you normally need an NBT editor to obtain), block states, if the block is waterlogged, the RGBA color and fill level of cauldron water (if you use a debug stick on the cauldron after setting this then the color will stay even when the liquid is switched to lava or powdered snow instead of water, but to change it again you will have to switch it back to water first), the fill level of powdered snow in a cauldron, the fill level of lava in a cauldron, the potion type and fill level of a potion in a cauldron, the rawtext of a sign, and the regular text of a sign. More info is in the section about debug sticks.
Command format: /scriptevent andexdb:debugStick <anything: anything>
andexdb:debugStickB
Command format: /scriptevent andexdb:debugStickB coordinates:<blockDimension: dimensionId>|<blockX: float>|<blockY: float>|<blockZ: float>
andexdb:debugStickC
Command format: /scriptevent andexdb:debugStickB coordinates:<blockDimension: dimensionId>|<blockX: float>|<blockY: float>|<blockZ: float>
andexdb:debugStickMenuB
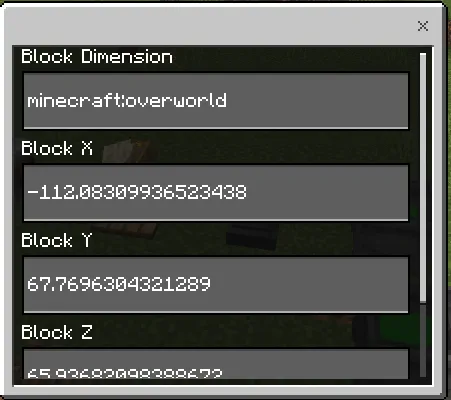
The selector UI for the debugStickB UI, debugStickB is a variant of debugStick where it gets the block to edit based on the specified coordinates instead of the block that you are looking at. It inputs the parameters selected in this UI into the message of the andexdb:debugStickB /scriptevent command in the format that is listed below:
/scriptevent andexdb:debugStickB coordinates:<blockDimension>|<blockX>|<blockY>|<blockZ>
Command format: /scriptevent andexdb:debugStickMenuB <anything: anything>
andexdb:debugStickMenuC
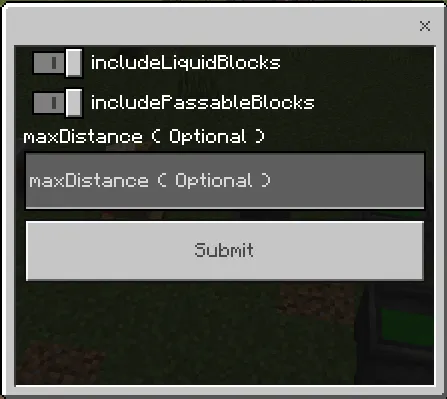
The selector UI for the debugStickC UI, debugStickC is a variant of debugStick where you can specify the filters for when it selects the block that you are looking at. It inputs the parameters selected in this UI into the message of the andexdb:debugStickC /scriptevent command in the format that is listed below:
/scriptevent andexdb:debugStickC options:<includeLiquidBlocks>|<includePassableBlocks>|<maxDistance>
Command format: /scriptevent andexdb:debugStickMenuC <anything: anything>
andexdb:debugScreen
Unused.
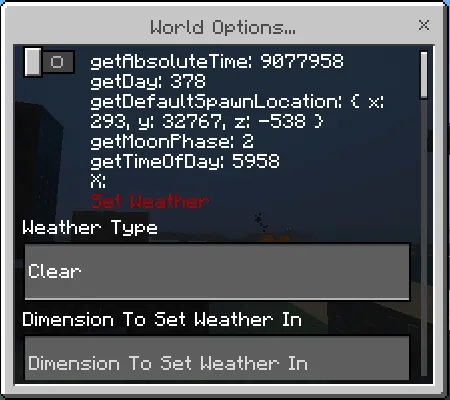
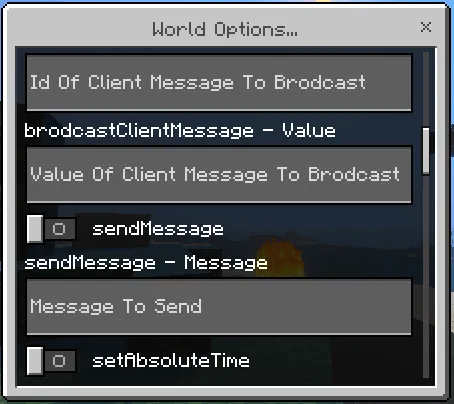
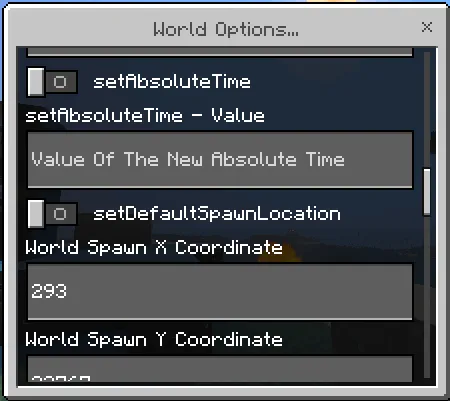
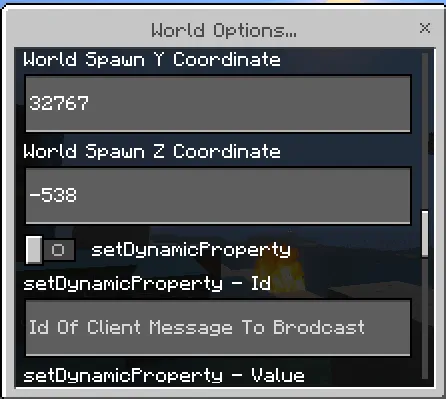
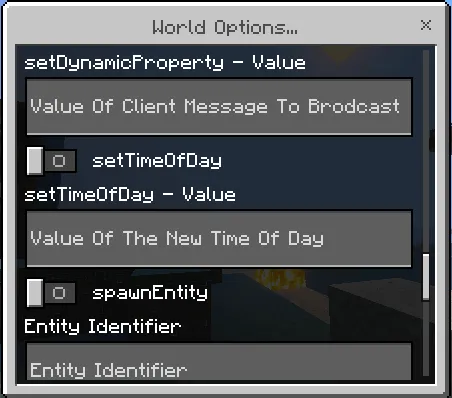
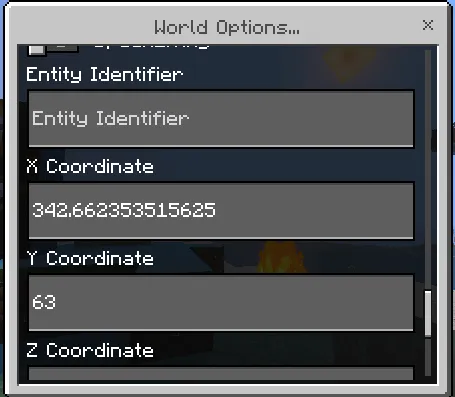
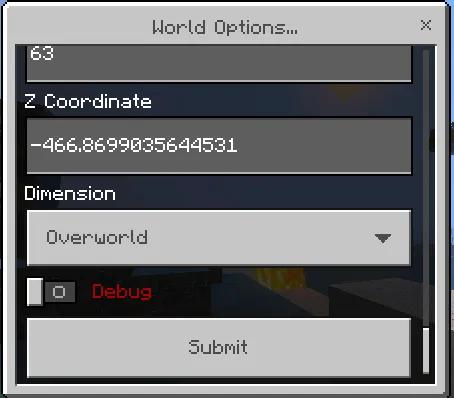
andexdb:worldOptions
The world options UI, more info under "selection menu" in the debug sticks section.
Command format: /scriptevent andexdb:worldOptions <anything: anything>
andexdb:scriptEvalRunWindow
A UI with multiple textboxes where you can enter JаvaScript/Script API and then when you click on the submit button then it will run that code that you typed in.
Command format: /scriptevent andexdb:scriptEvalRunWindow <anything: anything>
andexdb:evalAutoScriptSettings
Command format: /scriptevent andexdb:evalAutoScriptSettings <anything: anything>
andexdb:editEntityDynamicProperty
Command format: /scriptevent andexdb:editEntityDynamicProperty <anything: anything>
andexdb:editWorldDynamicProperty
Command format: /scriptevent andexdb:editWorldDynamicProperty <anything: anything>
andexdb:scriptEval
Runs the JаvaScript/Script API code specified in the message parameter.
Command format: /scriptevent andexdb:scriptEval <ScriptAPICode: JаvaScript>
andexdb:indirectScriptEval
Runs the JаvaScript/Script API code specified in the message parameter indirectly, which will cause any imported functions to not function of the code in this script eval (meaning that it will not be able to interact with Minecraft at all).
Command format: /scriptevent andexdb:indirectScriptEval <ScriptAPICode: JаvaScript>
andexdb:sendGlobalWorldMessage
Command format: /scriptevent andexdb:sendGlobalWorldMessage <anything: anything>
andexdb:setWorldDynamicProperty
Command format: /scriptevent andexdb:setWorldDynamicProperty <propertyId: string>|<propertyValue: string|undefined>
andexdb:setWorldDynamicPropertyB
Command format: /scriptevent andexdb:setWorldDynamicPropertyB <propertyId: string>|<propertyValue: string|undefined>
andexdb:setWorldDynamicPropertyInt
Command format: /scriptevent andexdb:setWorldDynamicPropertyInt <propertyId: string>|<propertyValue: float|undefined>
andexdb:setWorldDynamicPropertyBoolean
Command format: /scriptevent andexdb:setWorldDynamicPropertyBoolean <propertyId: string>|<propertyValue: bool|undefined>
andexdb:getEntityDynamicProperty
Command format: /scriptevent andexdb:getEntityDynamicProperty <targets: targetSelector>|<propertyId: string>
andexdb:getWorldDynamicProperty
Command format: /scriptevent andexdb:getWorldDynamicProperty <anything: anything>
andexdb:setPlayerNameTag
Command format: /scriptevent andexdb:setPlayerNameTag <playerName: string>|<newPlayerNameTag: string>
andexdb:playerControllerCommandForm
Unused.
andexdb:entityControllerCommandForm
Command format: /scriptevent andexdb:entityControllerCommandForm <anything: anything>
andexdb:getRedstone
Command format: /scriptevent andexdb:getRedstone <anything: anything>
andexdb:getRedstoneAndLiquid
Command format: /scriptevent andexdb:getRedstoneAndLiquid <anything: anything>
andexdb:getBlockStates
Command format: /scriptevent andexdb:getBlockStates <anything: anything>
andexdb:getBlockStatesNoLiquid
Command format: /scriptevent andexdb:getBlockStatesNoLiquid <anything: anything>
andexdb:spawnWithNoAI
Spawns in an entity with no ai
Command format: /scriptevent andexdb:spawnWithNoAI <entityType: string>|[location: location]|[dimensionId: string]|[gametestStructureSpawnLocation: location]
andexdb:spawnSimulatedPlayer
Spawns in a simulated player.
Command format: /scriptevent andexdb:spawnSimulatedPlayer [playerName: string]|[location: location]|[dimensionId: string]|[gametestStructureSpawnLocation: location]
andexdb:createParticle
Creates a particle in the world with the specified molang variable set. Note: This is the only way to set particle molang variables, this can be very useful for customizing some particles, here are some examples of this listed below:
Command format: /scriptevent andexdb:createParticle <x: float|~>|<y: float|~>|<z: float|~>|[action: action]...
[action: action]
<actionType: actionType>:<molangVariable>:<newValue: float|R:G:B|R:G:B:A|x:y:z>
Action Types:
setFloat: / f:
newValue format: <float: float>
setColorRGB: / rgb:
newValue format: <r: float>|<g: float>|<b: float>
setColorRGBA: / rgba:
newValue format: <r: float>|<g: float>|<b: float>|<a: float>
setVector3: / v3:
newValue format: <x: float>|<y: float>|<z: float>
Chat Commands
To use the majority of chat commands, you will first need to give yourself the canUseChatCommands tag.
To get notified whenever a player runs a chat command then just give yourself the getAllChatCommands tag.
Some chat commands require different tags than others, and some don't require any at all.
The tags required to use each chat command can be configured in the Manage Commands section of the Main Menu.
Most chat commands default to requiring the canUseChatCommands tag.
Some commands like \home, \help, and \tpa default to not requiring any tags to use them, so anyone can use them.
You can also disable individual commands completely in the Manage Commands section of the main menu.
For all built-in chat commands you can just type \help cmd followed by the name of the command and it will display what the command does, the syntax of it, and what any flag parameters on the command do. For example if you wanted to see how to use the \giveb command you would do \help cmd giveb and for the \\replace command you would do \help cmd \\replace.
Some examples of parameters in a command would be [-tfsa], <player: target>, and [name: string] in the following command syntax:
\examplecommand [-tfsa] <player: target> [name: string]
In the syntax of a command there are multiple ways a parameter can be written out:
Parameter Categories:
Optional Parameters:
Optional parameters are enclosed in square brackets like this: [name: string]
Note: Parameters written as a dash followed by a string of characters enclosed in square brackets (ex. [-tfsa] or [-z]) is not considered an optional parameter, this is a flags parameter.
optional parameters are optional, you can either include them or not include them, however if you do not include them then any parameters after them cannot be included either, so in the following command:
\examplecommand <player: target> [name: string] [escapeCodesEnabled: boolean]
If you choose not to include the name parameter, then you cannot include the escapeCodesEnabled parameter either.
So this means that this command syntax is actually like three separate syntaxes, you can do any of the following:
\examplecommand <player: target> <name: string> <escapeCodesEnabled: boolean>
\examplecommand <player: target> <name: string>
\examplecommand <player: target>
Required Parameters:
Required parameters are enclosed in arrow brackets like this: <player: target>
Required parameters are required, the parameter must be included.
Ignorable Parameters:
Ignorable parameters are enclosed in curly brackets like this: {includeEntities: boolean}
Ignorable parameters are optional, but unlike optional parameters, if you don't include them, you can still include the parameters after them, so in the following command:
\examplecommand <player: target> {name: string} [escapeCodesEnabled: boolean]
Even if you choose not to include the name parameter, you can still include the escapeCodesEnabled parameter either.
So this means that this command syntax is actually like four separate syntaxes, you can do any of the following:
\examplecommand <player: target> <name: string> <escapeCodesEnabled: boolean>
\examplecommand <player: target> <name: string>
\examplecommand <player: target> <escapeCodesEnabled: boolean>
\examplecommand <player: target>
Flags Parameters:
Flags parameters are written as a dash followed by a string of characters enclosed in square brackets like this: [-tfsa]
For a flags parameter, it has no specified parameter type. Instead, you just either put nothing and ignore the parameter, or you put a dash followed by the flags you want to enable, each flag is its own unique character, you can type these characters in any order, and you can include any combination of them that you like, however if you put a dash there then you must include at least one flag.
So, for the parameter [-tfsa] you could do any of the following examples:
Nothing, -t, -f, -s, -a, -tf, -ts, -ta, -ft, -fs, -fa, -at, -af, -as, -tfs, -tfa, -tsf, -tsa, -taf, -tas, -fta, -fts, -fsa, -fst, -fat, -fas, -stf, -sta, -sft, -sfa, -saf, -sat, -atf, -ats, -aft, -afs, -ast, -asf, -tfsa, -tfas, -tsfa, -tsaf, -tafs, -tasf, -ftsa, -ftas, -fsta, -fsat, -fast, -fats, -stfa, -staf, -sfta, -sfat, -satf, -saft ,-atfs, -atsf, -afts, -afst, -astf, -asft.
Parameter Format:
For all parameter categories except for flags parameters, a parameter will be written in one of the following formats inside of the parameter category's bracket type:
parameterName: parameterType
parameterName: parameterType[parameterRestrictions]
Here are some examples:
<name: string>[size: number[?=1,??=1,min=-1000,max=1000,allowNaN=false,allowNegatives=false,precision=20]]{player: target[?=@s,maxTargets=1]}[-tfsa]
Parameter Restrictions:
Parameter restrictions work as follows:
Parameter restrictions are specified inside of square brackets after the parameter's type.
Parameter restrictions are a comma-separated list of restrictions, each restriction is formatted as restrictionName=restrictionValue.
An example of a parameter with parameter restrictions would be: [size: number[?=1,??=1,min=-1000,max=1000,allowNaN=false,allowNegatives=false,precision=20]]
Some commonly used restrictions include:
?=value
This specifies the default value for the parameter, this will be used if it is not specified.
??=value
This specified the value to be used for the parameter in the event of an error when parsing the parameter.
min=number
The minimum value of the parameter.
max=number
The maximum value of the parameter.
maxLength=int
The maximum length of the list parameter type or string parameter type.
maxElementLength=int
The maximum length of the strings and/or lists inside of the list parameter type.
maxStringElementLength=int
The maximum length of the strings inside of the list parameter type.
maxListElementLength=int
The maximum length of the lists inside of the list parameter type.
escapeCodesAllowed=boolean
Indicates whether JаvaScript escape codes are allowed.
allowInfinity=boolean
Indicates whether the number parameter type allows for Infinity and -Infinity to be used.
allowNaN=boolean
Indicates whether the number parameter type allows for NaN to be used.
allowNegatives=boolean
Indicates whether negative number values are allowed in the number parameter type.
precision=int
Indicates the precision to be used when parsing the number parameter type. This means that the actually inputted number will be that same as that number with the JаvaScript toPrecision() function ran on it with the precision set to the value of this restriction.
canError=boolean
Indicates whether this parameter can throw an error.
minTargets=int
The minimum number of targets for a target parameter type.
maxTargets=int
The maximum number of targets for a target parameter type.
mustBeLowercase=boolean
Whether this string or boolean parameter must be in all lowercase.
mustBeUppercase=boolean
Whether this string or boolean parameter must be in all uppercase.
mustBeLowercase=boolean
Whether this string or boolean parameter must be in all lowercase.
mustBeCamelcase=boolean
Whether this string or boolean parameter must be in all camelcase.
mustBeTitlecase=boolean
Whether this string or boolean parameter must be in all titlecase.
allowMultiple=boolean
Whether this parameter type allows for multiple items.
For an array this would determine if the array could have more than one item in it.
For a target this would mean that it could have multiple targets.
caseSensitive=boolean
Whether or not this parameter is case-sensitive.
playersOnly=boolean
Whether or not this target parameter only allows targeting players.
int
An integer.
int32
A 32-bit integer.
int64
A 64-bit integer.
decimal
A decimal.
float
A float.
number
A float, decimal, integer, Infinity, -Inifnity, or NaN.
extendedNumber
A BigInt, float, decimal, integer, Infinity, -Inifnity, or NaN.
nonNaNNumber
A float, decimal, integer, Infinity, or -Infinity.
nonNaNExtendedNumber
A BigInt float, decimal, integer, Infinity, or -Infinity.
BigInt
A BigInt. ex. 5n or 19284892917n
boolean
A boolean. (true or false, usually required to be lowercase)
string
A string. Can be either a string of text with no spaces, or a JSON formatted string. (ex. "some text\nanother line of text \uE359 and the unicode character U+E359" or myStringOfText_With-0-Spaces)
JSON
Stringified JSON.
Some examples include:
1. {"a": 1, "b": "something", "c": true, "d": {"p": 95, "e": -99}, "e": [{"a": 54, "b": true}, [1, "a", true, false], 4, -9, true, false, null], "f": null, "g": -72}
2. true
3. false
4. 57
5. -23
6. "some text\nanother line of text \uE359 and the unicode character U+E359"
7. [1, 4, true, -7, false, "hi", "test", "to", "text\nnext line of text", {"a": 1, "b": 2}, [1, 4, false, "some"]]
JSONArray
A stringified JSON array.
Example: [1, 4, true, -7, false, "hi", "test", "to", "text\nnext line of text", {"a": 1, "b": 2}, [1, 4, false, "some"]]
JSONObject
A stringified JSON object.
Example: {"a": 1, "b": "something", "c": true, "d": {"p": 95, "e": -99}, "e": [{"a": 54, "b": true}, [1, "a", true, false], 4, -9, true, false, null], "f": null, "g": -72}
JSONString
A JSON formatted string. ex. "some text\nanother line of text \uE359 and the unicode character U+E359"
JSONNumber
A decimal, float, integer, Infinity, -Infinity, or NaN.
JSONBoolean
A boolean.
text
A string of text that allows for spaces, does not need quotation marks.
escapableString
A string of text that allows for spaces and JаvaScript escape codes, does not need quotation marks.
target
A target selector.
Examples:
- @s
- Andexter8
- Steve
- @a[name=Herobrine,tag=test,c=1,rm=0.5,r=5,x=1,y=1,z=1]
- @e[family=monster,type=creeper]
targetSelector
The same as target.
itemId
A namespaced id of an item type, for example andexdb:debug_stick, or minecraft:grass, or netherreactor, or stick.
blockId
A namespaced id of a block type, for example andexsa:diamond_crafting_table, or minecraft:grass_block, or glowingobsidian, or stone.
Block
The same as blockId. A namespaced id of a block type, for example andexsa:diamond_crafting_table, or minecraft:grass_block, or glowingobsidian, or stone.
Item
The same as itemId. A namespaced id of an item type, for example andexdb:debug_stick, or minecraft:grass, or netherreactor, or stick.
BlockPattern
// to-do
A block pattern.
Mask
SingleBlockMask
BlockType
block states
A set of block states. Ex. ["infiniburn_bit"=false,"cardinal_direction"="north"]
x y z
A set of coordinates, relative coordinates and caret notation are allowed.
Examples:
- 70 92.67 -69.69
- ~~~
- ~1~~5
- ^^^5
- ^^^
- ^2^1^8.5
- ~1.73~9.47~-10.23
- 70 ~ 63
- 19.38 ~-2210.21038 124065123478
location
A set of coordinates, relative coordinates are allowed.
Examples:
- 70 92.67 -69.69
- ~~~
- ~1~~5
- ~1.73~9.47~-10.23
- 70 ~ 63
- 19.38 ~-2210.21038 124065123478
~
A tilde. ~
Dimension
The name or namespaced id of a dimension. Valid values are overworld, nether, the_end, minecraft:overworld, minecraft:nether, and minecraft:the_end.
RGBA
A 4-character RGBA hexadecimal color code. ex. F927
RRGGBBAA
An 8-character RGBA hexadecimal color code. ex. FE932B76
RGB
A 3-character RGB hexadecimal color code. ex. F92
RRGGBB
A 6-character RGB hexadecimal color code. ex. FE932B
{<string>}
This parameter type means that the value you type in for it is the exact text that is inside of the {}. For example if the parameter type is {testabcd} then for the parameter you would type in testabcd.
(<parameterType>|<parameterType>)
This parameter type means that it can actually be any of the parameter types separated by vertical lines | inside of the parentheses (). For example, if your parameter was [value: (number|(string|JSONArray)[maxLength=2])[?=5]] then for the parameter you could do a number, a string with a max length of 2, a JSONArray with a max length of 2, or nothing, and if you put nothing then it will just default to 5.
\\backuparea
Creates a new backup area convering the entire selected area.
Command Syntax:
- \\backuparea <id: string>
Aliases: []
Categories: ["system","world","server","worldedit"]
Default Required Tags: ["canUseChatCommands"]
Version: 1.0.0
\\chunk
Sets the pos1 and pos2 locations of the selected area to contain the entire chunk that you are currently in for use in other worldedit commands.
Command Syntax:
- \\chunk
Aliases: []
Categories: ["system","world","server","worldedit"]
Default Required Tags: ["canUseChatCommands"]
Version: 1.0.0
\\cone
Generates a cone in the selected area.
Command Syntax:
- \\cone <radius: float> <blockPattern: BlockPattern> [mask: SingleBlockMask]
Aliases: []
Categories: ["system","world","server","worldedit"]
Default Required Tags: ["canUseChatCommands"]
Version: 1.0.0-beta.59
\\copy
Copies the selected area to the clipboard.
Command Syntax:
- \\copy [-meb]
Flags:
m: copy to memory instead of storage
e: don't include entities
b: don't include blocks
Aliases: []
Categories: ["system","world","server","worldedit"]
Default Required Tags: ["canUseChatCommands"]
Version: 3.0.2
\\cut
Cuts the selected area to the clipboard.
Command Syntax:
- \\cut [-meb]
Flags:
m: cut to memory instead of storage
e: don't include entities
b: don't include blocks
Aliases: []
Categories: ["system","world","server","worldedit"]
Default Required Tags: ["canUseChatCommands"]
Version: 3.0.2
\\drain
Drains the blocks between the selected area.
Command Syntax:
- \\drain
Aliases: []
Categories: ["system","world","server","worldedit"]
Default Required Tags: ["canUseChatCommands"]
Version: 1.0.2
\\flood
Floods the blocks between the selected area.
Command Syntax:
- \\flood
Aliases: []
Categories: ["system","world","server","worldedit"]
Default Required Tags: ["canUseChatCommands"]
Version: 1.0.2
\\generate
Generates a 3d shape according to a formula in the selected area, in [-sr] the s modifier will prevent the math equation parser from replacing single equal signs with double equal signs and the r modifier will prevent that as well as any other modifications so that it is run as pure JаvaScript, the formula can utilize the following variables: wx: world x, wy: world y, wz: world z, x: center relative x, y: center relative y, z: center relative z, ax: pos1 x, ay: pos1 y, az: pos1 z, bx: pos2 x, by: pos2 y, bz: pos2 z, nx: negative corner x, ny: negative corner y, nz: negative corner z, px: positive corner x, py: positive corner y, pz: positive corner z.
Command Syntax:
- \\generate [-sr] <blockPattern: BlockPattern> <expression: 3DGeometricMathEquation>
Aliases: []
Categories: ["system","world","server","worldedit"]
Default Required Tags: ["canUseChatCommands"]
Version: 2.0.0
\\generatef
Generates a 3d shape according to a formula in the selected area, this one does not allow access to custom variables which will prevent being able to run scripts using this, this one is much more limited than \\generate so it is only reccommended if you are restricting the \\generate command from a player to prevent script execution, in [-sr] the s modifier will prevent the math equation parser from replacing single equal signs with double equal signs and the r modifier will prevent that as well as any other modifications so that it is run as pure JаvaScript, the formula can utilize the following variables: wx: world x, wy: world y, wz: world z, x: center relative x, y: center relative y, z: center relative z, ax: pos1 x, ay: pos1 y, az: pos1 z, bx: pos2 x, by: pos2 y, bz: pos2 z, nx: negative corner x, ny: negative corner y, nz: negative corner z, px: positive corner x, py: positive corner y, pz: positive corner z.
Command Syntax:
- \\generatef [-sr] <blockPattern: BlockPattern> <expression: 3DGeometricMathEquation>
Aliases: []
Categories: ["system","world","server","worldedit"]
Default Required Tags: ["canUseChatCommands"]
Version: 2.0.0
\\generates
Generates a 3d shape with the specified step according to a formula in the selected area, the formula can utilize the following variables: wx: world x, wy: world y, wz: world z, x: center relative x, y: center relative y, z: center relative z, ax: pos1 x, ay: pos1 y, az: pos1 z, bx: pos2 x, by: pos2 y, bz: pos2 z, nx: negative corner x, ny: negative corner y, nz: negative corner z, px: positive corner x, py: positive corner y, pz: positive corner z.
Command Syntax:
- \\generates <step: float> <blockPattern: BlockPattern> <expression: 3DGeometricMathEquation>
Aliases: []
Categories: ["system","world","server","worldedit"]
Default Required Tags: ["canUseChatCommands"]
Version: 1.0.0
\\hpos1
Sets the pos1 location of the selected area to the block that you are looking at for use in other worldedit commands.
Command Syntax:
- \\hpos1
Aliases: []
Categories: ["system","world","server","worldedit"]
Default Required Tags: ["canUseChatCommands"]
Version: 1.0.0
\\hpos2
Sets the pos2 location of the selected area to the block that you are looking at for use in other worldedit commands.
Command Syntax:
- \\hpos2
Aliases: []
Categories: ["system","world","server","worldedit"]
Default Required Tags: ["canUseChatCommands"]
Version: 1.0.0
\\hsphere
Generates a hollow sphere in the selected area.
Command Syntax:
- \\hsphere <radius: float> <thickness: float> <blockPattern: BlockPattern> [mask: SingleBlockMask]
Aliases: []
Categories: ["system","world","server","worldedit"]
Default Required Tags: ["canUseChatCommands"]
Version: 1.0.0
\\idtfill
Fills all or parts of the selected area with a specific block, with no limits, also temporarily spawns a tickingarea to load in chunks around it, also allows specifying the integrity of the fill, can use any block type including NBT Editor only ones.
Command Syntax:
- \\idtfill <integrity: float> <tileName: Block> <blockStates: block states> <ifillMode: replace|fill|cube|keep|walls|hollow|outline|pillars§c|floor|ceilling|diamond|hourglass§r> <replaceTileName: Block> [replaceBlockStates: block states] [clearContainers: boolean]§r
- \\idtfill <integrity: float> <tileName: Block|random> <blockStates: block states> <ifillMode: replace|fill|cube|keep|walls|hollow|outline|pillars§c|floor|ceilling|diamond|hourglass§r> <reaplceTileName: Block> [clearContainers: boolean]§r
- \\idtfill <integrity: float> <tileName: Block|random> <blockStates: block states> [ifillMode: replace|fill|cube|keep|walls|hollow|outline|pillars§c|floor|ceilling|diamond|hourglass§r] [clearContainers: boolean]§r
- \\idtfill <integrity: float> <tileName: Block|random> <blockStates: block states> [clearContainers: boolean]§r
- \\idtfill <integrity: float> <tileName: Block|random> <ifillMode: replace|fill|cube|keep|walls|hollow|outline|pillars§c|floor|ceilling|diamond|hourglass§r> <replaceTileName: Block> [replaceBlockStates: block states] [clearContainers: boolean]§r
- \\idtfill <integrity: float> <tileName: Block|random> <ifillMode: replace|fill|cube|keep|walls|hollow|outline|pillars§c|floor|ceilling|diamond|hourglass§r> <reaplceTileName: Block> [clearContainers: boolean]§r
- \\idtfill <integrity: float> <tileName: Block|random> [ifillMode: replace|fill|cube|keep|walls|hollow|outline|pillars§c|floor|ceilling|diamond|hourglass§r] [clearContainers: boolean]§r
- \\idtfill <integrity: float> <tileName: Block|random> [clearContainers: boolean]§r
- \\idtfill <integrity: float> <skygridSize: float> <tileName: Block> <blockStates: block states> <mode: skygrid|inverseskygrid> <replaceTileName: Block> [replaceBlockStates: block states] [clearContainers: boolean]§r
- \\idtfill <integrity: float> <skygridSize: float> <tileName: Block> <blockStates: block states> <mode: skygrid|inverseskygrid> <reaplceTileName: Block> [clearContainers: boolean]§r
- \\idtfill <integrity: float> <skygridSize: float> <tileName: Block> <blockStates: block states> <mode: skygrid|inverseskygrid> [clearContainers: boolean]§r
- \\idtfill <integrity: float> <skygridSize: float> <tileName: Block> <blockStates: block states> <mode: skygrid|inverseskygrid> [clearContainers: boolean]§r
- \\idtfill <integrity: float> <skygridSize: float> <tileName: Block> <mode: skygrid|inverseskygrid> <replaceTileName: Block> [replaceBlockStates: block states] [clearContainers: boolean]§r
- \\idtfill <integrity: float> <skygridSize: float> <tileName: Block> <mode: skygrid|inverseskygrid> <reaplceTileName: Block> [clearContainers: boolean]§r
- \\idtfill <integrity: float> <skygridSize: float> <tileName: Block> <mode: skygrid|inverseskygrid> [clearContainers: boolean]§r
- \\idtfill <integrity: float> <tileName: Block> [clearContainers: boolean]§r
- \\idtfill <integrity: float> clear [clearContainers: boolean]§r
- \\idtfill <integrity: float> drain§r
- \\idtfill <integrity: float> <axis: x|y|z|xy|yz|xz|xyz> <tileName: Block> <blockStates: block states> circle [replaceTileName: Block] [replaceBlockStates: block states] [clearContainers: boolean]§r
- \\idtfill <integrity: float> <axis: x|y|z|xy|yz|xz|xyz> <tileName: Block> <blockStates: block states> circle [replaceTileName: Block] [clearContainers: boolean]§r
- \\idtfill <integrity: float> <axis: x|y|z|xy|yz|xz|xyz> <tileName: Block> <blockStates: block states> circle [clearContainers: boolean]§r
- \\idtfill <integrity: float> <axis: x|y|z|xy|yz|xz|xyz> <tileName: Block> circle [replaceTileName: Block] [replaceBlockStates: block states] [clearContainers: boolean]§r
- \\idtfill <integrity: float> <axis: x|y|z|xy|yz|xz|xyz> <tileName: Block> circle [replaceTileName: Block] [clearContainers: boolean]§r
- \\idtfill <integrity: float> <axis: x|y|z|xy|yz|xz|xyz> <tileName: Block> circle [clearContainers: boolean]§r
- \\idtfill <integrity: float> <tileName: Block> <blockStates: block states> <mode: circlex|circley|circlez|circlexy|circleyz|circlexyz|sphere|semisphere> <replaceTileName: Block> [replaceBlockStates: block states] [clearContainers: boolean]§r
- \\idtfill <integrity: float> <tileName: Block> <blockStates: block states> <mode: circlex|circley|circlez|circlexy|circleyz|circlexyz|sphere|semisphere> <replaceTileName: Block> [clearContainers: boolean]§r
- \\idtfill <integrity: float> <tileName: Block> <blockStates: block states> <mode: circlex|circley|circlez|circlexy|circleyz|circlexyz|sphere|semisphere> [clearContainers: boolean]§r
- \\idtfill <integrity: float> <tileName: Block> <mode: circlex|circley|circlez|circlexy|circleyz|circlexyz|sphere|semisphere> <replaceTileName: Block> [replaceBlockStates: block states] [clearContainers: boolean]§r
- \\idtfill <integrity: float> <tileName: Block> <mode: circlex|circley|circlez|circlexy|circleyz|circlexyz|sphere|semisphere> <replaceTileName: Block> [clearContainers: boolean]§r
- \\idtfill <integrity: float> <tileName: Block> <mode: circlex|circley|circlez|circlexy|circleyz|circlexyz|sphere|semisphere> [clearContainers: boolean]§r
- \\idtfill <integrity: float> <thickness: float> <tileName: Block> <blockStates: block states> <mode: hollowsphere|dome> <replaceTileName: Block> [replaceBlockStates: block states] [clearContainers: boolean]§r
- \\idtfill <integrity: float> <thickness: float> <tileName: Block> <blockStates: block states> <mode: hollowsphere|dome> <replaceTileName: Block> [clearContainers: boolean]§r
- \\idtfill <integrity: float> <thickness: float> <tileName: Block> <blockStates: block states> <mode: hollowsphere|dome> [clearContainers: boolean]§r
- \\idtfill <integrity: float> <thickness: float> <tileName: Block> <mode: hollowsphere|dome> <replaceTileName: Block> [replaceBlockStates: block states] [clearContainers: boolean]§r
- \\idtfill <integrity: float> <thickness: float> <tileName: Block> <mode: hollowsphere|dome> <replaceTileName: Block> [clearContainers: boolean]§r
- \\idtfill <integrity: float> <thickness: float> <tileName: Block> <mode: hollowsphere|dome> [clearContainers: boolean]§r
- \\idtfill <integrity: float> <length: float> <tileName: Block> <blockStates: block states> <mode: cylinderx|cylindery|cylinderz|cylinderxy|cylinderyz|cylinderxz|cylinderxyz> <replaceTileName: Block> [replaceBlockStates: block states] [clearContainers: boolean]§r
- \\idtfill <integrity: float> <length: float> <tileName: Block> <blockStates: block states> <mode: cylinderx|cylindery|cylinderz|cylinderxy|cylinderyz|cylinderxz|cylinderxyz> <replaceTileName: Block> [clearContainers: boolean]§r
- \\idtfill <integrity: float> <length: float> <tileName: Block> <blockStates: block states> <mode: cylinderx|cylindery|cylinderz|cylinderxy|cylinderyz|cylinderxz|cylinderxyz> [clearContainers: boolean]§r
- \\idtfill <integrity: float> <length: float> <tileName: Block> <mode: cylinderx|cylindery|cylinderz|cylinderxy|cylinderyz|cylinderxz|cylinderxyz> <replaceTileName: Block> [replaceBlockStates: block states] [clearContainers: boolean]§r
- \\idtfill <integrity: float> <length: float> <tileName: Block> <mode: cylinderx|cylindery|cylinderz|cylinderxy|cylinderyz|cylinderxz|cylinderxyz> <replaceTileName: Block> [clearContainers: boolean]§r
- \\idtfill <integrity: float> <length: float> <tileName: Block> <mode: cylinderx|cylindery|cylinderz|cylinderxy|cylinderyz|cylinderxz|cylinderxyz> [clearContainers: boolean]§r
- \\idtfill <integrity: float> <length: float> <axis: x|y|z|xy|yz|xz|xyz> <tileName: Block> <blockStates: block states> <mode: tunnel|cylinder> [replaceTileName: Block] [replaceBlockStates: block states] [clearContainers: boolean]§r
- \\idtfill <integrity: float> <length: float> <axis: x|y|z|xy|yz|xz|xyz> <tileName: Block> <blockStates: block states> <mode: tunnel|cylinder> [replaceTileName: Block] [clearContainers: boolean]§r
- \\idtfill <integrity: float> <length: float> <axis: x|y|z|xy|yz|xz|xyz> <tileName: Block> <blockStates: block states> <mode: tunnel|cylinder> [clearContainers: boolean]§r
- \\idtfill <integrity: float> <length: float> <axis: x|y|z|xy|yz|xz|xyz> <tileName: Block> <mode: tunnel|cylinder> [replaceTileName: Block] [replaceBlockStates: block states] [clearContainers: boolean]§r
- \\idtfill <integrity: float> <length: float> <axis: x|y|z|xy|yz|xz|xyz> <tileName: Block> <mode: tunnel|cylinder> [replaceTileName: Block] [clearContainers: boolean]§r
- \\idtfill <integrity: float> <length: float> <axis: x|y|z|xy|yz|xz|xyz> <tileName: Block> <mode: tunnel|cylinder> [clearContainers: boolean]§r
- \\idtfill <offset: x y z> <integrity: float> <thickness: float> <tileName: Block> <blockStates: block states> hollowovoid [replaceTileName: Block] [replaceBlockStates: block states] [clearContainers: boolean]§r
- \\idtfill <offset: x y z> <integrity: float> <thickness: float> <tileName: Block> <blockStates: block states> hollowovoid [replaceTileName: Block] [clearContainers: boolean]§r
- \\idtfill <offset: x y z> <integrity: float> <thickness: float> <tileName: Block> <blockStates: block states> hollowovoid [clearContainers: boolean]§r
- \\idtfill <offset: x y z> <integrity: float> <thickness: float> <tileName: Block> hollowovoid [replaceTileName: Block] [replaceBlockStates: block states] [clearContainers: boolean]§r
- \\idtfill <offset: x y z> <integrity: float> <thickness: float> <tileName: Block> hollowovoid [replaceTileName: Block] [clearContainers: boolean]§r
- \\idtfill <offset: x y z> <integrity: float> <thickness: float> <tileName: Block> hollowovoid [clearContainers: boolean]
Aliases: []
Categories: ["system","world","server","worldedit"]
Default Required Tags: ["canUseChatCommands"]
Version: 1.0.2-rc.5
\\itfill
Fills all or parts of the selected area with a specific block, with no limits, also temporarily spawns a tickingarea to load in chunks around it, can use any block type including NBT Editor only ones.
Command Syntax:
- \\itfill <tileName: Block> <blockStates: block states> <ifillMode: replace|fill|cube|keep|walls|hollow|outline|pillars§c|floor|ceilling|diamond|hourglass§r> <replaceTileName: Block> [replaceBlockStates: block states] [clearContainers: boolean]§r
- \\itfill <tileName: Block> <blockStates: block states> <ifillMode: replace|fill|cube|keep|walls|hollow|outline|pillars§c|floor|ceilling|diamond|hourglass§r> <reaplceTileName: Block> [clearContainers: boolean]§r
- \\itfill <tileName: Block> <blockStates: block states> [ifillMode: replace|fill|cube|keep|walls|hollow|outline|pillars§c|floor|ceilling|diamond|hourglass§r] [clearContainers: boolean]§r
- \\itfill <tileName: Block> <blockStates: block states> [clearContainers: boolean]§r
- \\itfill <tileName: Block> <ifillMode: replace|fill|cube|keep|walls|hollow|outline|pillars§c|floor|ceilling|diamond|hourglass§r> <replaceTileName: Block> [replaceBlockStates: block states] [clearContainers: boolean]§r
- \\itfill <tileName: Block> <ifillMode: replace|fill|cube|keep|walls|hollow|outline|pillars§c|floor|ceilling|diamond|hourglass§r> <reaplceTileName: Block> [clearContainers: boolean]§r
- \\itfill <tileName: Block> [ifillMode: replace|fill|cube|keep|walls|hollow|outline|pillars§c|floor|ceilling|diamond|hourglass§r] [clearContainers: boolean]§r
- \\itfill <tileName: Block> [clearContainers: boolean]§r
- \\itfill <skygridSize: float> <tileName: Block> <blockStates: block states> <mode: skygrid|inverseskygrid> <replaceTileName: Block> [replaceBlockStates: block states] [clearContainers: boolean]§r
- \\itfill <skygridSize: float> <tileName: Block> <blockStates: block states> <mode: skygrid|inverseskygrid> <reaplceTileName: Block> [clearContainers: boolean]§r
- \\itfill <skygridSize: float> <tileName: Block> <blockStates: block states> <mode: skygrid|inverseskygrid> [clearContainers: boolean]§r
- \\itfill <skygridSize: float> <tileName: Block> <blockStates: block states> <mode: skygrid|inverseskygrid> [clearContainers: boolean]§r
- \\itfill <skygridSize: float> <tileName: Block> <mode: skygrid|inverseskygrid> <replaceTileName: Block> [replaceBlockStates: block states] [clearContainers: boolean]§r
- \\itfill <skygridSize: float> <tileName: Block> <mode: skygrid|inverseskygrid> <reaplceTileName: Block> [clearContainers: boolean]§r
- \\itfill <skygridSize: float> <tileName: Block> <mode: skygrid|inverseskygrid> [clearContainers: boolean]§r
- \\itfill <tileName: Block> [clearContainers: boolean]§r
- \\itfill clear [clearContainers: boolean]§r
- \\itfill drain§r
- \\itfill <axis: x|y|z|xy|yz|xz|xyz> <tileName: Block> <blockStates: block states> circle [replaceTileName: Block] [replaceBlockStates: block states] [clearContainers: boolean]§r
- \\itfill <axis: x|y|z|xy|yz|xz|xyz> <tileName: Block> <blockStates: block states> circle [replaceTileName: Block] [clearContainers: boolean]§r
- \\itfill <axis: x|y|z|xy|yz|xz|xyz> <tileName: Block> <blockStates: block states> circle [clearContainers: boolean]§r
- \\itfill <axis: x|y|z|xy|yz|xz|xyz> <tileName: Block> circle [replaceTileName: Block] [replaceBlockStates: block states] [clearContainers: boolean]§r
- \\itfill <axis: x|y|z|xy|yz|xz|xyz> <tileName: Block> circle [replaceTileName: Block] [clearContainers: boolean]§r
- \\itfill <axis: x|y|z|xy|yz|xz|xyz> <tileName: Block> circle [clearContainers: boolean]§r
- \\itfill <tileName: Block> <blockStates: block states> <mode: circlex|circley|circlez|circlexy|circleyz|circlexyz|sphere|semisphere> <replaceTileName: Block> [replaceBlockStates: block states] [clearContainers: boolean]§r
- \\itfill <tileName: Block> <blockStates: block states> <mode: circlex|circley|circlez|circlexy|circleyz|circlexyz|sphere|semisphere> <replaceTileName: Block> [clearContainers: boolean]§r
- \\itfill <tileName: Block> <blockStates: block states> <mode: circlex|circley|circlez|circlexy|circleyz|circlexyz|sphere|semisphere> [clearContainers: boolean]§r
- \\itfill <tileName: Block> <mode: circlex|circley|circlez|circlexy|circleyz|circlexyz|sphere|semisphere> <replaceTileName: Block> [replaceBlockStates: block states] [clearContainers: boolean]§r
- \\itfill <tileName: Block> <mode: circlex|circley|circlez|circlexy|circleyz|circlexyz|sphere|semisphere> <replaceTileName: Block> [clearContainers: boolean]§r
- \\itfill <tileName: Block> <mode: circlex|circley|circlez|circlexy|circleyz|circlexyz|sphere|semisphere> [clearContainers: boolean]§r
- \\itfill <thickness: float> <tileName: Block> <blockStates: block states> <mode: hollowsphere|dome> <replaceTileName: Block> [replaceBlockStates: block states] [clearContainers: boolean]§r
- \\itfill <thickness: float> <tileName: Block> <blockStates: block states> <mode: hollowsphere|dome> <replaceTileName: Block> [clearContainers: boolean]§r
- \\itfill <thickness: float> <tileName: Block> <blockStates: block states> <mode: hollowsphere|dome> [clearContainers: boolean]§r
- \\itfill <thickness: float> <tileName: Block> <mode: hollowsphere|dome> <replaceTileName: Block> [replaceBlockStates: block states] [clearContainers: boolean]§r
- \\itfill <thickness: float> <tileName: Block> <mode: hollowsphere|dome> <replaceTileName: Block> [clearContainers: boolean]§r
- \\itfill <thickness: float> <tileName: Block> <mode: hollowsphere|dome> [clearContainers: boolean]§r
- \\itfill <length: float> <tileName: Block> <blockStates: block states> <mode: cylinderx|cylindery|cylinderz|cylinderxy|cylinderyz|cylinderxz|cylinderxyz> <replaceTileName: Block> [replaceBlockStates: block states] [clearContainers: boolean]§r
- \\itfill <length: float> <tileName: Block> <blockStates: block states> <mode: cylinderx|cylindery|cylinderz|cylinderxy|cylinderyz|cylinderxz|cylinderxyz> <replaceTileName: Block> [clearContainers: boolean]§r
- \\itfill <length: float> <tileName: Block> <blockStates: block states> <mode: cylinderx|cylindery|cylinderz|cylinderxy|cylinderyz|cylinderxz|cylinderxyz> [clearContainers: boolean]§r
- \\itfill <length: float> <tileName: Block> <mode: cylinderx|cylindery|cylinderz|cylinderxy|cylinderyz|cylinderxz|cylinderxyz> <replaceTileName: Block> [replaceBlockStates: block states] [clearContainers: boolean]§r
- \\itfill <length: float> <tileName: Block> <mode: cylinderx|cylindery|cylinderz|cylinderxy|cylinderyz|cylinderxz|cylinderxyz> <replaceTileName: Block> [clearContainers: boolean]§r
- \\itfill <length: float> <tileName: Block> <mode: cylinderx|cylindery|cylinderz|cylinderxy|cylinderyz|cylinderxz|cylinderxyz> [clearContainers: boolean]§r
- \\itfill <length: float> <axis: x|y|z|xy|yz|xz|xyz> <tileName: Block> <blockStates: block states> <mode: tunnel|cylinder> [replaceTileName: Block] [replaceBlockStates: block states] [clearContainers: boolean]§r
- \\itfill <length: float> <axis: x|y|z|xy|yz|xz|xyz> <tileName: Block> <blockStates: block states> <mode: tunnel|cylinder> [replaceTileName: Block] [clearContainers: boolean]§r
- \\itfill <length: float> <axis: x|y|z|xy|yz|xz|xyz> <tileName: Block> <blockStates: block states> <mode: tunnel|cylinder> [clearContainers: boolean]§r
- \\itfill <length: float> <axis: x|y|z|xy|yz|xz|xyz> <tileName: Block> <mode: tunnel|cylinder> [replaceTileName: Block] [replaceBlockStates: block states] [clearContainers: boolean]§r
- \\itfill <length: float> <axis: x|y|z|xy|yz|xz|xyz> <tileName: Block> <mode: tunnel|cylinder> [replaceTileName: Block] [clearContainers: boolean]§r
- \\itfill <length: float> <axis: x|y|z|xy|yz|xz|xyz> <tileName: Block> <mode: tunnel|cylinder> [clearContainers: boolean]§r
- \\itfill <offset: x y z> <thickness: float> <tileName: Block> <blockStates: block states> hollowovoid [replaceTileName: Block] [replaceBlockStates: block states] [clearContainers: boolean]§r
- \\itfill <offset: x y z> <thickness: float> <tileName: Block> <blockStates: block states> hollowovoid [replaceTileName: Block] [clearContainers: boolean]§r
- \\itfill <offset: x y z> <thickness: float> <tileName: Block> <blockStates: block states> hollowovoid [clearContainers: boolean]§r
- \\itfill <offset: x y z> <thickness: float> <tileName: Block> hollowovoid [replaceTileName: Block] [replaceBlockStates: block states] [clearContainers: boolean]§r
- \\itfill <offset: x y z> <thickness: float> <tileName: Block> hollowovoid [replaceTileName: Block] [clearContainers: boolean]§r
- \\itfill <offset: x y z> <thickness: float> <tileName: Block> hollowovoid [clearContainers: boolean]
Aliases: []
Categories: ["system","world","server","worldedit"]
Default Required Tags: ["canUseChatCommands"]
Version: 1.0.0
\\offset
Offsets the pos1 and pos2 locations of the selected area.
Command Syntax:
- \\offset [x: float] [y: float] [z: float]
Aliases: []
Categories: ["system","world","server","worldedit"]
Default Required Tags: ["canUseChatCommands"]
Version: 1.0.0
\\paste
Pastes the clipboard to the selected area.
Command Syntax:
- \\paste [-webxz] [integrity: float] [integritySeed: string] [rotation: 0|90|180|270] [animationMode: none|blocks|layers] [animationSeconds: float]
Flags:
w: waterlog structure
e: don't include entities
b: don't include blocks
x: mirror structure x axis
z: mirror structure z axis
Aliases: []
Categories: ["system","world","server","worldedit"]
Default Required Tags: ["canUseChatCommands"]
Version: 3.0.0
\\pos1
Sets the pos1 location of the selected area for use in other worldedit commands.
Command Syntax:
- \\pos1 [location: x y z]
Aliases: []
Categories: ["system","world","server","worldedit"]
Default Required Tags: ["canUseChatCommands"]
Version: 1.0.0
\\pos2
Sets the pos2 location of the selected area for use in other worldedit commands.
Command Syntax:
- \\pos2 [location: x y z]
Aliases: []
Categories: ["system","world","server","worldedit"]
Default Required Tags: ["canUseChatCommands"]
Version: 1.0.0
\\protectarea
Sets the selected area as a protected area.
Command Syntax:
- \\protectarea <areaType: string> <name: string> [mode: 0|1(default=0)] [icon_path: string]
Aliases: []
Categories: ["system","world","server","worldedit"]
Default Required Tags: ["canUseChatCommands"]
Version: 1.0.0
\\remove
Remove the blocks in the selected area.
Command Syntax:
- \\remove
Aliases: []
Categories: ["system","world","server","worldedit"]
Default Required Tags: ["canUseChatCommands"]
Version: 1.0.0
\\replace
Replaces the blocks between the selected area with the selected block type.
Command Syntax:
- \\replace <blockPattern: BlockPattern> [mask: mask]
Aliases: []
Categories: ["system","world","server","worldedit"]
Default Required Tags: ["canUseChatCommands"]
Version: 2.0.0
\\selectmode
Sets the selection mode for the item you are holding, this is used to pick where to set pos1/pos2 to if the held item is a selection tool, or if the \brush command was used to make the held item into a custom brush then it will be used to determine what block the brush will target.
Command Syntax:
- \\selectmode [default|noliquid|nopassable|noliquidnopassable]
Aliases: []
Categories: ["system","world","server","worldedit"]
Default Required Tags: ["canUseChatCommands"]
Version: 1.0.0
\\set
Sets the blocks between the selected area to the selected block type.
Command Syntax:
- \\set <blockPattern: BlockPattern>
Aliases: []
Categories: ["system","world","server","worldedit"]
Default Required Tags: ["canUseChatCommands"]
Version: 1.0.0
\\seti
Sets the blocks between the selected area to the selected block type with the specified integrity.
Command Syntax:
- \\seti <integrity: number> <blockPattern: BlockPattern>
Aliases: []
Categories: ["system","world","server","worldedit"]
Default Required Tags: ["canUseChatCommands"]
Version: 1.0.0
\\shift
Shifts the pos1 and pos2 locations of the selected area.
Command Syntax:
- \\shift <direction: {north}|{south}|{east}|{west}|{up}|{down}> <distance: float>
Aliases: []
Categories: ["system","world","server","worldedit"]
Default Required Tags: ["canUseChatCommands"]
Version: 1.0.0
\\sphere
Generates a sphere in the selected area.
Command Syntax:
- \\sphere <radius: float> <blockPattern: BlockPattern> [mask: SingleBlockMask]
Aliases: []
Categories: ["system","world","server","worldedit"]
Default Required Tags: ["canUseChatCommands"]
Version: 1.0.0
\\stack
Stacks the specified number of copies of the step area on top of the selected area.
Command Syntax:
- \\stack [stackCount: int]
Aliases: []
Categories: ["system","world","server","worldedit"]
Default Required Tags: ["canUseChatCommands"]
Version: 1.0.0
\\undo
Undoes the last action (from history).
Command Syntax:
- \\undo [-kt]
Flags:
k: don't remove the undo save point after finishing the undo
t: spawn in a ticking area before running the undo command
h: makes the copied structure be pasted at your current location instead of the selected location
Aliases: []
Categories: ["system","world","server","worldedit"]
Default Required Tags: ["canUseChatCommands"]
Version: 3.0.0
\\walls
Replaces the walls of the selected area with the selected block type.
Command Syntax:
- \\walls <blockPattern: BlockPattern> [mask: SingleBlockMask]
Aliases: []
Categories: ["system","world","server","worldedit"]
Default Required Tags: ["canUseChatCommands"]
Version: 1.0.2-beta.3
\align
Centers you on the x and z axis on the block you are currently at.
Command Syntax:
- \align
Aliases: []
Categories: ["world","players"]
Default Required Tags: ["canUseChatCommands"]
Version: 1.0.0
\aligncenter
Centers you on the x, y, and z axis on the block you are currently at.
Command Syntax:
- \aligncenter
Aliases: []
Categories: ["world","players"]
Default Required Tags: ["canUseChatCommands"]
Version: 1.0.0
\binvsee
Displays the contents of the specified block's inventory.
Command Syntax:
- \binvsee <dimension: dimension|~> <block: x y z>
Aliases: []
Categories: ["invsee"]
Default Required Tags: ["canUseChatCommands"]
Version: 4.1.0
\brush
Sets the held item as the specified brush type or unbinds the brush from the held item.
Command Syntax:
- \brush [-l] none§r
- \brush [-l] <brushType: sphere|cube|square> <blockPattern: BlockPattern> [radius: float]§r
- \brush [-l] <brushType: splatter|splattercube|splattersquare|splattersurface|splattercubesurface|splattersquaresurface> <blockPattern: BlockPattern> [radius: float] [decay: float]§r
- \brush [-l] <brushType: extinguish|ex|remexp> [radius: float]
Aliases: ["br","\\\\brush","\\\\br"]
Categories: ["world","worldedit"]
Default Required Tags: ["canUseChatCommands"]
Version: 1.0.0
\butcher
Kill all or nearby mobs.
Command Syntax:
- \butcher [-abfgnprtwipceh] [radius: float]
Flags:
No Flags: Kill items and experience orbs.
a: kill animals
b: kill ambient mobs
c: kill cloned players
e: kill everything
g: kill golems
h: kill hostile mobs
i: kill items and experience orbs
j: kill projectiles
l: kill bosses
o: kill paintings
p: kill players
r: kill armor stands
t: allow killing of name tagged entities
v: kill vehicles
Aliases: ["but"]
Categories: ["world","worldedit"]
Default Required Tags: ["canUseChatCommands"]
Version: 2.7.0
\butcherdespawn
Despawn all or nearby mobs.
Command Syntax:
- \butcherdespawn [-abfgnprtwipceh] [radius: float]
Flags:
No Flags: Kill items and experience orbs.
a: despawn animals
b: despawn ambient mobs
c: despawn cloned players
e: despawn everything
g: despawn golems
h: despawn hostile mobs
i: despawn items and experience orbs
j: despawn projectiles
l: despawn bosses
o: despawn paintings
p: despawn players
r: despawn armor stands
t: allow despawning of name tagged entities
v: despawn vehicles
Aliases: ["butdes"]
Categories: ["world","worldedit"]
Default Required Tags: ["canUseChatCommands"]
Version: 2.7.0
\chatcommandui
Opens up a menu where you can type a chat command to run with no character limits.
Command Syntax:
- \chatcommandui
Aliases: ["chtcmdui","cmdui","commandui"]
Categories: ["uis"]
Default Required Tags: ["canUseChatCommands"]
Version: 1.0.0
\chatsendui
Opens up a menu where you can type a chat message to send with no character limits.
Command Syntax:
- \chatsendui
Aliases: ["chtsndui","chtsendui","sendui"]
Categories: ["uis"]
Default Required Tags: ["canUseChatCommands"]
Version: 1.0.0
\chunkban
Fills a shulker box with the item in your first hotbar slot and put that shulker box into your first hotbar slot, and repeats this the specified number of times, this can be used to create a chunk ban.
Command Syntax:
- chunkban [slot: int|~] [loopCount: int] [target: string|~]
Aliases: []
Categories: ["dangerous"]
Default Required Tags: ["canUseChatCommands","canUseDangerousCommands"]
Version: 1.2.7-beta.83
\chunkinfo
Displays info about the current chunk.
Command Syntax:
- \chunkinfo
Aliases: []
Categories: ["world","worldedit"]
Default Required Tags: ["canUseChatCommands"]
Version: 1.0.0
\clear
Clears a player's inventory.
Command Syntax:
- §cThis command is still unfinished!
Aliases: []
Categories: ["players"]
Default Required Tags: ["canUseChatCommands"]
Version: 0.0.1-indev.35
\clearenderchest
Clears a player's ender chest.
Command Syntax:
- clearenderchest [stackCount: int|fill|replaceall|replacefill] [stackSize: int|max|~] [target: string|~]
Aliases: []
Categories: ["players","containers/inventories"]
Default Required Tags: ["canUseChatCommands"]
Version: 1.0.0
\clearenderchestslot
Clears a slot of a player's ender chest.
Command Syntax:
- clearenderchestslot [stackCount: int|fill|replaceall|replacefill] [stackSize: int|max|~] [target: string|~]
Aliases: []
Categories: ["players","containers/inventories"]
Default Required Tags: ["canUseChatCommands"]
Version: 1.0.0
\cloneitem
Clones the item in your hand to the specified player's inventory.
Command Syntax:
- \cloneitem [toPlayer: target|~]
Aliases: []
Categories: ["items"]
Default Required Tags: ["canUseChatCommands"]
Version: 1.0.0
\compressitems
Compresses your inventory into 2 chests and inserts those chests into your inventory.
Command Syntax:
- \compressitems [mode: inventory|hotbar|armor|equipment|all] [target: string|~]
Aliases: []
Categories: ["players","containers/inventories","items"]
Default Required Tags: ["canUseChatCommands"]
Version: 1.0.0-rc.5
\compressitemscontainer
Compresses your inventory into a specified container type and inserts those containers into your inventory.
Command Syntax:
- \compressitemscontainer [containerType: Block] [mode: inventory|hotbar|armor|equipment|all] [target: string|~]
Aliases: []
Categories: ["players","containers/inventories","items"]
Default Required Tags: ["canUseChatCommands"]
Version: 1.0.0
\compressitemscontainerb
Compresses your items into container(s) and gives you those container(s) as items.
Command Syntax:
- \compressitemscontainerb [containerType: Block] [mode: inventory|hotbar|armor|equipment|all] [target: string|~]
Aliases: []
Categories: ["players","containers/inventories","items"]
Default Required Tags: ["canUseChatCommands"]
Version: 0.0.1-alpha.76
\compressitemsshulker
Compresses your inventory into 2 shulker boxes and inserts those shulker boxes into your inventory.
Command Syntax:
- \compressitemsshulker [mode: inventory|hotbar|armor|equipment|all] [target: string|~]
Aliases: []
Categories: ["players","containers/inventories","items"]
Default Required Tags: ["canUseChatCommands"]
Version: 1.0.0
\copyitem
Copies the item in your hand to the specified slot of the specified player's inventory.
Command Syntax:
- \copyitem [toSlot: int|head|chest|legs|feet|mainhand|offhand|~] [toPlayer: target|~]
Aliases: []
Categories: ["items"]
Default Required Tags: ["canUseChatCommands"]
Version: 0.1.4-beta.1
\createexplosion
Creates an explosion.
Command Syntax:
- \createexplosion <location: x y z> [dimension: string] [radius: float] [allowUnderwater: bool] [breaksBlocks: bool] [causesFire: bool] [source: target]
Aliases: []
Categories: ["world"]
Default Required Tags: ["canUseChatCommands"]
Version: 1.0.0-rc.57
\datapickblock
Pick Blocks the block that your are looking at while copying the nbt data of the block as well, just like using the pick block button while holding CTRL on your keyboard.
Command Syntax:
- \datapickblock
Aliases: ["dpb"]
Categories: ["world"]
Default Required Tags: ["canUseChatCommands"]
Version: 1.0.0
\defaulthealth
Sets the health of entities to their default health values.
Command Syntax:
- defaulthealth
Aliases: ["dfthlth","dflthlth","dfthealth","dflthealth"]
Categories: ["players","entities"]
Default Required Tags: ["canUseChatCommands"]
Version: 1.0.0
\disconnect
Additional Addons Required: ["8Crafter's Entity Scale, NBT, and Behavior Modifier, Bossbar, and Morph Addon"]
Disconnects the specified players with an unexpected packet type error without saying that they left the game in the chat. So, it basically lets you silent disconnect players.
Command Syntax:
- \disconnect <players: target>
Aliases: ["boot"]
Categories: ["Entity Scale Add-On","system","world","players","server"]
Default Required Tags: ["canUseChatCommands"]
Version: 1.0.0
\drain
Drains liquids in the specified radius.
Command Syntax:
- \drain [radius: number]
Aliases: []
Categories: ["world"]
Default Required Tags: ["canUseChatCommands"]
Version: 3.0.0
\dupeitem
Duplicates teh item in your hand.
Command Syntax:
- \dupeitem [slot: int|head|chest|legs|feet|mainhand|offhand|~]
Aliases: []
Categories: ["items"]
Default Required Tags: ["canUseChatCommands"]
Version: 1.0.0
\editorstick
Command Syntax:
- editorstick
Aliases: []
Categories: ["uis"]
Default Required Tags: ["canUseChatCommands"]
Version: 1.0.0
\editorstickb
Command Syntax:
- editorstickb
Aliases: []
Categories: ["uis"]
Default Required Tags: ["canUseChatCommands"]
Version: 1.0.0
\editorstickc
Command Syntax:
- editorstickc
Aliases: []
Categories: ["uis"]
Default Required Tags: ["canUseChatCommands"]
Version: 1.0.0
\einvsee
Displays the contents of the specified entity's inventory.
Command Syntax:
- \einvsee <targetSelector: target>
Aliases: []
Categories: ["invsee"]
Default Required Tags: ["canUseChatCommands"]
Version: 1.6.0
\enderchest
Spawns an ender chest where you are standing.
Command Syntax:
- \enderchest
Aliases: []
Categories: ["misc"]
Default Required Tags: ["canUseChatCommands"]
Version: 1.0.0
\eval
Runs the specified JаvaScript / Script API code. This can be very useful for doing things such as running more advanced commands with JаvaScript variables and conditions, or running commands with JаvaScript escape codes(for example to put multiple lines of text in the name of an entity or use special unicode characters in commands without needing to copy and paste them into your game). (Note: The names of the server modules are mcServer for the minecraft/Server module, mcServerUI for the minecraft/ServerUI module, and GameTest for the minecraft/GameTest module). Here are some examples:
Send a tellraw command message:
\eval world.sendMessage("Example message\nNew Line\nSender's Name: " + player.name + "\nToken Emoji: \uE105")
Give all players health boost with the level equal to their XP level:
\eval world.getAllPlayers().forEach((p)=>{p.addEffect("health_boost", 200, {amplifier: player.level, showParticles: false}); })
Command Syntax:
- \eval <ScriptAPICode: JаvaScript>
Aliases: []
Categories: ["misc"]
Default Required Tags: ["canUseChatCommands"]
Version: 1.1.0
\execute
Executes a command on behalf of one or more entities.
Command Syntax:
- \execute ...§r
- \... align <axes: string> ...§r
- \... anchored <eyes|feet> ...§r
- \... as <origin: target> ...§r
- \... at <origin: target> ...§r
- \... facingblock <position: x y z> ...§r
- \... facing <origin: target> ...§r
- \... facingentity <origin: target> ...§r
- \... in <dimension: Dimension> ...§r
- \... positioned <position: x y z> ...§r
- \... rotated <yaw: value> <pitch: value> ...§r
- \... matchlocation <origin: target> ...§r
- \... matchrotation <origin: target> ...§r
- \... matchdimension <origin: target> ...§r
- \... if block <position: x y z> <block: Block> <blockStates: block states> ...§r
- \... if entity <target: target> ...§r
- \... run <command: command>
Aliases: []
Categories: ["system"]
Default Required Tags: ["canUseChatCommands"]
Version: 2.0.0
\extinguish
Extinguishes fire and soul fire in the specified radius.
Command Syntax:
- \extinguish [radius: number[?=10]]
Aliases: ["ext","ex","remfire"]
Categories: ["world"]
Default Required Tags: ["canUseChatCommands"]
Version: 2.2.0
\fill
Fills all or parts of a reigon with a specific block, can use any block type including NBT Editor only ones.
Command Syntax:
- \fill <from: x y z> <to: x y z> <tileName: Block> [blockStates: block states] [replaceTileName: Block] [replaceBlockStates: block states]§r
- \fill <from: x y z> <to: x y z> <tileName: Block> <replaceTileName: Block> [replaceBlockStates: block states]
Aliases: []
Categories: ["world"]
Default Required Tags: ["canUseChatCommands"]
Version: 1.1.0
\fillillegal
Fills a player's inventory with illegal items.
Command Syntax:
- \fillillegal [stackCount: int|fill|replaceall|replacefill] [stackSize: int|max|~] [target: string|~]
Aliases: ["invfillillegal"]
Categories: ["items","players","containers/inventories"]
Default Required Tags: ["canUseChatCommands"]
Version: 0.9.0-alpha.37
\fillinventory
Fills a player's inventory with items based on the provided itemJSON.
Command Syntax:
- \fillinventory <itemJSON: itemJSON> [stackCount: int|fill|replaceall|replacefill] [target: string|~]
Aliases: ["invfill"]
Categories: ["items","players","containers/inventories"]
Default Required Tags: ["canUseChatCommands"]
Version: 1.0.0-beta.17
\filljunk
Fills a player's inventory with junk items.
Command Syntax:
- \filljunk [stackCount: int|fill|replaceall|replacefill] [stackSize: int|max|~] [target: string|~]
Aliases: ["invfilljunk"]
Categories: ["items","players","containers/inventories"]
Default Required Tags: ["canUseChatCommands"]
Version: 0.9.0-alpha.37
\fillop
Fills a player's inventory with op items.
Command Syntax:
- \fillop [stackCount: int|fill|replaceall|replacefill] [stackSize: int|max|~] [target: string|~]
Aliases: ["invfillop"]
Categories: ["items","players","containers/inventories"]
Default Required Tags: ["canUseChatCommands"]
Version: 0.9.0-alpha.37
\fillrandom
Fills a player's inventory with random items.
Command Syntax:
- \fillrandom [stackCount: int|fill|replaceall|replacefill] [stackSize: int|max|~] [target: string|~]
Aliases: ["invfillrandom"]
Categories: ["items","players","containers/inventories"]
Default Required Tags: ["canUseChatCommands"]
Version: 1.0.0-rc.77
\findtransformdvindex
Displays the data value of enchantment transfer smithing template needed to combine with a smithing table enchanted book in a smithing table to turn the smithing table enchanted book into the specified item type and data value.
Command Syntax:
- \findtransformdvindex [itemName: string] [dаta: int]
Aliases: []
Categories: ["server","items"]
Default Required Tags: ["canUseChatCommands"]
Version: 1.0.0
\gettransformst
Gives you an enchantment transfer smithing template with the data value needed to combine with a smithing table enchanted book in a smithing table to turn the smithing table enchanted book into the specified item type and data value.
Command Syntax:
- gettransformst
Aliases: []
Categories: ["server","items"]
Default Required Tags: ["canUseChatCommands"]
Version: 1.0.0
\getuuid
Gets the UUID of the specified entity.
Command Syntax:
- \getuuid <target: target[allowMultiple=false]>
Aliases: []
Categories: ["entities"]
Default Required Tags: ["canUseChatCommands"]
Version: 1.0.2
\getworldspawnpoint
Command Syntax:
- getworldspawnpoint
Aliases: ["getworldspawn","getwsp","getws","gwsp","gws"]
Categories: ["world"]
Default Required Tags: ["canUseChatCommands"]
Version: 1.0.0
\give
Inserts the specified number of the specified item type into the player's inventory. Note: The item parameter can be set to any valid item id, even ones that can't be used with the normal vanilla /give, such as ones that require an NBT editor to obtain, for example you could use minecraft:netherreactor to get a Nether Reactor Core. The count parameter can be any value from 0-255.
Command Syntax:
- \give <item: itemType> [amount: int[min=1,max=255]]
Aliases: []
Categories: ["items"]
Default Required Tags: ["canUseChatCommands"]
Version: 2.0.0
\giveb
Creates a new stack of the specified item type of the specified size in the player's inventory. Note: The item parameter can be set to any valid item id, even ones that can't be used with the normal vanilla /give, such as ones that require an NBT editor to obtain, for example you could use minecraft:netherreactor to get a Nether Reactor Core. The count parameter can be any value from 0-255.
Command Syntax:
- \giveb <item: itemType> [stackSize: int[min=1,max=255]>
Aliases: []
Categories: ["items"]
Default Required Tags: ["canUseChatCommands"]
Version: 2.0.0
\givec
Gives you an item stack based on the provided itemJSON in your next empty inventory slot.
Command Syntax:
- \givec <itemJSON: itemJSON>§r
- simplified itemJSON format (type "\help itemJSONFormat" to see full format options): §r
- {§r
- "name"?: string,§r
- "lore"?: string[],§r
- "count"?: number,§r
- "keepondeath"?: boolean,§r
- "lockmode"?: ItemLockMode,§r
- "canplaceon"?: string[],§r
- "components"?: {§r
- "enchantable"?: {§r
- "add"?: Enchantment|Enchantment[],§r
- "addList"?: Enchantment[],§r
- "remove"?: Enchantment,§r
- "removeEnchantments"?: Enchantment,§r
- "clear"?: any§r
- },§r
- "durability"?: {§r
- "durability"?: number,§r
- "damage"?: number,§r
- "repair"?: number,§r
- "setDurabilityToMax"?: any§r
- },§r
- "damage"?: {§r
- "durability"?: number,§r
- "damage"?: number,§r
- "repair"?: number,§r
- "setDurabilityToMax"?: any§r
- }§r
- },§r
- force?: boolean§r
- source?: {§r
- type?: string,§r
- targetSelector?: string,§r
- targetSelectorExecutionLocation?: DimensionLocation,§r
- targetSelectorSourceEntity?: Entity,§r
- player?: string,§r
- entityAtBlock?: DimensionLocation,§r
- entityType?: string,§r
- entityTypeId?: string,§r
- entityId?: string|number,§r
- block?: DimensionLocation,§r
- slot?: number,§r
- id?: string,§r
- itemId?: string,§r
- count?: number,§r
- amount?: number§r
- },§r
- type?: string,§r
- dynamicproperties?: [string, string|number|boolean|Vector3|undefined][]|Record<string, string|number|boolean|Vector3|undefined>,§r
- cleardynamicproperties?: any,§r
- removedynamicproperties?: string[],§r
- removedynamicproperty?: string§r
- }§r
- examples: §r
- stack of 255 sharpness 1 wooden swords: {"minecraft:components": {"enchantable": {"add": {"level": 1, "type": "sharpness"}}}, "id": "wooden_sword", "count": 255}§r
- sharpness 5 fortune 3 efficiency 5 iron axe that cannot be dropped and are kept on death with the name "§4Storage Hog Axe§r" and the lore "§eTakes\nUp\nYour\nInventory§r" (with the \n as line break characters) that says lol in the chat and damages the user when used: {"minecraft:components": {"enchantable": {"add": [{"level": 1, "type": "sharpness"}, {"type": "fortune", "level": 3}, {"type": "efficiency", "level": 5}]}}, "id": "iron_axe", "count": 72, "keepondeath": true, "lockMode": "inventory", "name": "§r§4Storage Hog Axe§r§f", "lore": ["§r§eTakes\nUp§r§f","§r§eYour\nInventory§r§f"], "dynamicProperties": {"code": "world.sendMessage('lol'); event.source.runCommandAsync(\"/damage @s 1 thorns entity @s\")"}}§r
- stack of 16 unbreaking 3 mending 1 shields that are locked to a specific slot and are kept on death: {"minecraft:components": {"enchantable": {"addList": [{"level": 1, "type": "mending"}, {"type": "unbreaking", "level": 3}]}}, "id": "shield", "count": 16, "keepondeath": true, "lockMode": "slot"}
Aliases: []
Categories: ["items"]
Default Required Tags: ["canUseChatCommands"]
Version: 2.0.0
\gma
Sets your gamemode to adventure.
Command Syntax:
- \gma
Aliases: []
Categories: ["misc"]
Default Required Tags: ["canUseChatCommands"]
Version: 1.0.0
\gmc
Sets your gamemode to creative.
Command Syntax:
- \gmc
Aliases: []
Categories: ["players"]
Default Required Tags: ["canUseChatCommands"]
Version: 1.0.0
\gmd
Sets your gamemode to default.
Command Syntax:
- \gmd
Aliases: []
Categories: ["misc"]
Default Required Tags: ["canUseChatCommands"]
Version: 1.0.0
\gmp
Sets your gamemode to spectator.
Command Syntax:
- \gmp
Aliases: []
Categories: ["misc"]
Default Required Tags: ["canUseChatCommands"]
Version: 1.0.0
\gmr
Sets your gamemode to a random gamemode.
Command Syntax:
- \gmr
Aliases: []
Categories: ["misc"]
Default Required Tags: ["canUseChatCommands"]
Version: 1.0.0
\gms
Sets your gamemode to survival.
Command Syntax:
- \gms
Aliases: []
Categories: ["misc"]
Default Required Tags: ["canUseChatCommands"]
Version: 1.0.0
\gohome
Warps to a home.
Command Syntax:
- \gohome <homeName: text>
Aliases: []
Categories: ["players","warps"]
Default Required Tags: []
Version: 1.0.0
\h#
Swaps your hotbar with the specified hotbar preset, optionally specifying a row of the container block to swap your hotbar with.
Command Syntax:
- \h<presetId: float> [containerRow: float[?=0]]
Aliases: []
Categories: ["containers/inventories"]
Default Required Tags: ["canUseChatCommands"]
Version: 1.0.0
\heal
Heals entities.
Command Syntax:
- \heal [targets: target[allowMultiple=true]]
Aliases: []
Categories: ["players","entities"]
Default Required Tags: ["canUseChatCommands"]
Version: 1.0.0
\health
Modifies the health of entities.
Command Syntax:
- \health <health: number> [targets: target[allowMultiple=true]]
Aliases: []
Categories: ["players","entities"]
Default Required Tags: ["canUseChatCommands"]
Version: 1.0.0
\help
Command Syntax:
- help help chatcommands help JаvaScriptfunctions help jsfunction <jsObjectId: string>
Aliases: []
Categories: ["misc"]
Default Required Tags: []
Version: 33.5.2
\home
Sets/Removes/Warps to a home.
Command Syntax:
- \home <mode: set|remove|go|warp|teleport> <homeName: text>§r
- \home clear§r
- \home removeall§r
- \home list
Aliases: []
Categories: ["players","warps"]
Default Required Tags: []
Version: 1.0.0
\hset
Sets a hotbar preset.
Command Syntax:
- \hset <presetID: float> [dimensionId: string] [x: float] [y: float] [z: float]
Aliases: []
Categories: ["containers/inventories"]
Default Required Tags: ["canUseChatCommands"]
Version: 1.0.0
\idtfill
Fills all or parts of a reigon with a specific block, with no limits, also temporarily spawns a tickingarea to load in chunks around it, also allows specifying the integrity of the fill, can use any block type including NBT Editor only ones.
Command Syntax:
- \idtfill <from: x y z> <to: x y z> <integrity: float> <tileName: Block> <blockStates: block states> <ifillMode: replace|fill|cube|keep|walls|hollow|outline|pillars§c|floor|ceilling|diamond|hourglass§r> <replaceTileName: Block> [replaceBlockStates: block states] [clearContainers: boolean]§r
- \idtfill <from: x y z> <to: x y z> <integrity: float> <tileName: Block|random> <blockStates: block states> <ifillMode: replace|fill|cube|keep|walls|hollow|outline|pillars§c|floor|ceilling|diamond|hourglass§r> <reaplceTileName: Block> [clearContainers: boolean]§r
- \idtfill <from: x y z> <to: x y z> <integrity: float> <tileName: Block|random> <blockStates: block states> [ifillMode: replace|fill|cube|keep|walls|hollow|outline|pillars§c|floor|ceilling|diamond|hourglass§r] [clearContainers: boolean]§r
- \idtfill <from: x y z> <to: x y z> <integrity: float> <tileName: Block|random> <blockStates: block states> [clearContainers: boolean]§r
- \idtfill <from: x y z> <to: x y z> <integrity: float> <tileName: Block|random> <ifillMode: replace|fill|cube|keep|walls|hollow|outline|pillars§c|floor|ceilling|diamond|hourglass§r> <replaceTileName: Block> [replaceBlockStates: block states] [clearContainers: boolean]§r
- \idtfill <from: x y z> <to: x y z> <integrity: float> <tileName: Block|random> <ifillMode: replace|fill|cube|keep|walls|hollow|outline|pillars§c|floor|ceilling|diamond|hourglass§r> <reaplceTileName: Block> [clearContainers: boolean]§r
- \idtfill <from: x y z> <to: x y z> <integrity: float> <tileName: Block|random> [ifillMode: replace|fill|cube|keep|walls|hollow|outline|pillars§c|floor|ceilling|diamond|hourglass§r] [clearContainers: boolean]§r
- \idtfill <from: x y z> <to: x y z> <integrity: float> <tileName: Block|random> [clearContainers: boolean]§r
- \idtfill <from: x y z> <to: x y z> <integrity: float> <skygridSize: float> <tileName: Block> <blockStates: block states> <mode: skygrid|inverseskygrid> <replaceTileName: Block> [replaceBlockStates: block states] [clearContainers: boolean]§r
- \idtfill <from: x y z> <to: x y z> <integrity: float> <skygridSize: float> <tileName: Block> <blockStates: block states> <mode: skygrid|inverseskygrid> <reaplceTileName: Block> [clearContainers: boolean]§r
- \idtfill <from: x y z> <to: x y z> <integrity: float> <skygridSize: float> <tileName: Block> <blockStates: block states> <mode: skygrid|inverseskygrid> [clearContainers: boolean]§r
- \idtfill <from: x y z> <to: x y z> <integrity: float> <skygridSize: float> <tileName: Block> <blockStates: block states> <mode: skygrid|inverseskygrid> [clearContainers: boolean]§r
- \idtfill <from: x y z> <to: x y z> <integrity: float> <skygridSize: float> <tileName: Block> <mode: skygrid|inverseskygrid> <replaceTileName: Block> [replaceBlockStates: block states] [clearContainers: boolean]§r
- \idtfill <from: x y z> <to: x y z> <integrity: float> <skygridSize: float> <tileName: Block> <mode: skygrid|inverseskygrid> <reaplceTileName: Block> [clearContainers: boolean]§r
- \idtfill <from: x y z> <to: x y z> <integrity: float> <skygridSize: float> <tileName: Block> <mode: skygrid|inverseskygrid> [clearContainers: boolean]§r
- \idtfill <from: x y z> <to: x y z> <integrity: float> <tileName: Block> [clearContainers: boolean]§r
- \idtfill <from: x y z> <to: x y z> <integrity: float> clear [clearContainers: boolean]§r
- \idtfill <from: x y z> <to: x y z> <integrity: float> drain§r
- \idtfill <center: x y z> <integrity: float> <radius: float> <axis: x|y|z|xy|yz|xz|xyz> <tileName: Block> <blockStates: block states> circle [replaceTileName: Block] [replaceBlockStates: block states] [clearContainers: boolean]§r
- \idtfill <center: x y z> <integrity: float> <radius: float> <axis: x|y|z|xy|yz|xz|xyz> <tileName: Block> <blockStates: block states> circle [replaceTileName: Block] [clearContainers: boolean]§r
- \idtfill <center: x y z> <integrity: float> <radius: float> <axis: x|y|z|xy|yz|xz|xyz> <tileName: Block> <blockStates: block states> circle [clearContainers: boolean]§r
- \idtfill <center: x y z> <integrity: float> <radius: float> <axis: x|y|z|xy|yz|xz|xyz> <tileName: Block> circle [replaceTileName: Block] [replaceBlockStates: block states] [clearContainers: boolean]§r
- \idtfill <center: x y z> <integrity: float> <radius: float> <axis: x|y|z|xy|yz|xz|xyz> <tileName: Block> circle [replaceTileName: Block] [clearContainers: boolean]§r
- \idtfill <center: x y z> <integrity: float> <radius: float> <axis: x|y|z|xy|yz|xz|xyz> <tileName: Block> circle [clearContainers: boolean]§r
- \idtfill <center: x y z> <integrity: float> <radius: float> <tileName: Block> <blockStates: block states> <mode: circlex|circley|circlez|circlexy|circleyz|circlexyz|sphere|semisphere> <replaceTileName: Block> [replaceBlockStates: block states] [clearContainers: boolean]§r
- \idtfill <center: x y z> <integrity: float> <radius: float> <tileName: Block> <blockStates: block states> <mode: circlex|circley|circlez|circlexy|circleyz|circlexyz|sphere|semisphere> <replaceTileName: Block> [clearContainers: boolean]§r
- \idtfill <center: x y z> <integrity: float> <radius: float> <tileName: Block> <blockStates: block states> <mode: circlex|circley|circlez|circlexy|circleyz|circlexyz|sphere|semisphere> [clearContainers: boolean]§r
- \idtfill <center: x y z> <integrity: float> <radius: float> <tileName: Block> <mode: circlex|circley|circlez|circlexy|circleyz|circlexyz|sphere|semisphere> <replaceTileName: Block> [replaceBlockStates: block states] [clearContainers: boolean]§r
- \idtfill <center: x y z> <integrity: float> <radius: float> <tileName: Block> <mode: circlex|circley|circlez|circlexy|circleyz|circlexyz|sphere|semisphere> <replaceTileName: Block> [clearContainers: boolean]§r
- \idtfill <center: x y z> <integrity: float> <radius: float> <tileName: Block> <mode: circlex|circley|circlez|circlexy|circleyz|circlexyz|sphere|semisphere> [clearContainers: boolean]§r
- \idtfill <center: x y z> <integrity: float> <radius: float> <thickness: float> <tileName: Block> <blockStates: block states> <mode: hollowsphere|dome> <replaceTileName: Block> [replaceBlockStates: block states] [clearContainers: boolean]§r
- \idtfill <center: x y z> <integrity: float> <radius: float> <thickness: float> <tileName: Block> <blockStates: block states> <mode: hollowsphere|dome> <replaceTileName: Block> [clearContainers: boolean]§r
- \idtfill <center: x y z> <integrity: float> <radius: float> <thickness: float> <tileName: Block> <blockStates: block states> <mode: hollowsphere|dome> [clearContainers: boolean]§r
- \idtfill <center: x y z> <integrity: float> <radius: float> <thickness: float> <tileName: Block> <mode: hollowsphere|dome> <replaceTileName: Block> [replaceBlockStates: block states] [clearContainers: boolean]§r
- \idtfill <center: x y z> <integrity: float> <radius: float> <thickness: float> <tileName: Block> <mode: hollowsphere|dome> <replaceTileName: Block> [clearContainers: boolean]§r
- \idtfill <center: x y z> <integrity: float> <radius: float> <thickness: float> <tileName: Block> <mode: hollowsphere|dome> [clearContainers: boolean]§r
- \idtfill <center: x y z> <integrity: float> <radius: float> <length: float> <tileName: Block> <blockStates: block states> <mode: cylinderx|cylindery|cylinderz|cylinderxy|cylinderyz|cylinderxz|cylinderxyz> <replaceTileName: Block> [replaceBlockStates: block states] [clearContainers: boolean]§r
- \idtfill <center: x y z> <integrity: float> <radius: float> <length: float> <tileName: Block> <blockStates: block states> <mode: cylinderx|cylindery|cylinderz|cylinderxy|cylinderyz|cylinderxz|cylinderxyz> <replaceTileName: Block> [clearContainers: boolean]§r
- \idtfill <center: x y z> <integrity: float> <radius: float> <length: float> <tileName: Block> <blockStates: block states> <mode: cylinderx|cylindery|cylinderz|cylinderxy|cylinderyz|cylinderxz|cylinderxyz> [clearContainers: boolean]§r
- \idtfill <center: x y z> <integrity: float> <radius: float> <length: float> <tileName: Block> <mode: cylinderx|cylindery|cylinderz|cylinderxy|cylinderyz|cylinderxz|cylinderxyz> <replaceTileName: Block> [replaceBlockStates: block states] [clearContainers: boolean]§r
- \idtfill <center: x y z> <integrity: float> <radius: float> <length: float> <tileName: Block> <mode: cylinderx|cylindery|cylinderz|cylinderxy|cylinderyz|cylinderxz|cylinderxyz> <replaceTileName: Block> [clearContainers: boolean]§r
- \idtfill <center: x y z> <integrity: float> <radius: float> <length: float> <tileName: Block> <mode: cylinderx|cylindery|cylinderz|cylinderxy|cylinderyz|cylinderxz|cylinderxyz> [clearContainers: boolean]§r
- \idtfill <center: x y z> <integrity: float> <radius: float> <length: float> <axis: x|y|z|xy|yz|xz|xyz> <tileName: Block> <blockStates: block states> <mode: tunnel|cylinder> [replaceTileName: Block] [replaceBlockStates: block states] [clearContainers: boolean]§r
- \idtfill <center: x y z> <integrity: float> <radius: float> <length: float> <axis: x|y|z|xy|yz|xz|xyz> <tileName: Block> <blockStates: block states> <mode: tunnel|cylinder> [replaceTileName: Block] [clearContainers: boolean]§r
- \idtfill <center: x y z> <integrity: float> <radius: float> <length: float> <axis: x|y|z|xy|yz|xz|xyz> <tileName: Block> <blockStates: block states> <mode: tunnel|cylinder> [clearContainers: boolean]§r
- \idtfill <center: x y z> <integrity: float> <radius: float> <length: float> <axis: x|y|z|xy|yz|xz|xyz> <tileName: Block> <mode: tunnel|cylinder> [replaceTileName: Block] [replaceBlockStates: block states] [clearContainers: boolean]§r
- \idtfill <center: x y z> <integrity: float> <radius: float> <length: float> <axis: x|y|z|xy|yz|xz|xyz> <tileName: Block> <mode: tunnel|cylinder> [replaceTileName: Block] [clearContainers: boolean]§r
- \idtfill <center: x y z> <integrity: float> <radius: float> <length: float> <axis: x|y|z|xy|yz|xz|xyz> <tileName: Block> <mode: tunnel|cylinder> [clearContainers: boolean]§r
- \idtfill <center: x y z> <radius: x y z> <offset: x y z> <integrity: float> <length: float> <tileName: Block> <blockStates: block states> hollowovoid [replaceTileName: Block] [replaceBlockStates: block states] [clearContainers: boolean]§r
- \idtfill <center: x y z> <radius: x y z> <offset: x y z> <integrity: float> <length: float> <tileName: Block> <blockStates: block states> hollowovoid [replaceTileName: Block] [clearContainers: boolean]§r
- \idtfill <center: x y z> <radius: x y z> <offset: x y z> <integrity: float> <length: float> <tileName: Block> <blockStates: block states> hollowovoid [clearContainers: boolean]§r
- \idtfill <center: x y z> <radius: x y z> <offset: x y z> <integrity: float> <length: float> <tileName: Block> hollowovoid [replaceTileName: Block] [replaceBlockStates: block states] [clearContainers: boolean]§r
- \idtfill <center: x y z> <radius: x y z> <offset: x y z> <integrity: float> <length: float> <tileName: Block> hollowovoid [replaceTileName: Block] [clearContainers: boolean]§r
- \idtfill <center: x y z> <radius: x y z> <offset: x y z> <integrity: float> <length: float> <tileName: Block> hollowovoid [clearContainers: boolean]
Aliases: []
Categories: ["world"]
Default Required Tags: ["canUseChatCommands"]
Version: 30.0.1-beta.99
\ifill
Fills all or parts of a reigon with a specific block, with no limits, can use any block type including NBT Editor only ones.
Command Syntax:
- \ifill <from: x y z> <to: x y z> <tileName: Block> {blockStates: block states} <ifillMode: replace|fill|cube|keep|walls|hollow|outline|pillars§c|floor|ceilling|diamond|hourglass§r> <replaceTileName: Block> [replaceBlockStates: block states] [clearContainers: boolean]§r
- \ifill <from: x y z> <to: x y z> <tileName: Block> {blockStates: block states} <ifillMode: replace|fill|cube|keep|walls|hollow|outline|pillars§c|floor|ceilling|diamond|hourglass§r> <reaplceTileName: Block> [clearContainers: boolean]§r
- \ifill <from: x y z> <to: x y z> <tileName: Block> {blockStates: block states} [ifillMode: replace|fill|cube|keep|walls|hollow|outline|pillars§c|floor|ceilling|diamond|hourglass§r] [clearContainers: boolean]§r
- \ifill <from: x y z> <to: x y z> <tileName: Block> {blockStates: block states} [clearContainers: boolean]§r
- \ifill <from: x y z> <to: x y z> <skygridSize: float> <tileName: Block> {blockStates: block states} <mode: skygrid|inverseskygrid> <replaceTileName: Block> [replaceBlockStates: block states] [clearContainers: boolean]§r
- \ifill <from: x y z> <to: x y z> <skygridSize: float> <tileName: Block> {blockStates: block states} <mode: skygrid|inverseskygrid> <reaplceTileName: Block> [clearContainers: boolean]§r
- \ifill <from: x y z> <to: x y z> <skygridSize: float> <tileName: Block> {blockStates: block states} <mode: skygrid|inverseskygrid> [clearContainers: boolean]§r
- \ifill <from: x y z> <to: x y z> clear [clearContainers: boolean]§r
- \ifill <from: x y z> <to: x y z> drain§r
- \ifill <center: x y z> <radius: float> <axis: x|y|z|xy|yz|xz|xyz> <tileName: Block> {blockStates: block states} circle {replaceTileName: Block} {replaceBlockStates: block states} [clearContainers: boolean]§r
- \ifill <center: x y z> <radius: float> <tileName: Block> {blockStates: block states} <mode: circlex|circley|circlez|circlexy|circleyz|circlexyz|sphere|semisphere> {replaceTileName: Block} {replaceBlockStates: block states} [clearContainers: boolean]§r
- \ifill <center: x y z> <radius: float> <thickness: float> <tileName: Block> {blockStates: block states} <mode: hollowsphere|dome> {replaceTileName: Block} {replaceBlockStates: block states} [clearContainers: boolean]§r
- \ifill <center: x y z> <radius: float> <length: float> <tileName: Block> {blockStates: block states} <mode: cylinderx|cylindery|cylinderz|cylinderxy|cylinderyz|cylinderxz|cylinderxyz> {replaceTileName: Block} {replaceBlockStates: block states} [clearContainers: boolean]§r
- \ifill <center: x y z> <radius: float> <length: float> <axis: x|y|z|xy|yz|xz|xyz> <tileName: Block> {blockStates: block states} <mode: tunnel|cylinder> {replaceTileName: Block} {replaceBlockStates: block states} [clearContainers: boolean]§r
- \ifill <center: x y z> <radius: x y z> <offset: x y z> <length: float> <tileName: Block> {blockStates: block states} hollowovoid {replaceTileName: Block} {replaceBlockStates: block states} [clearContainers: boolean]
Aliases: []
Categories: ["world"]
Default Required Tags: ["canUseChatCommands"]
Version: 32.0.1
\ignite
Ignites blocks in the specified radius.
Command Syntax:
- \ignite [radius: float[?=10]]
Aliases: []
Categories: ["world"]
Default Required Tags: ["canUseChatCommands"]
Version: 2.3.0-beta.17
\invsee
Displays the contents of the specified player's inventory.
Command Syntax:
- \invsee <playerTarget: target[allowMultiple=false]>
Aliases: []
Categories: ["invsee"]
Default Required Tags: ["canUseChatCommands"]
Version: 1.6.0
\invseep
Displays the contents of the specified player's inventory, including the dynamic properties set on the items.
Command Syntax:
- \invseep <playerTarget: target[allowMultiple=false]>
Aliases: []
Categories: ["invsee"]
Default Required Tags: ["canUseChatCommands"]
Version: 1.6.0
\invseeuuidmode
Displays the contents of the inventory of the entity with the specified UUID.
Command Syntax:
- \invseeuuidmode <entityUUID: int>
Aliases: []
Categories: ["invsee"]
Default Required Tags: ["canUseChatCommands"]
Version: 1.2.0
\item
Super advanced item modification command.
Command Syntax:
- \item <mode: lore|lorene> <lore: JSON>§r
- \item <mode: canplaceon|candestroy> <blockTypes: string[]>§r
- \item name <name: text>§r
- \item count <count: int(1-255)>§r
- \item remove§r
- \item gettags§r
- \item <mode: json|jsonb> <itemJSON: ItemJSON>§r
- \item property removelist <propertyIdList: string[]>§r
- \item property setlist <propertyList: JSON>§r
- \item property <mode: remove|get> <propertyId: string>§r
- \item property setnumber <propertyId: string> <propertyValue: number>§r
- \item property setstring <propertyId: string> <propertyValue: string>§r
- \item property setboolean <propertyId: string> <propertyValue: boolean>§r
- \item property setvector3 <propertyId: string> <propertyValue: Vector3>§r
- \item property <mode: list|clear>§r
- \item enchantment add <enchantment: {"level": number, "type": string}>§r
- \item enchantment addlist <enchantment: {"level": number, "type": string}[]>§r
- \item enchantment <mode: remove|get|testfor> <enchantmentId: string>§r
- \item enchantment <mode: list|clear>§r
- \item slot <slot: int> <mode: lore|lorene> <lore: JSON>§r
- \item slot <slot: int> name <name: text>§r
- \item slot <slot: int> count <count: int(1-255)>§r
- \item slot <slot: int> remove§r
- \item slot <slot: int> gettags§r
- \item slot <slot: int> <mode: json|jsonb> <itemJSON: ItemJSON>§r
- \item slot <slot: int> property removelist <propertyIdList: string[]>§r
- \item slot <slot: int> property setlist <propertyList: JSON>§r
- \item slot <slot: int> property <mode: remove|get> <propertyId: string>§r
- \item slot <slot: int> property setnumber <propertyId: string> <propertyValue: number>§r
- \item slot <slot: int> property setstring <propertyId: string> <propertyValue: string>§r
- \item slot <slot: int> property setboolean <propertyId: string> <propertyValue: boolean>§r
- \item slot <slot: int> property setvector3 <propertyId: string> <propertyValue: Vector3>§r
- \item slot <slot: int> property <mode: list|clear>§r
- \item slot <slot: int> enchantment add <enchantment: {"level": number, "type": string}>§r
- \item slot <slot: int> enchantment addlist <enchantment: {"level": number, "type": string}[]>§r
- \item slot <slot: int> enchantment <mode: remove|get|testfor> <enchantmentId: string>§r
- \item slot <slot: int> enchantment <mode: list|clear>
Aliases: []
Categories: ["items"]
Default Required Tags: ["canUseChatCommands"]
Version: 5.0.0
\itfill
Fills all or parts of a reigon with a specific block, with no limits, also temporarily spawns a tickingarea to load in chunks around it, can use any block type including NBT Editor only ones.
Command Syntax:
- \itfill <from: x y z> <to: x y z> <tileName: Block> <blockStates: block states> <ifillMode: replace|fill|cube|keep|walls|hollow|outline|pillars§c|floor|ceilling|diamond|hourglass§r> <replaceTileName: Block> [replaceBlockStates: block states] [clearContainers: boolean]§r
- \itfill <from: x y z> <to: x y z> <tileName: Block> <blockStates: block states> <ifillMode: replace|fill|cube|keep|walls|hollow|outline|pillars§c|floor|ceilling|diamond|hourglass§r> <reaplceTileName: Block> [clearContainers: boolean]§r
- \itfill <from: x y z> <to: x y z> <tileName: Block> <blockStates: block states> [ifillMode: replace|fill|cube|keep|walls|hollow|outline|pillars§c|floor|ceilling|diamond|hourglass§r] [clearContainers: boolean]§r
- \itfill <from: x y z> <to: x y z> <tileName: Block> <blockStates: block states> [clearContainers: boolean]§r
- \itfill <from: x y z> <to: x y z> <tileName: Block> <ifillMode: replace|fill|cube|keep|walls|hollow|outline|pillars§c|floor|ceilling|diamond|hourglass§r> <replaceTileName: Block> [replaceBlockStates: block states] [clearContainers: boolean]§r
- \itfill <from: x y z> <to: x y z> <tileName: Block> <ifillMode: replace|fill|cube|keep|walls|hollow|outline|pillars§c|floor|ceilling|diamond|hourglass§r> <reaplceTileName: Block> [clearContainers: boolean]§r
- \itfill <from: x y z> <to: x y z> <tileName: Block> [ifillMode: replace|fill|cube|keep|walls|hollow|outline|pillars§c|floor|ceilling|diamond|hourglass§r] [clearContainers: boolean]§r
- \itfill <from: x y z> <to: x y z> <tileName: Block> [clearContainers: boolean]§r
- \itfill <from: x y z> <to: x y z> <skygridSize: float> <tileName: Block> <blockStates: block states> <mode: skygrid|inverseskygrid> <replaceTileName: Block> [replaceBlockStates: block states] [clearContainers: boolean]§r
- \itfill <from: x y z> <to: x y z> <skygridSize: float> <tileName: Block> <blockStates: block states> <mode: skygrid|inverseskygrid> <reaplceTileName: Block> [clearContainers: boolean]§r
- \itfill <from: x y z> <to: x y z> <skygridSize: float> <tileName: Block> <blockStates: block states> <mode: skygrid|inverseskygrid> [clearContainers: boolean]§r
- \itfill <from: x y z> <to: x y z> <skygridSize: float> <tileName: Block> <blockStates: block states> <mode: skygrid|inverseskygrid> [clearContainers: boolean]§r
- \itfill <from: x y z> <to: x y z> <skygridSize: float> <tileName: Block> <mode: skygrid|inverseskygrid> <replaceTileName: Block> [replaceBlockStates: block states] [clearContainers: boolean]§r
- \itfill <from: x y z> <to: x y z> <skygridSize: float> <tileName: Block> <mode: skygrid|inverseskygrid> <reaplceTileName: Block> [clearContainers: boolean]§r
- \itfill <from: x y z> <to: x y z> <skygridSize: float> <tileName: Block> <mode: skygrid|inverseskygrid> [clearContainers: boolean]§r
- \itfill <from: x y z> <to: x y z> <tileName: Block> [clearContainers: boolean]§r
- \itfill <from: x y z> <to: x y z> clear [clearContainers: boolean]§r
- \itfill <from: x y z> <to: x y z> drain§r
- \itfill <center: x y z> <radius: float> <axis: x|y|z|xy|yz|xz|xyz> <tileName: Block> <blockStates: block states> circle [replaceTileName: Block] [replaceBlockStates: block states] [clearContainers: boolean]§r
- \itfill <center: x y z> <radius: float> <axis: x|y|z|xy|yz|xz|xyz> <tileName: Block> <blockStates: block states> circle [replaceTileName: Block] [clearContainers: boolean]§r
- \itfill <center: x y z> <radius: float> <axis: x|y|z|xy|yz|xz|xyz> <tileName: Block> <blockStates: block states> circle [clearContainers: boolean]§r
- \itfill <center: x y z> <radius: float> <axis: x|y|z|xy|yz|xz|xyz> <tileName: Block> circle [replaceTileName: Block] [replaceBlockStates: block states] [clearContainers: boolean]§r
- \itfill <center: x y z> <radius: float> <axis: x|y|z|xy|yz|xz|xyz> <tileName: Block> circle [replaceTileName: Block] [clearContainers: boolean]§r
- \itfill <center: x y z> <radius: float> <axis: x|y|z|xy|yz|xz|xyz> <tileName: Block> circle [clearContainers: boolean]§r
- \itfill <center: x y z> <radius: float> <tileName: Block> <blockStates: block states> <mode: circlex|circley|circlez|circlexy|circleyz|circlexyz|sphere|semisphere> <replaceTileName: Block> [replaceBlockStates: block states] [clearContainers: boolean]§r
- \itfill <center: x y z> <radius: float> <tileName: Block> <blockStates: block states> <mode: circlex|circley|circlez|circlexy|circleyz|circlexyz|sphere|semisphere> <replaceTileName: Block> [clearContainers: boolean]§r
- \itfill <center: x y z> <radius: float> <tileName: Block> <blockStates: block states> <mode: circlex|circley|circlez|circlexy|circleyz|circlexyz|sphere|semisphere> [clearContainers: boolean]§r
- \itfill <center: x y z> <radius: float> <tileName: Block> <mode: circlex|circley|circlez|circlexy|circleyz|circlexyz|sphere|semisphere> <replaceTileName: Block> [replaceBlockStates: block states] [clearContainers: boolean]§r
- \itfill <center: x y z> <radius: float> <tileName: Block> <mode: circlex|circley|circlez|circlexy|circleyz|circlexyz|sphere|semisphere> <replaceTileName: Block> [clearContainers: boolean]§r
- \itfill <center: x y z> <radius: float> <tileName: Block> <mode: circlex|circley|circlez|circlexy|circleyz|circlexyz|sphere|semisphere> [clearContainers: boolean]§r
- \itfill <center: x y z> <radius: float> <thickness: float> <tileName: Block> <blockStates: block states> <mode: hollowsphere|dome> <replaceTileName: Block> [replaceBlockStates: block states] [clearContainers: boolean]§r
- \itfill <center: x y z> <radius: float> <thickness: float> <tileName: Block> <blockStates: block states> <mode: hollowsphere|dome> <replaceTileName: Block> [clearContainers: boolean]§r
- \itfill <center: x y z> <radius: float> <thickness: float> <tileName: Block> <blockStates: block states> <mode: hollowsphere|dome> [clearContainers: boolean]§r
- \itfill <center: x y z> <radius: float> <thickness: float> <tileName: Block> <mode: hollowsphere|dome> <replaceTileName: Block> [replaceBlockStates: block states] [clearContainers: boolean]§r
- \itfill <center: x y z> <radius: float> <thickness: float> <tileName: Block> <mode: hollowsphere|dome> <replaceTileName: Block> [clearContainers: boolean]§r
- \itfill <center: x y z> <radius: float> <thickness: float> <tileName: Block> <mode: hollowsphere|dome> [clearContainers: boolean]§r
- \itfill <center: x y z> <radius: float> <length: float> <tileName: Block> <blockStates: block states> <mode: cylinderx|cylindery|cylinderz|cylinderxy|cylinderyz|cylinderxz|cylinderxyz> <replaceTileName: Block> [replaceBlockStates: block states] [clearContainers: boolean]§r
- \itfill <center: x y z> <radius: float> <length: float> <tileName: Block> <blockStates: block states> <mode: cylinderx|cylindery|cylinderz|cylinderxy|cylinderyz|cylinderxz|cylinderxyz> <replaceTileName: Block> [clearContainers: boolean]§r
- \itfill <center: x y z> <radius: float> <length: float> <tileName: Block> <blockStates: block states> <mode: cylinderx|cylindery|cylinderz|cylinderxy|cylinderyz|cylinderxz|cylinderxyz> [clearContainers: boolean]§r
- \itfill <center: x y z> <radius: float> <length: float> <tileName: Block> <mode: cylinderx|cylindery|cylinderz|cylinderxy|cylinderyz|cylinderxz|cylinderxyz> <replaceTileName: Block> [replaceBlockStates: block states] [clearContainers: boolean]§r
- \itfill <center: x y z> <radius: float> <length: float> <tileName: Block> <mode: cylinderx|cylindery|cylinderz|cylinderxy|cylinderyz|cylinderxz|cylinderxyz> <replaceTileName: Block> [clearContainers: boolean]§r
- \itfill <center: x y z> <radius: float> <length: float> <tileName: Block> <mode: cylinderx|cylindery|cylinderz|cylinderxy|cylinderyz|cylinderxz|cylinderxyz> [clearContainers: boolean]§r
- \itfill <center: x y z> <radius: float> <length: float> <axis: x|y|z|xy|yz|xz|xyz> <tileName: Block> <blockStates: block states> <mode: tunnel|cylinder> [replaceTileName: Block] [replaceBlockStates: block states] [clearContainers: boolean]§r
- \itfill <center: x y z> <radius: float> <length: float> <axis: x|y|z|xy|yz|xz|xyz> <tileName: Block> <blockStates: block states> <mode: tunnel|cylinder> [replaceTileName: Block] [clearContainers: boolean]§r
- \itfill <center: x y z> <radius: float> <length: float> <axis: x|y|z|xy|yz|xz|xyz> <tileName: Block> <blockStates: block states> <mode: tunnel|cylinder> [clearContainers: boolean]§r
- \itfill <center: x y z> <radius: float> <length: float> <axis: x|y|z|xy|yz|xz|xyz> <tileName: Block> <mode: tunnel|cylinder> [replaceTileName: Block] [replaceBlockStates: block states] [clearContainers: boolean]§r
- \itfill <center: x y z> <radius: float> <length: float> <axis: x|y|z|xy|yz|xz|xyz> <tileName: Block> <mode: tunnel|cylinder> [replaceTileName: Block] [clearContainers: boolean]§r
- \itfill <center: x y z> <radius: float> <length: float> <axis: x|y|z|xy|yz|xz|xyz> <tileName: Block> <mode: tunnel|cylinder> [clearContainers: boolean]§r
- \itfill <center: x y z> <radius: x y z> <offset: x y z> <length: float> <tileName: Block> <blockStates: block states> hollowovoid [replaceTileName: Block] [replaceBlockStates: block states] [clearContainers: boolean]§r
- \itfill <center: x y z> <radius: x y z> <offset: x y z> <length: float> <tileName: Block> <blockStates: block states> hollowovoid [replaceTileName: Block] [clearContainers: boolean]§r
- \itfill <center: x y z> <radius: x y z> <offset: x y z> <length: float> <tileName: Block> <blockStates: block states> hollowovoid [clearContainers: boolean]§r
- \itfill <center: x y z> <radius: x y z> <offset: x y z> <length: float> <tileName: Block> hollowovoid [replaceTileName: Block] [replaceBlockStates: block states] [clearContainers: boolean]§r
- \itfill <center: x y z> <radius: x y z> <offset: x y z> <length: float> <tileName: Block> hollowovoid [replaceTileName: Block] [clearContainers: boolean]§r
- \itfill <center: x y z> <radius: x y z> <offset: x y z> <length: float> <tileName: Block> hollowovoid [clearContainers: boolean]
Aliases: []
Categories: ["world"]
Default Required Tags: ["canUseChatCommands"]
Version: 29.100.1
\jumpto
Command Syntax:
- \jumpto
Aliases: ["j"]
Categories: ["world"]
Default Required Tags: ["canUseChatCommands"]
Version: 1.0.0
\kick
Kicks one or more players from the server.
Command Syntax:
- \kick <players: target> [reason: string]
Aliases: []
Categories: ["system","world","players","server"]
Default Required Tags: ["canUseChatCommands"]
Version: 1.0.0
\listbans
Lists all bans.
Command Syntax:
- \listbans
Aliases: ["getbans"]
Categories: ["system","world","server"]
Default Required Tags: ["canUseChatCommands"]
Version: 1.0.0
\listidbans
Lists all id bans.
Command Syntax:
- \listidbans
Aliases: ["getidbans"]
Categories: ["system","world","server"]
Default Required Tags: ["canUseChatCommands"]
Version: 1.0.0
\listnamebans
Lists all name bans.
Command Syntax:
- \listnamebans
Aliases: ["getnamebans"]
Categories: ["system","world","server"]
Default Required Tags: ["canUseChatCommands"]
Version: 1.0.0
\liststructures
Lists all saved structures.
Command Syntax:
- \liststructures
Aliases: ["getstructures"]
Categories: ["system","world","server","blocks"]
Default Required Tags: ["canUseChatCommands"]
Version: 1.0.0
\mainmenu
Opens up the main menu.
Command Syntax:
- \mainmenu
Aliases: ["menu","mm"]
Categories: ["uis"]
Default Required Tags: ["canUseChatCommands"]
Version: 2.0.0
\managecommands
Opens up the commands editor menu.
Command Syntax:
- \managecommands
Aliases: ["mngcmds"]
Categories: ["uis"]
Default Required Tags: ["canUseChatCommands"]
Version: 1.0.0
\manageplayers
Opens up the manage players menu.
Command Syntax:
- \manageplayers
Aliases: ["mngplyrs"]
Categories: ["uis"]
Default Required Tags: ["canUseChatCommands"]
Version: 1.0.0
\managescriptautoeval
Opens up the Script Auto Eval settings menu.
Command Syntax:
- \managescriptautoeval
Aliases: []
Categories: ["uis"]
Default Required Tags: ["canUseChatCommands"]
Version: 1.0.0
\maxhealth
Heals entities.
Command Syntax:
- \maxhealth [targets: target]
Aliases: []
Categories: ["players","entities"]
Default Required Tags: ["canUseChatCommands"]
Version: 1.0.0
\messageui
Opens up a menu where you can type a chat message or command to send or run with no character limits.
Command Syntax:
- \messageui
Aliases: ["msgui"]
Categories: ["uis"]
Default Required Tags: ["canUseChatCommands"]
Version: 1.0.0
\minhealth
Sets the health of entities to their minimum health values.
Command Syntax:
- \minhealth [targets: target]
Aliases: []
Categories: ["players","entities"]
Default Required Tags: ["canUseChatCommands"]
Version: 1.0.0
\morph
Additional Addons Required: ["8Crafter's Entity Scale, NBT, and Behavior Modifier, Bossbar, and Morph Addon"]
Morphs into the morph with the specified morph ID.
Command Syntax:
- \morph <morphId: int>
Aliases: []
Categories: ["Entity Scale Add-On"]
Default Required Tags: ["canUseChatCommands"]
Version: 1.0.1
\notificationsettings
Command Syntax:
- notificationsettings
Aliases: ["notificationssettings"]
Categories: ["uis"]
Default Required Tags: ["canUseChatCommands"]
Version: 2.0.0
\offlineinfo
Displays the saved player data of the specified player.
Command Syntax:
- \offlineinfo <playerName: string>
Aliases: []
Categories: ["players"]
Default Required Tags: ["canUseChatCommands"]
Version: 1.1.0
\offlineinfoescaped
Command Syntax:
- [object Object]
Aliases: []
Categories: ["players"]
Default Required Tags: ["canUseChatCommands"]
Version: 0.1.0-alpha.12
\offlineinforaw
Command Syntax:
- [object Object]
Aliases: []
Categories: ["players"]
Default Required Tags: ["canUseChatCommands"]
Version: 1.0.0-rc.1
\offlineinfourl
Command Syntax:
- [object Object]
Aliases: []
Categories: ["players"]
Default Required Tags: ["canUseChatCommands"]
Version: 1.0.0-rc.1
\offlineinvsee
Displays the saved contents of the specified player's inventory.
Command Syntax:
- \offlineinvsee <playerName: string>
Aliases: []
Categories: ["players","invsee"]
Default Required Tags: ["canUseChatCommands"]
Version: 1.2.0
\offlineuuidinfo
Displays the saved player data of the player with the specified UUID.
Command Syntax:
- \offlineuuidinfo <playerUUID: int>
Aliases: []
Categories: ["players"]
Default Required Tags: ["canUseChatCommands"]
Version: 1.1.0
\offlineuuidinfoescaped
Command Syntax:
- [object Object]
Aliases: []
Categories: ["players"]
Default Required Tags: ["canUseChatCommands"]
Version: 0.1.0-alpha.3
\offlineuuidinforaw
Command Syntax:
- [object Object]
Aliases: []
Categories: ["players"]
Default Required Tags: ["canUseChatCommands"]
Version: 1.0.0-rc.1
\offlineuuidinfourl
Command Syntax:
- [object Object]
Aliases: []
Categories: ["players"]
Default Required Tags: ["canUseChatCommands"]
Version: 1.0.0-rc.1
\offlineuuidinvsee
Displays the saved contents of the inventory of the player with the specified UUID.
Command Syntax:
- \offlineuuidinvsee <playerUUID: int>
Aliases: []
Categories: ["players","invsee"]
Default Required Tags: ["canUseChatCommands"]
Version: 1.2.0
\phase
Command Syntax:
- phase
Aliases: []
Categories: ["world"]
Default Required Tags: ["canUseChatCommands"]
Version: 1.0.0
\printlayers
Displays a list of all the non-air blocks at your specified x and z coordinates.
Command Syntax:
- \printlayers
Aliases: []
Categories: ["world"]
Default Required Tags: ["canUseChatCommands"]
Version: 1.0.0
\rank
Manages ranks stored in players.
Command Syntax:
- \rank <players: target> <mode: add|remove> <tag: string>§r
- \rank <players: target> clear
Aliases: []
Categories: ["players"]
Default Required Tags: ["canUseChatCommands"]
Version: 1.0.0
\remexp
Removes explosive blocks and entities in the specified radius, the radius defaults to 10 if not specified. Removes TNT and respawn anchors if in the overworld, removes TNT and beds if in the nether, and removes TNT, beds, and respawn anchors if in the end.
Command Syntax:
- \remexp [radius: number]
Aliases: []
Categories: ["world"]
Default Required Tags: ["canUseChatCommands"]
Version: 2.3.0
\remexpne
Removes explosive blocks in the specified radius, the radius defaults to 10 if not specified. Removes TNT and respawn anchors if in the overworld, removes TNT and beds if in the nether, and removes TNT, beds, and respawn anchors if in the end. Unlike the emexp command, this one does not remove explosive entities, it only removes explosive blocks.
Command Syntax:
- remexpne [radius: number]
Aliases: []
Categories: ["world"]
Default Required Tags: ["canUseChatCommands"]
Version: 2.3.0
\remove
Command Syntax:
- remove
Aliases: ["rem","rement"]
Categories: ["world","worldedit"]
Default Required Tags: ["canUseChatCommands"]
Version: 1.0.0
\removeotheritemenchantments
Removes all enchantment types from an item except for the item types specified.
Command Syntax:
- \remotheritemenchants <enchantmentTypesToKeep: StringArray>
Aliases: ["remotheritemenchants","roie"]
Categories: ["server","items"]
Default Required Tags: ["canUseChatCommands"]
Version: 1.0.0
\replacenear
Replaces blocks of the specified type with another specified block type in the specified radius.
Command Syntax:
- \repalcenear <radius: number> <replaceTileName: Block> <replaceBlockStates: block states> <tileName: Block> <blockStates: block states>
Aliases: []
Categories: ["world","worldedit"]
Default Required Tags: ["canUseChatCommands"]
Version: 1.0.0
\run
Runs the specified command after the specified number of ticks.
Command Syntax:
- \run <delayTicks: int[min=0]> <command: command>
Aliases: []
Categories: ["misc"]
Default Required Tags: ["canUseChatCommands"]
Version: 1.0.0
\scale
Additional Addons Required: ["8Crafter's Entity Scale, NBT, and Behavior Modifier, Bossbar, and Morph Addon"]
Sets the scale of the player, the default is 1.0. The visual scale scales the rendering and hitbox of the player by a certain amount, this can be combined with the visual scale. Note: To use this command the player must first have a scale component, to add this to the player you must run one of the andexsa:scale_#x commands on the player. Ex. /event entity @s andexsa:scale_1x
Command Syntax:
- \scale <scale: float>
Aliases: []
Categories: ["Entity Scale Add-On"]
Default Required Tags: ["canUseChatCommands"]
Version: 1.0.1
\scanenderchest
Scans a player's ender chest and displays the contents of it.
Command Syntax:
- \scanenderchest [targets: target|~]
Aliases: ["ecinvsee","scnendchest"]
Categories: ["players","containers/inventories","invsee"]
Default Required Tags: ["canUseChatCommands"]
Version: 1.3.0
\selectioninfo
Displays info about the current selection.
Command Syntax:
- \selectioninfo
Aliases: ["selinfo","seli"]
Categories: ["world","worldedit"]
Default Required Tags: ["canUseChatCommands"]
Version: 1.0.0
\setitem
Creates a new stack of the specified item type of the specified size in the specified slot of the specified player's inventory. Note: The item parameter can be set to any valid item id, even ones that can't be used with the normal vanilla /give, such as ones that require an NBT editor to obtain, for example you could use minecraft:netherreactor to get a Nether Reactor Core. The count parameter can be any value from 0-255.
Command Syntax:
- \setitem <item: itemType> <amount: int> <slot: int>
Aliases: []
Categories: ["misc"]
Default Required Tags: ["canUseChatCommands"]
Version: 1.0.0
\setitemb
Replaces the item stack in the specified inventory slot with an item stack based on the provided itemJSON.
Command Syntax:
- \setitemb <itemJSON: itemJSON> <slot: int>§r
- simplified itemJSON format (type "\help itemJSONFormat" to see full format options): §r
- {§r
- "name"?: string,§r
- "lore"?: string[],§r
- "count"?: number,§r
- "keepondeath"?: boolean,§r
- "lockmode"?: ItemLockMode,§r
- "canplaceon"?: string[],§r
- "components"?: {§r
- "enchantable"?: {§r
- "add"?: Enchantment|Enchantment[],§r
- "addList"?: Enchantment[],§r
- "remove"?: Enchantment,§r
- "removeEnchantments"?: Enchantment,§r
- "clear"?: any§r
- },§r
- "durability"?: {§r
- "durability"?: number,§r
- "damage"?: number,§r
- "repair"?: number,§r
- "setDurabilityToMax"?: any§r
- },§r
- "damage"?: {§r
- "durability"?: number,§r
- "damage"?: number,§r
- "repair"?: number,§r
- "setDurabilityToMax"?: any§r
- }§r
- },§r
- force?: boolean§r
- source?: {§r
- type?: string,§r
- targetSelector?: string,§r
- targetSelectorExecutionLocation?: DimensionLocation,§r
- targetSelectorSourceEntity?: Entity,§r
- player?: string,§r
- entityAtBlock?: DimensionLocation,§r
- entityType?: string,§r
- entityTypeId?: string,§r
- entityId?: string|number,§r
- block?: DimensionLocation,§r
- slot?: number,§r
- id?: string,§r
- itemId?: string,§r
- count?: number,§r
- amount?: number§r
- },§r
- type?: string,§r
- dynamicproperties?: [string, string|number|boolean|Vector3|undefined][]|Record<string, string|number|boolean|Vector3|undefined>,§r
- cleardynamicproperties?: any,§r
- removedynamicproperties?: string[],§r
- removedynamicproperty?: string§r
- }§r
- examples: §r
- stack of 255 sharpness 1 wooden swords: {"minecraft:components": {"enchantable": {"add": {"level": 1, "type": "sharpness"}}}, "id": "wooden_sword", "count": 255}§r
- sharpness 5 fortune 3 efficiency 5 iron axe that cannot be dropped and are kept on death with the name "§4Storage Hog Axe§r" and the lore "§eTakes\nUp\nYour\nInventory§r" (with the \n as line break characters) that says lol in the chat and damages the user when used: {"minecraft:components": {"enchantable": {"add": [{"level": 1, "type": "sharpness"}, {"type": "fortune", "level": 3}, {"type": "efficiency", "level": 5}]}}, "id": "iron_axe", "count": 72, "keepondeath": true, "lockMode": "inventory", "name": "§r§4Storage Hog Axe§r§f", "lore": ["§r§eTakes\nUp§r§f","§r§eYour\nInventory§r§f"], "dynamicProperties": {"code": "world.sendMessage('lol'); event.source.runCommandAsync(\"/damage @s 1 thorns entity @s\")"}}§r
- stack of 16 unbreaking 3 mending 1 shields that are locked to a specific slot and are kept on death: {"minecraft:components": {"enchantable": {"addList": [{"level": 1, "type": "mending"}, {"type": "unbreaking", "level": 3}]}}, "id": "shield", "count": 16, "keepondeath": true, "lockMode": "slot"}
Aliases: []
Categories: ["misc"]
Default Required Tags: ["canUseChatCommands"]
Version: 2.0.0
\setnametag
Sets the name tag of a player or entity.
Command Syntax:
- \setnametag <target: target> [nameTag: string]
Aliases: ["setplayernametag","setentitynametag"]
Categories: ["misc"]
Default Required Tags: ["canUseChatCommands"]
Version: 1.0.2
\settings
Opens up the settings menu.
Command Syntax:
- \settings
Aliases: []
Categories: ["uis"]
Default Required Tags: ["canUseChatCommands"]
Version: 2.0.0
\shuffleinventory
Shuffles the inventory of the specified player.
Command Syntax:
- \shuffleinventory <playerTarget: target|~>
Aliases: ["invshuffle"]
Categories: ["players"]
Default Required Tags: ["canUseChatCommands"]
Version: 0.2.2-beta.2
\snapshot
Manages backups and backup areas.
Command Syntax:
- \snapshot backup <areaId: string>§r
- \snapshot rollback <areaId: string> [backupIndex: number]§r
- \snapshot deletebackup <areaId: string> [backupIndex: number]§r
- \snapshot clearbackups <areaId: string>§r
- \snapshot deletearea <areaId: string>§r
- \snapshot clearareas§r
- \snapshot listbackups <areaId: string>§r
- \snapshot listareas§r
- \snapshot list
Aliases: []
Categories: ["system","world","server","worldedit"]
Default Required Tags: ["canUseChatCommands"]
Version: 1.0.0
\spawn
Teleports you to spawn.
Command Syntax:
- \spawn
Aliases: []
Categories: ["world","players","warps","misc"]
Default Required Tags: ["canUseChatCommands"]
Version: 1.0.0
\structure
Manages structures.
Command Syntax:
- \structure createempty <structureName: string> <sizeX: float> <sizeY: float> <sizeZ: float> [saveMode: memory|disk]§r
- \structure save <structureName: string> <from: x y z> <to: x y z> [saveMode: world|memory] [includeEntities: Boolean] [includeBlocks: Boolean]§r
- \structure load <structureName: string> <to: x y z> [rotation: 0|90|190|270] [mirror: none|x|z|xz] [includeEntities: Boolean] [includeBlocks: Boolean] [waterlogged: Boolean] [integrity: float] [integritySeed: string] [animationMode: none|blocks|layers] [animationSeconds: float]§r
- \structure delete <structureName: string>§r
- \structure copy <copyFromStructureName: string> <copyToStructureName: string>§r
- \structure copytodisk <structureName: string> <copyToStructureName: string>§r
- \structure copytomemory <structureName: string> <copyToStructureName: string>§r
- \structure savetodisk <structureName: string>§r
- \structure movetomemory <structureName: string>§r
- \structure removeair <structureName: string>§r
- \structure removeall§r
- \structure list
Aliases: []
Categories: ["system","world","server","blocks"]
Default Required Tags: ["canUseChatCommands"]
Version: 2.3.17
\summon
Summons entities.
Command Syntax:
- \summon <spawnCount: int> <entity: EntityType<[spawnEvent]>> [spawnPos: x y z] [yRot: value] [xRot: value] [persistent: bool] [nameTag: string]§r
- ex. \summon 5 sheep<spawn_baby> ~~~~~ true "Sheep That Won't Despawn"
Aliases: []
Categories: ["entities"]
Default Required Tags: ["canUseChatCommands"]
Version: 1.3.4
\swapinventories
Swaps the inventories of 2 players.
Command Syntax:
- \swapinventories [player: target|~] [otherPlayer: target|~]
Aliases: ["invswap"]
Categories: ["players"]
Default Required Tags: ["canUseChatCommands"]
Version: 0.2.1-beta.1
\swapitems
Swaps an item in a slot of one player's inventory with another slot of another player's inventory.
Command Syntax:
- \swapitems [slot: int|head|chest|legs|feet|mainhand|offhand|~] [otherSlot: int|head|chest|legs|feet|mainhand|offhand|~] [player: target|~] [otherPlayer: target|~]
Aliases: []
Categories: ["items"]
Default Required Tags: ["canUseChatCommands"]
Version: 0.1.1-beta.1
\takeitem
Steals an item from another player's inventory and puts it into yoru inventory.
Command Syntax:
- \takeitem <fromSlot: int|head|chest|legs|feet|mainhand|offhand|~> <fromPlayer: target|~>
Aliases: []
Categories: ["items"]
Default Required Tags: ["canUseChatCommands"]
Version: 0.1.1-beta.1
\terminal
Opens up the command runner/terminal menu.
Command Syntax:
- \terminal
Aliases: ["cmdrunner"]
Categories: ["uis"]
Default Required Tags: ["canUseChatCommands"]
Version: 1.0.0
\thru
Teleports to the other side of the wall/floor/ceilling that you are looking at.
Command Syntax:
- \thru
Aliases: []
Categories: ["world"]
Default Required Tags: ["canUseChatCommands"]
Version: 1.0.0
\timezone
Sets your timezone to the specific UTC offset in hours.
Command Syntax:
- \timezone [UTCOffsetInHours: float]
Aliases: ["tz"]
Categories: ["system","world","server"]
Default Required Tags: []
Version: 1.0.0
\tint
Additional Addons Required: ["8Crafter's Entity Scale, NBT, and Behavior Modifier, Bossbar, and Morph Addon"]
Tints the players skins a specified color, and optionally sets the alpha channel of their skins. The r, g, and b parameters are the color to tint it. The a parameter is the alpha channel. For the r, g, b, and a parameters, 1 is 0% brightness, 2 is 100% brightness, and anything higher than new makes the skins glow a certain amount. To enable the alpha channel you must set the useSpectatorMaterial parameter to 1, 0 is the default player material, 1 is the player material for players who are in spectator mode, 0 does not allow for an alpha channel, but 1 does allow for an alpha channel.
Command Syntax:
- \tint [red: float|~] [green: float|~] [blue: float|~] [alpha: float|~] [materialType: 0|1] [playerTarget: target[?=@s,allowMultiple=false]]
Aliases: []
Categories: ["Entity Scale Add-On"]
Default Required Tags: ["canUseChatCommands"]
Version: 1.0.4
\top
Teleports on top of the highest solid block at your x and z coordinates.
Command Syntax:
- \top
Aliases: []
Categories: ["world"]
Default Required Tags: ["canUseChatCommands"]
Version: 1.0.0
\tpa
Requests to teleport to the specified player.
Command Syntax:
- \tpa <player: target|playerName|string>
Aliases: []
Categories: ["players","warps"]
Default Required Tags: []
Version: 1.0.0
\tps
Additional Addons Required: ["8Crafter's Entity Scale, NBT, and Behavior Modifier, Bossbar, and Morph Addon"]
Gets the current TPS values and displays them in the chat to you only.
Command Syntax:
- \tps
Aliases: []
Categories: ["Entity Scale Add-On","system","world"]
Default Required Tags: ["canUseChatCommands"]
Version: 1.0.0
\transferitem
Transfers the item in your hand to the specified player's inventory.
Command Syntax:
- \transferitem <transferItemToPlayer: target>
Aliases: []
Categories: ["items"]
Default Required Tags: ["canUseChatCommands"]
Version: 1.0.0
\transformresultatdvindex
Displays what item a smithing table enchanted book combined with a enchantment transfer smithing template of the specified data value would turn in to.
Command Syntax:
- \transformresultatdvindex [dаta: int]
Aliases: []
Categories: ["server","items"]
Default Required Tags: ["canUseChatCommands"]
Version: 1.0.0
\up
Teleports up the specified number of blocks and places glass below you if placeGlass is not set to false.
Command Syntax:
- \up [placeGlass: bool[?=true]]
Aliases: []
Categories: ["world"]
Default Required Tags: ["canUseChatCommands"]
Version: 1.0.0
\version
Displays the format version of the add-on.
Command Syntax:
- \version
Aliases: ["ver"]
Categories: ["system","world","server"]
Default Required Tags: ["canUseChatCommands"]
Version: 1.0.0
\visualscale
Additional Addons Required: ["8Crafter's Entity Scale, NBT, and Behavior Modifier, Bossbar, and Morph Addon"]
Sets the visual scale of the player, the default is 0.9375. The visual scale scales the rendering of the player by a certain amount without changing the hitbox, this can be combined with the regular scale.
Command Syntax:
- \visualscale <visualscale: float>
Aliases: []
Categories: ["Entity Scale Add-On"]
Default Required Tags: ["canUseChatCommands"]
Version: 1.0.0-beta.1
\visualscaleenabled
Additional Addons Required: ["8Crafter's Entity Scale, NBT, and Behavior Modifier, Bossbar, and Morph Addon"]
Enables or disables the visual scale override set in the isualscale command.
Command Syntax:
- \visualscaleenabled <visualscaleenabled: bool>
Aliases: []
Categories: ["Entity Scale Add-On"]
Default Required Tags: ["canUseChatCommands"]
Version: 1.0.0-beta.1
\vthru
Teleports to the other side of the wall/floor/ceilling that you are looking at, even if it would put you into the void.
Command Syntax:
- \vthru
Aliases: []
Categories: ["world"]
Default Required Tags: ["canUseChatCommands"]
Version: 1.0.0
\w
Warps to the specified private warp.
Command Syntax:
- \w <name: escapableString>
Aliases: []
Categories: ["warps"]
Default Required Tags: ["canUseChatCommands"]
Version: 1.1.0
\warp
Warps to the specified global warp.
Command Syntax:
- \warp <name: escapableString>
Aliases: []
Categories: ["warps"]
Default Required Tags: ["canUseChatCommands"]
Version: 1.1.0
\warplist
Lists all global warps.
Command Syntax:
- \warplist
Aliases: []
Categories: ["warps"]
Default Required Tags: ["canUseChatCommands"]
Version: 1.0.0
\warplistdetails
Lists all global warps with more details.
Command Syntax:
- \warplistdetails
Aliases: []
Categories: ["warps"]
Default Required Tags: ["canUseChatCommands"]
Version: 1.0.0
\warplistrawdata
Lists the raw data of the global warps.
Command Syntax:
- \warplistrawdata
Aliases: []
Categories: ["warps"]
Default Required Tags: ["canUseChatCommands"]
Version: 1.0.0
\warpremove
Removes the specified global warp.
Command Syntax:
- \warpremove <name: escapableString>
Aliases: []
Categories: ["warps"]
Default Required Tags: ["canUseChatCommands"]
Version: 1.0.0
\warpreset
Removes all global warps.
Command Syntax:
- \warpreset
Aliases: []
Categories: ["warps"]
Default Required Tags: ["canUseChatCommands"]
Version: 1.0.0
\warpset
Sets a global warp.
Command Syntax:
- \warpset <dimension: dimension> <x: float> <y: float> <z: float> <name: escapableString>
Aliases: []
Categories: ["warps"]
Default Required Tags: ["canUseChatCommands"]
Version: 1.1.0
\wlist
Lists all private warps.
Command Syntax:
- \wlist
Aliases: []
Categories: ["warps"]
Default Required Tags: ["canUseChatCommands"]
Version: 1.0.0
\wlistdetails
Lists all private warps with more details.
Command Syntax:
- \wlistdetails
Aliases: []
Categories: ["warps"]
Default Required Tags: ["canUseChatCommands"]
Version: 1.0.0
\wlistrawdata
Lists the raw data of the private warps.
Command Syntax:
- \wlistrawdata
Aliases: []
Categories: ["warps"]
Default Required Tags: ["canUseChatCommands"]
Version: 1.0.0
\wremove
Removes the specified private warp.
Command Syntax:
- \wremove <name: escapableString>
Aliases: []
Categories: ["warps"]
Default Required Tags: ["canUseChatCommands"]
Version: 1.0.0
\wreset
Removes all private warps.
Command Syntax:
- \wreset
Aliases: []
Categories: ["warps"]
Default Required Tags: ["canUseChatCommands"]
Version: 1.0.0
\wset
Sets a private warp.
Command Syntax:
- \wset <dimension: dimension> <x: float> <y: float> <z: float> <name: escapableString>
Aliases: []
Categories: ["warps"]
Default Required Tags: ["canUseChatCommands"]
Version: 1.1.0
\einvseeb
The original version of the \einvsee command that does not scan equipment slots.
Command Syntax:
- \einvseeb <targetSelector: target>
Aliases: []
Categories: ["invsee"]
Default Required Tags: ["canUseChatCommands"]
Version: 1.6.0
\ifillb
Fills all or parts of a reigon with a specific block, with no limits, can use any block type including NBT Editor only ones.
Command Syntax:
- \ifillb <from: x y z> <to: x y z> <tileName: Block> {blockStates: block states} [replaceTileName: Block] [replaceBlockStates: block states]
Aliases: []
Categories: ["world"]
Default Required Tags: ["canUseChatCommands"]
Version: 1.28.1
\ifillc
Fills all or parts of a reigon with a specific block, with no limits, can use any block type including NBT Editor only ones.
Command Syntax:
- \ifillc <from: x y z> <to: x y z> <tileName: Block> {blockStates: block states} [replaceTileName: Block] [replaceBlockStates: block states]
Aliases: []
Categories: ["world"]
Default Required Tags: ["canUseChatCommands"]
Version: 1.28.1
\ifilld
Fills all or parts of a reigon with a specific block, with no limits, can use any block type including NBT Editor only ones.
Command Syntax:
- \ifillc <from: x y z> <to: x y z> <tileName: Block> {blockStates: block states} [replaceTileName: Block] [replaceBlockStates: block states]
Aliases: []
Categories: ["world"]
Default Required Tags: ["canUseChatCommands"]
Version: 1.28.1
\igfill
Fills all or parts of a reigon with a specific block, with no limits, uses a generator function so it never will produce a script hang error but it is extremely slow, can use any block type including NBT Editor only ones.
Command Syntax:
- \igfill <from: x y z> <to: x y z> <tileName: Block> {blockStates: block states} [replaceTileName: Block] [replaceBlockStates: block states]
Aliases: []
Categories: ["world"]
Default Required Tags: ["canUseChatCommands"]
Version: 4.100.1
\ihollow
Same as the \ifill command except for the fact that it only fills the sides of the specified area.
Command Syntax:
- \ihollow <from: x y z> <to: x y z> <tileName: Block> <blockStates: block states|JSON|Array> [replaceTileName: Block] [replaceBlockStates: block states|JSON|Array] ihollow <from: x y z> <to: x y z> <tileName: Block> [replaceTileName: Block] [replaceBlockStates: block states|JSON|Array]
Aliases: []
Categories: ["world"]
Default Required Tags: ["canUseChatCommands"]
Version: 6.12.0
\iogfill
Fills all or parts of a reigon with a specific block, with no limits, uses a generator function so it never will produce a script hang error but it is extremely slow, can use any block type including NBT Editor only ones.
Command Syntax:
- \iogfill <from: x y z> <to: x y z> <tileName: Block> [blockStates: block states] [replaceTileName: Block] [replaceBlockStates: block states]§r
- \iogfill <from: x y z> <to: x y z> <tileName: Block> <replaceTileName: Block> [replaceBlockStates: block states]
Aliases: []
Categories: ["world"]
Default Required Tags: ["canUseChatCommands"]
Version: 4.19.1
\ioutline
Same as the \ifill command except for the fact that it only fills the outline of the specified area.
Command Syntax:
- \ioutline <from: x y z> <to: x y z> <tileName: Block> <blockStates: block states|JSON|Array> [replaceTileName: Block] [replaceBlockStates: block states|JSON|Array] ioutline <from: x y z> <to: x y z> <tileName: Block> [replaceTileName: Block] [replaceBlockStates: block states|JSON|Array]
Aliases: []
Categories: ["world"]
Default Required Tags: ["canUseChatCommands"]
Version: 6.12.0
\ipillars
Same as the \ifill command except for the fact that it only fills the pillars of the specified area.
Command Syntax:
- \ipillars <from: x y z> <to: x y z> <tileName: Block> <blockStates: block states|JSON|Array> [replaceTileName: Block] [replaceBlockStates: block states|JSON|Array] ipillars <from: x y z> <to: x y z> <tileName: Block> [replaceTileName: Block] [replaceBlockStates: block states|JSON|Array]
Aliases: []
Categories: ["world"]
Default Required Tags: ["canUseChatCommands"]
Version: 6.12.0
\ithollow
Same as the \ihollow command except for the fact that it temporarily spawns a tickingarea to load in the chunks where the blocks will be filled.
Command Syntax:
- \ithollow <from: x y z> <to: x y z> <tileName: Block> <blockStates: block states|JSON|Array> [replaceTileName: Block] [replaceBlockStates: block states|JSON|Array] ithollow <from: x y z> <to: x y z> <tileName: Block> [replaceTileName: Block] [replaceBlockStates: block states|JSON|Array]
Aliases: []
Categories: ["world"]
Default Required Tags: ["canUseChatCommands"]
Version: 7.12.0
\itoutline
Same as the \ioutline command except for the fact that it temporarily spawns a tickingarea to load in the chunks where the blocks will be filled.
Command Syntax:
- \itoutline <from: x y z> <to: x y z> <tileName: Block> <blockStates: block states|JSON|Array> [replaceTileName: Block] [replaceBlockStates: block states|JSON|Array] itoutline <from: x y z> <to: x y z> <tileName: Block> [replaceTileName: Block] [replaceBlockStates: block states|JSON|Array]
Aliases: []
Categories: ["world"]
Default Required Tags: ["canUseChatCommands"]
Version: 7.12.0
\itpillars
Same as the \ipillars command except for the fact that it temporarily spawns a tickingarea to load in the chunks where the blocks will be filled.
Command Syntax:
- \itpillars <from: x y z> <to: x y z> <tileName: Block> <blockStates: block states|JSON|Array> [replaceTileName: Block] [replaceBlockStates: block states|JSON|Array] itpillars <from: x y z> <to: x y z> <tileName: Block> [replaceTileName: Block] [replaceBlockStates: block states|JSON|Array]
Aliases: []
Categories: ["world"]
Default Required Tags: ["canUseChatCommands"]
Version: 7.12.0
\itwalls
Same as the \iwalls command except for the fact that it temporarily spawns a tickingarea to load in the chunks where the blocks will be filled.
Command Syntax:
- \itwalls <from: x y z> <to: x y z> <tileName: Block> <blockStates: block states|JSON|Array> [replaceTileName: Block] [replaceBlockStates: block states|JSON|Array] itwalls <from: x y z> <to: x y z> <tileName: Block> [replaceTileName: Block] [replaceBlockStates: block states|JSON|Array]
Aliases: []
Categories: ["world"]
Default Required Tags: ["canUseChatCommands"]
Version: 7.12.0
\iwalls
Same as the \ifill command except for the fact that it only fills the walls of the specified area.
Command Syntax:
- \iwalls <from: x y z> <to: x y z> <tileName: Block> <blockStates: block states|JSON|Array> [replaceTileName: Block] [replaceBlockStates: block states|JSON|Array] iwalls <from: x y z> <to: x y z> <tileName: Block> [replaceTileName: Block] [replaceBlockStates: block states|JSON|Array]
Aliases: []
Categories: ["world"]
Default Required Tags: ["canUseChatCommands"]
Version: 6.12.0
\scanenderchestc
Scans a player's ender chest and displays the contents of it.
Command Syntax:
- \scanenderchestc [target: string|~]
Aliases: ["ecinvseec","scnendchestc"]
Categories: ["players","containers/inventories","invsee"]
Default Required Tags: ["canUseChatCommands"]
Version: 1.4.0
\stopgen
Stops generator functions such as the \igfill and \iogfill commands.
Command Syntax:
- \stopgen <generatorId: int>
Aliases: []
Categories: ["misc"]
Default Required Tags: ["canUseChatCommands"]
Version: 1.0.0
\swapinventoriesb
Swaps the inventories of 2 players.
Command Syntax:
- \swapinventoriesb [player: playerName|~] [otherPlayer: playerName|~]
Aliases: ["invswapb"]
Categories: ["players"]
Default Required Tags: ["canUseChatCommands"]
Version: 1.4.1
\tempban
Bans the player with the specified name or UUID until the specified data and time.
\tempban name <unbanYear: int> <unbanMonth: int> <unbanDay: int> <unbanHour: int> <unbanMinute: int> <unbanSecond: int> <playerName: string>
\tempban UUID <unbanYear: int> <unbanMonth: int> <unbanDay: int> <unbanHour: int> <unbanMinute: int> <unbanSecond: int> <playerUUID: int>
\ban
Bans the player with the specified name or UUID.
\ban name <playerName: string> <durationInMinutes: float><reason: JаvaScriptString>
\ban UUID <playerUUID: int> <durationInMinutes: float><reason: JаvaScriptString>
\unban
\debug
\setblock
Command format: \setblock <position: position> <block: Block> [blockStates: block states] [isWaterlogged: boolean]
Custom Commands
- Open the main menu (use "\mm").
- Go to "Manage Commands", scroll down to and click "Custom".
- Set the command name, do not include the command prefix (like "\").
- Set the toggle to "Commands" or "JаvaScript", which will change how you define the command's syntax later on (whether it runs normal vanilla commands or runs a command in JаvaScript).
- "Command Version", "Formatting Code", and "Description" are used for the command's help documentation, and are not necessary for the command to work
- "Command Prefix" sets the command prefix for this command.
- Then click "Create Command", which will bring you back to the menu.
- Go back to the custom commands tab and click on your command. Click on "edit code". In the text box, enter your command or code (depending on the toggle you selected earlier).
- You can also use multiple commands at once by going back to your custom command and clicking "Edit Command". At the top, there is a slider to change the number of lines. Change the slider value to the number of commands you want, then after reentering the "Edit Code" tab, there will be a box for each command you want to run.
- In the "Edit Command" section you can turn on the "Automatic Parameter Evaluation" toggle and scroll down to the bottom text box where you can enter parameters for the command (like in `/say <text: string>`, the "<text: string>" is a parameter). More information on how to format these is in that menu. These can be accessed in your command syntax (step 8) by using "${param[#]}" in command mode or "param[#]" in JаvaScript mode. String parameters support escape characters if they are in quotation marks: "<string>".
Settings
Images of the UI:
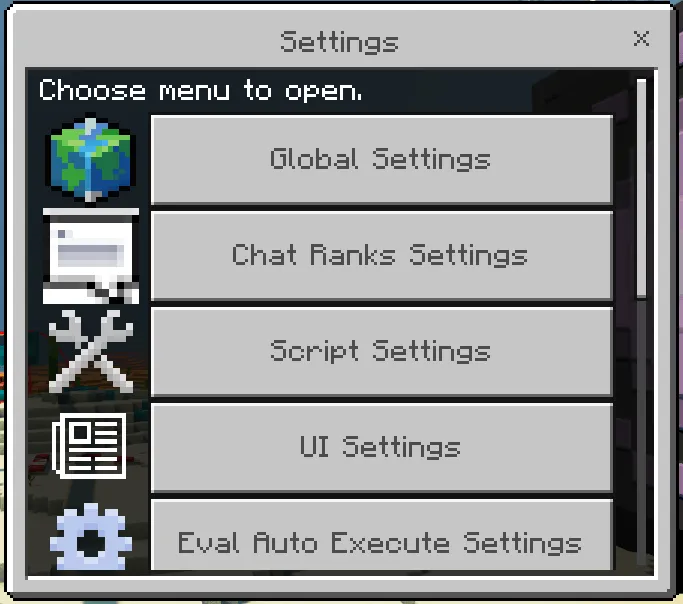
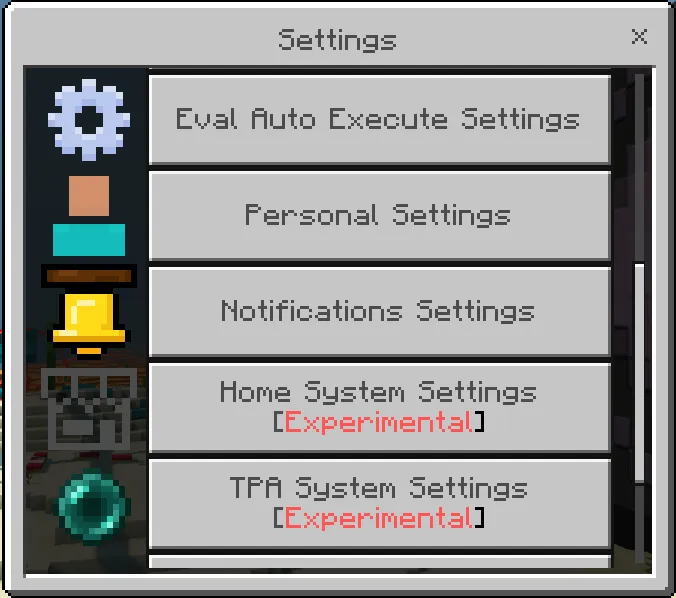
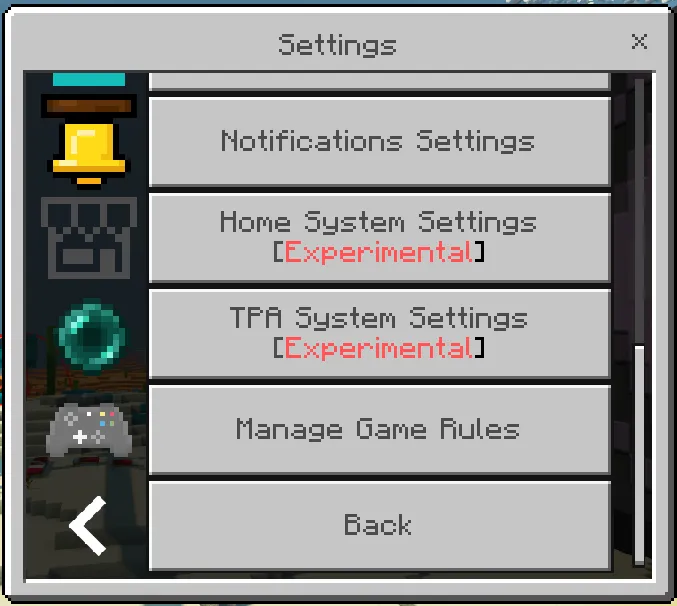
Images of the UI:
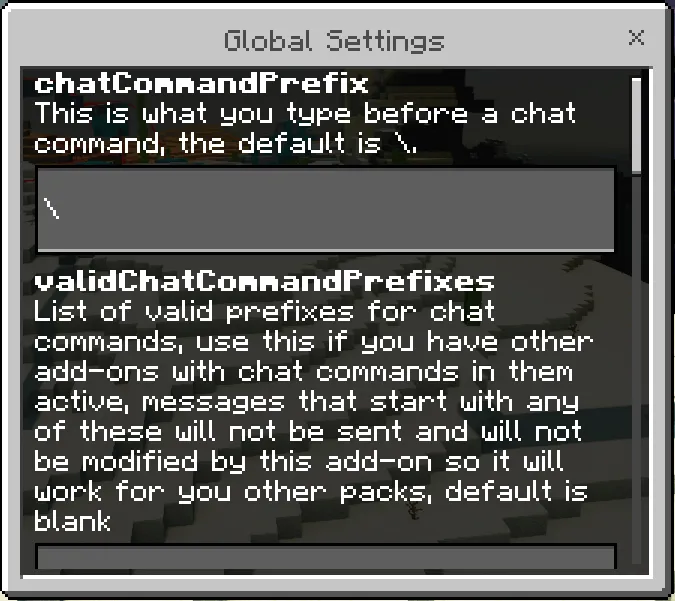
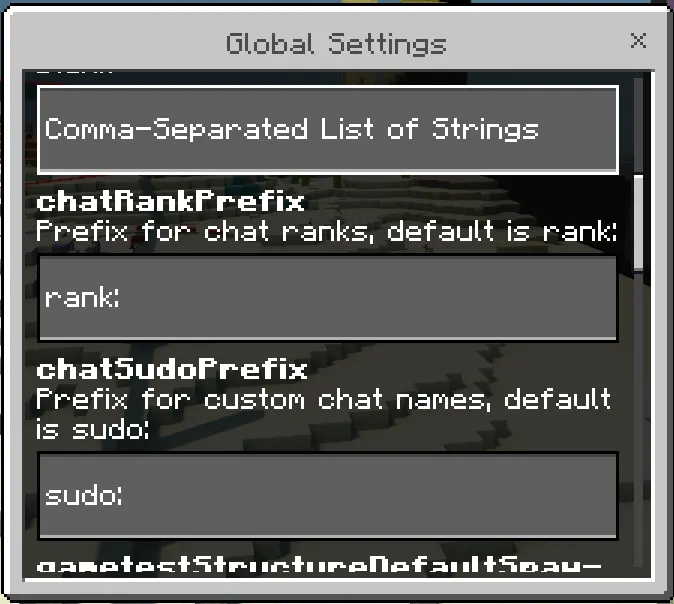
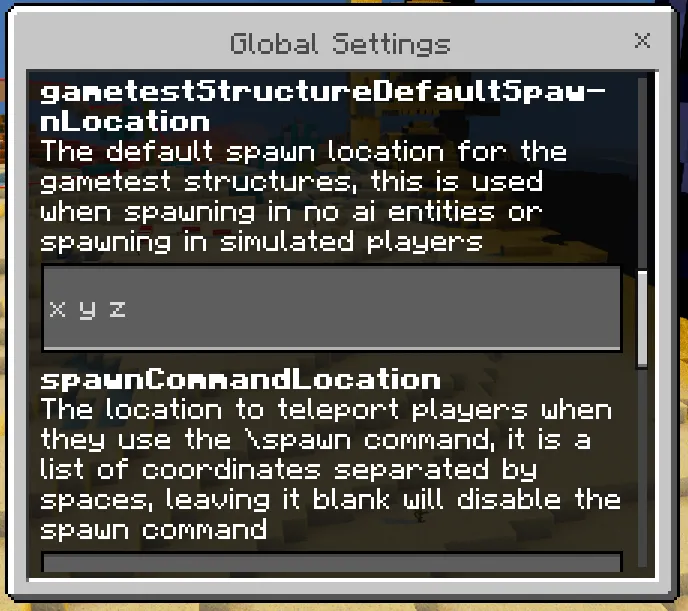
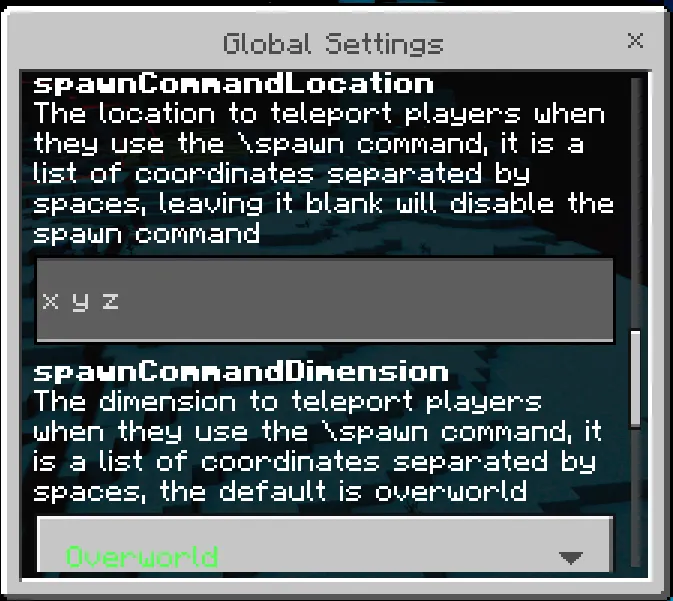
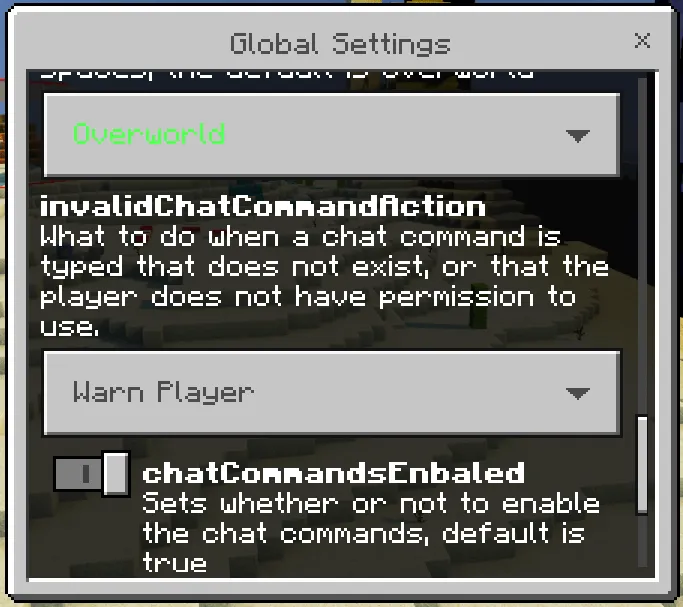
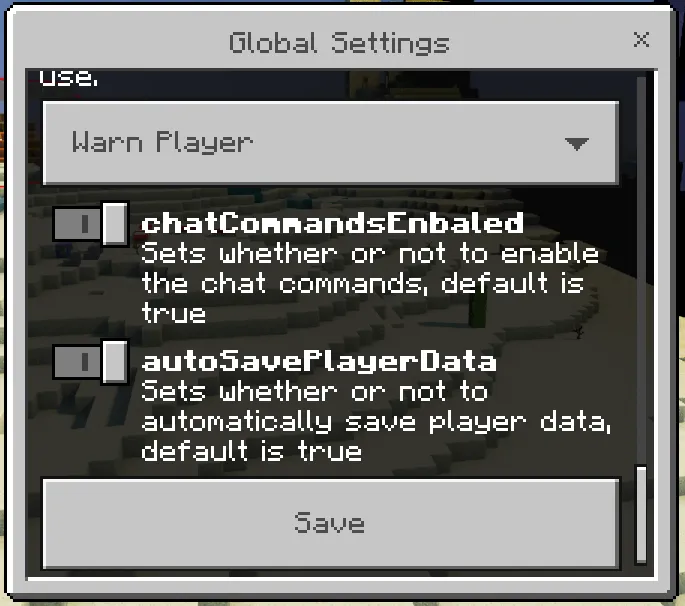
Images of the UI:
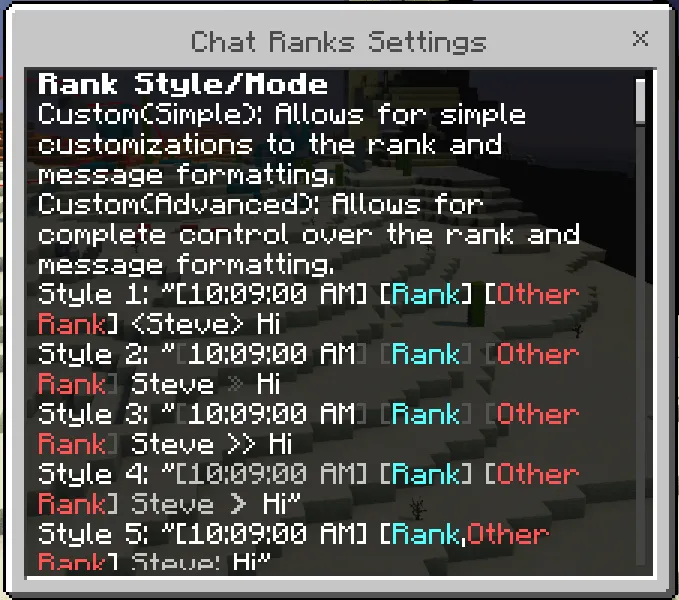
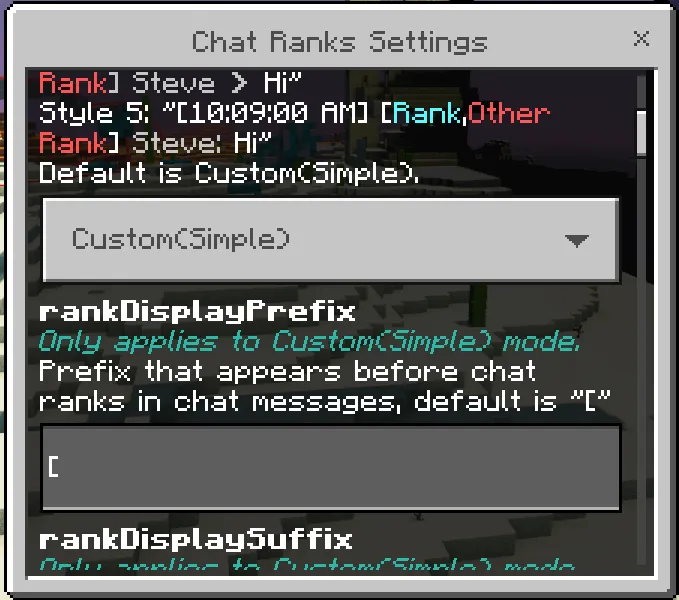
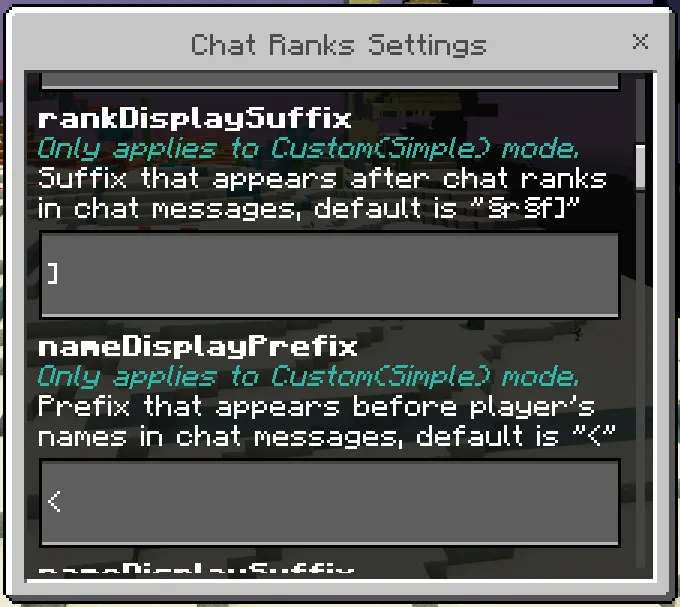
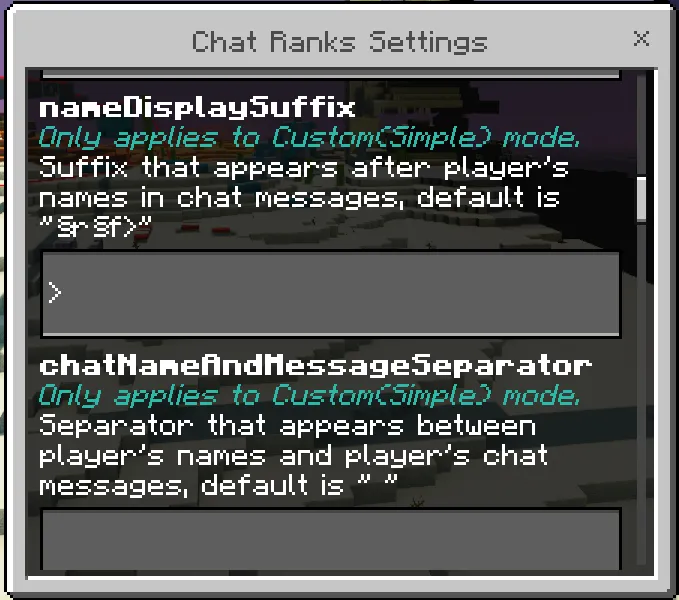
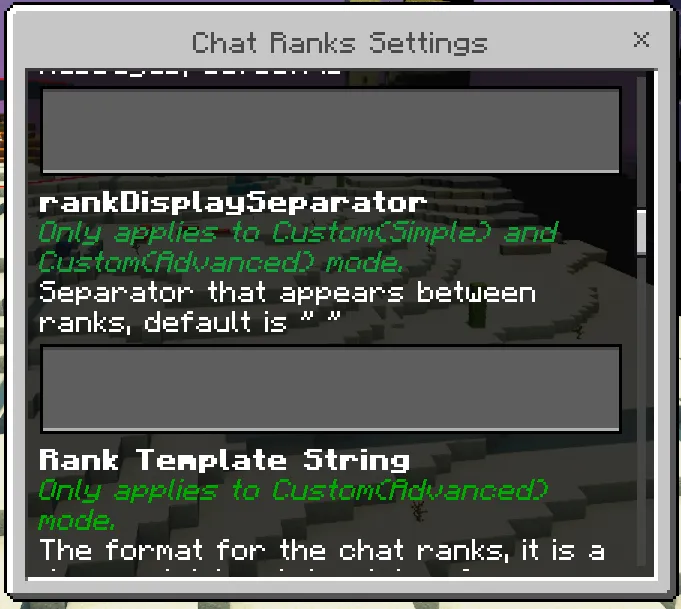
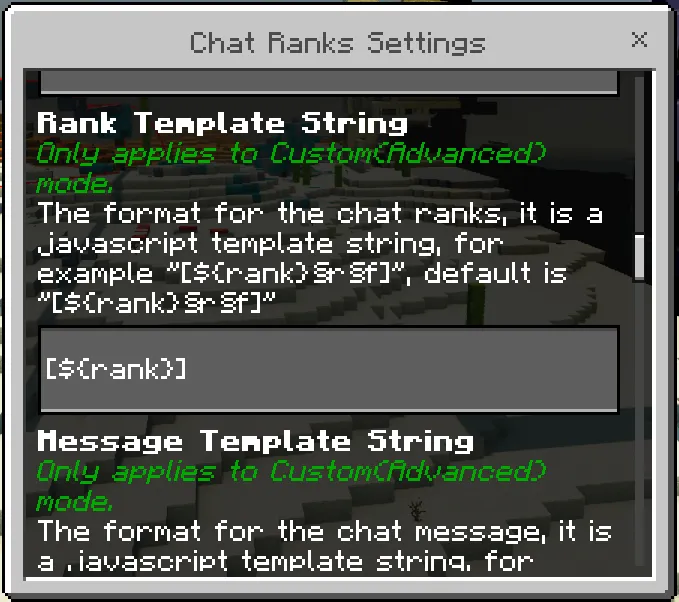
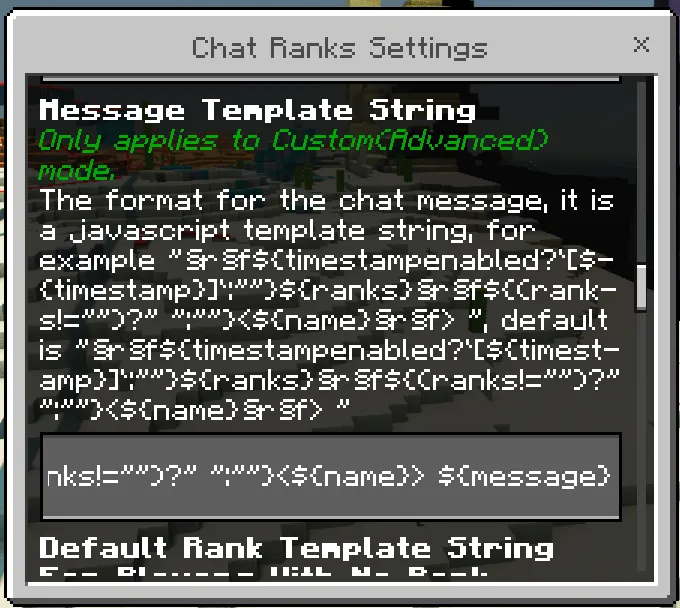
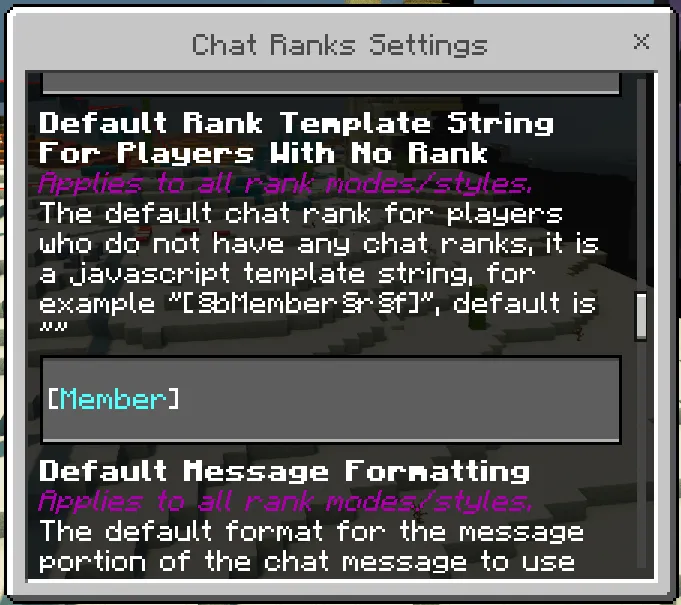
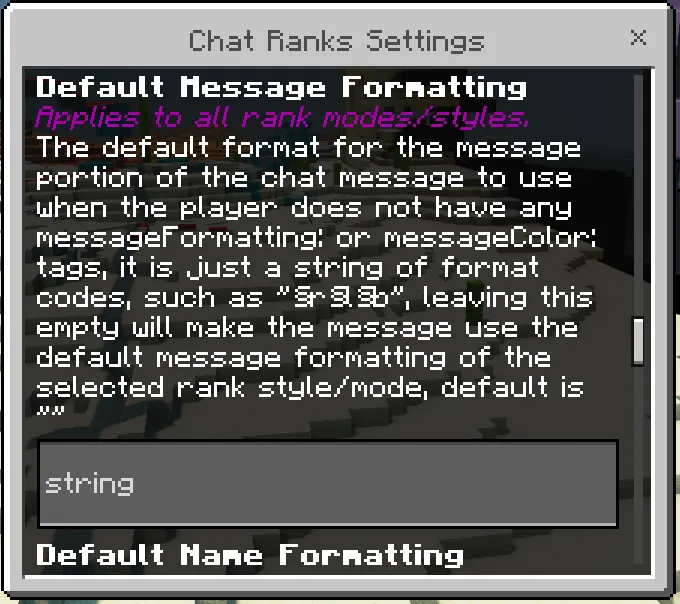
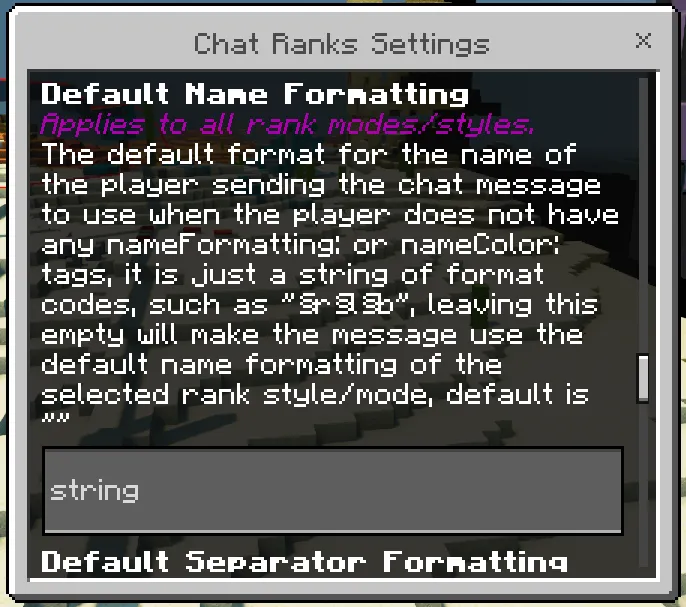
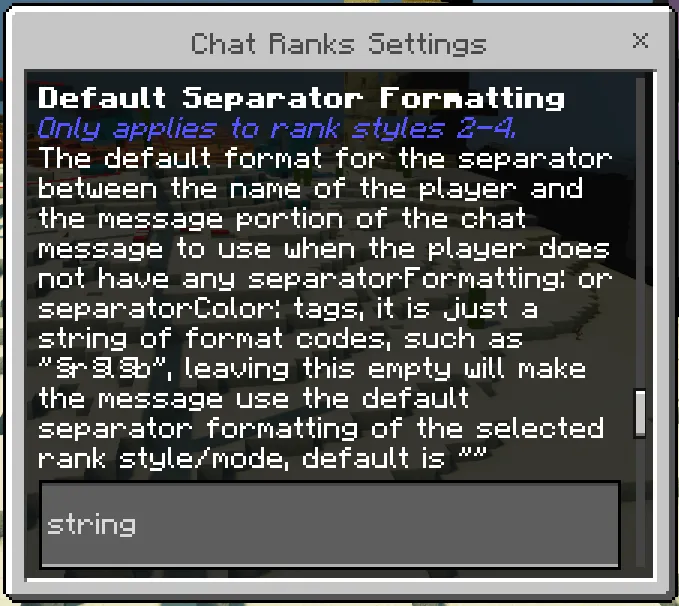

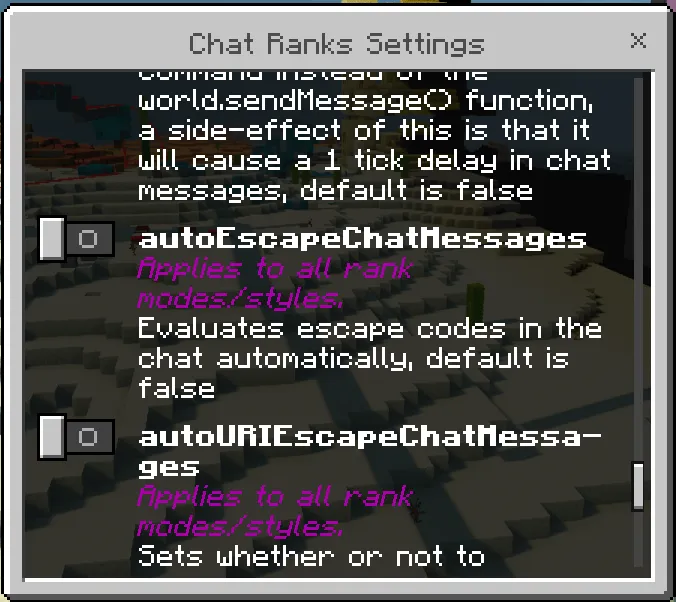
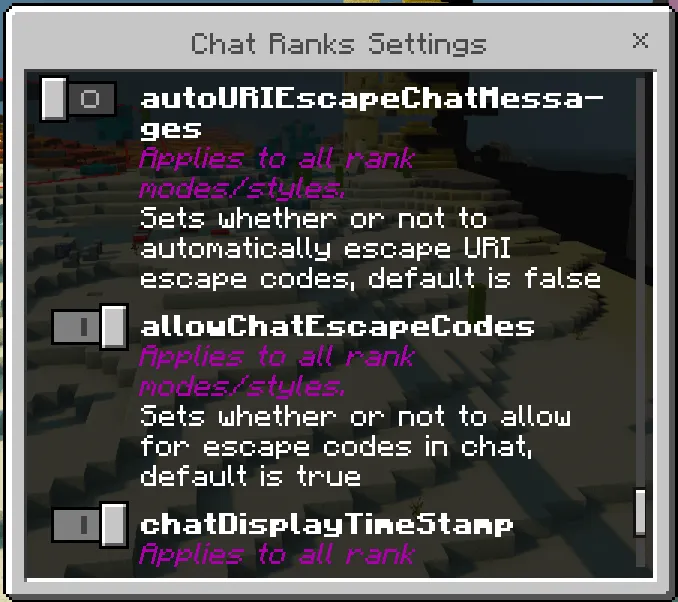
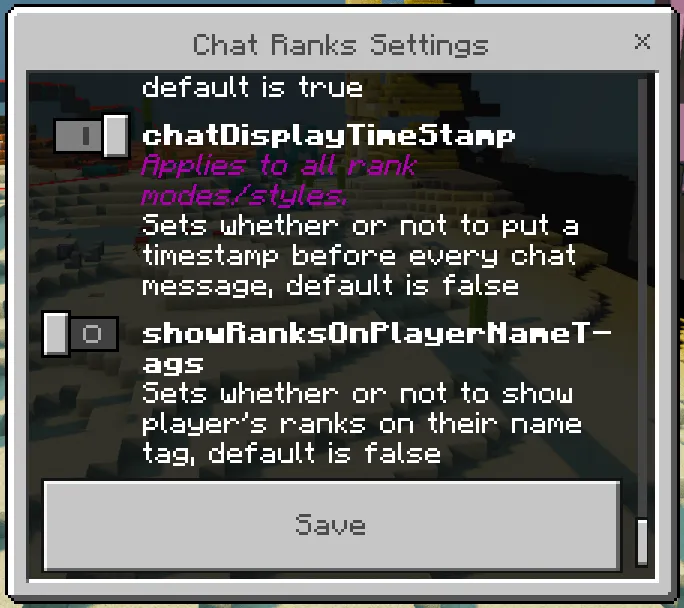
Images of the UI:
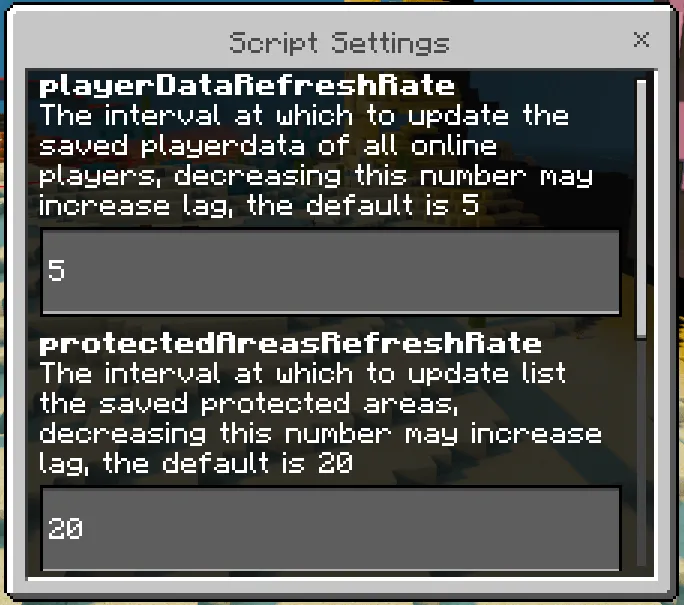
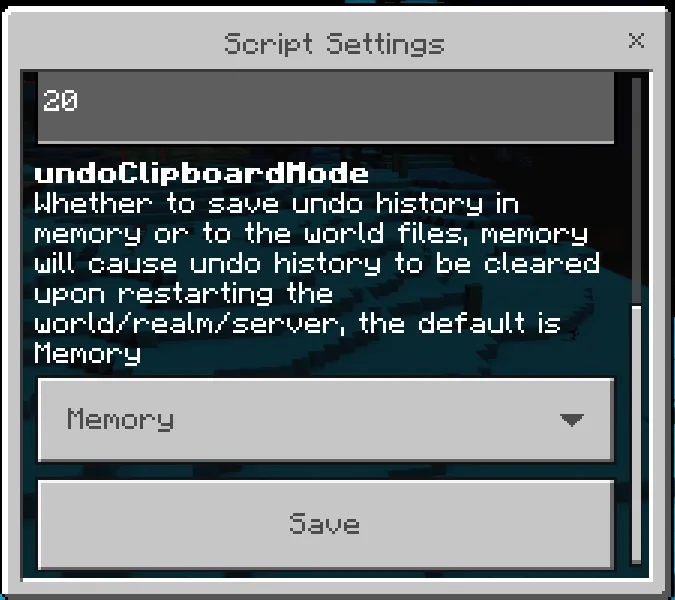
Images of the UI:
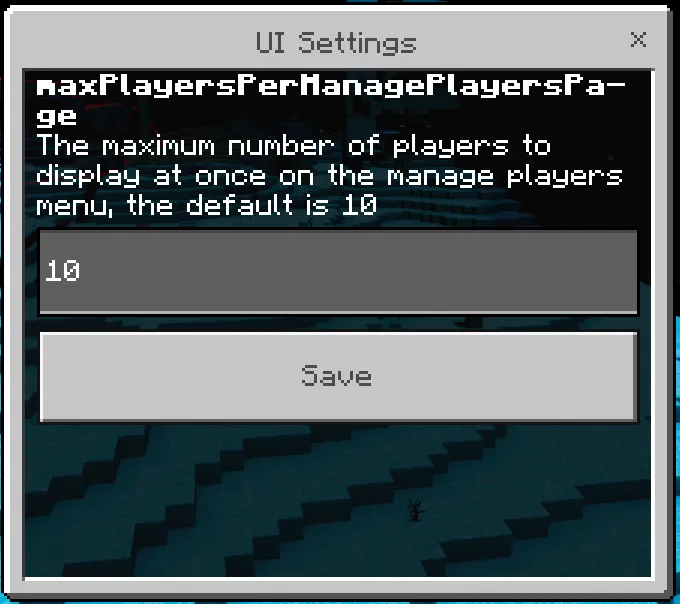
Images of the UI:
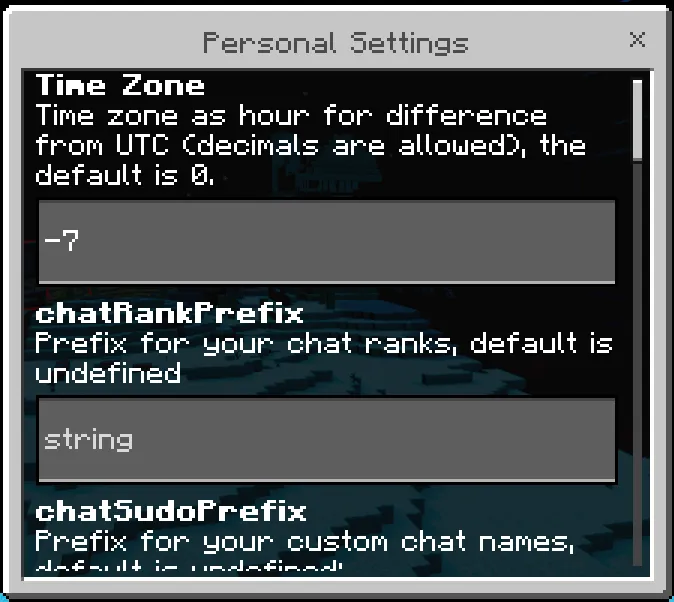
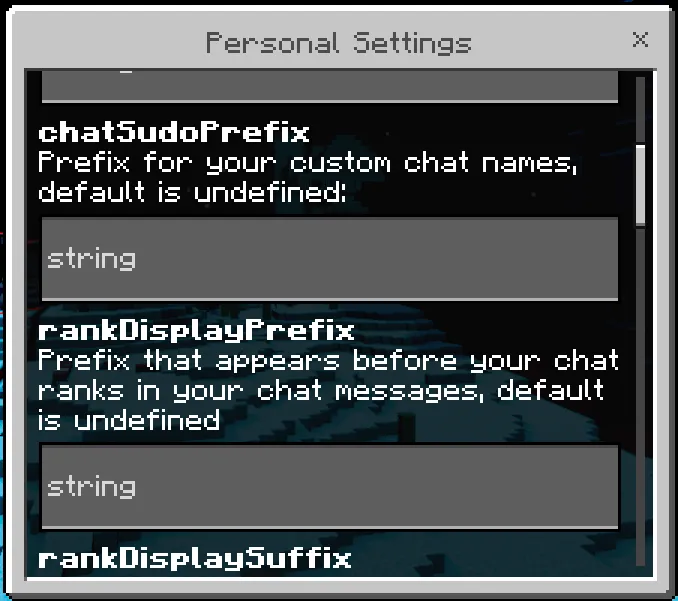
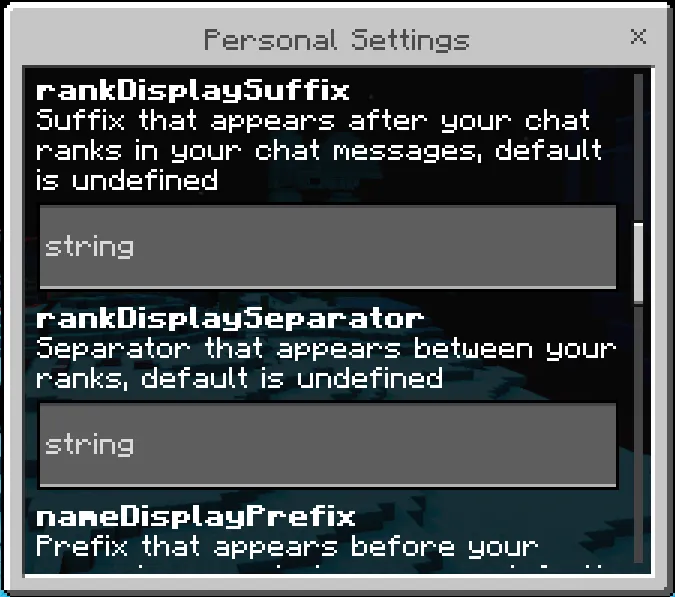
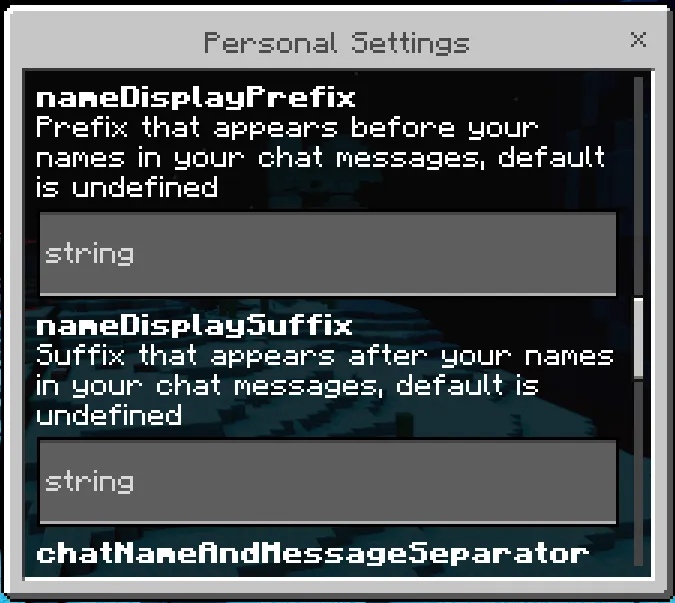
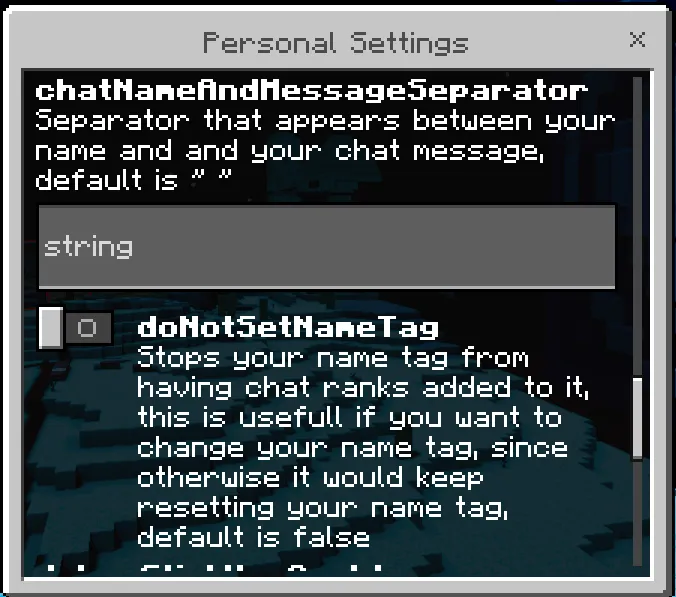
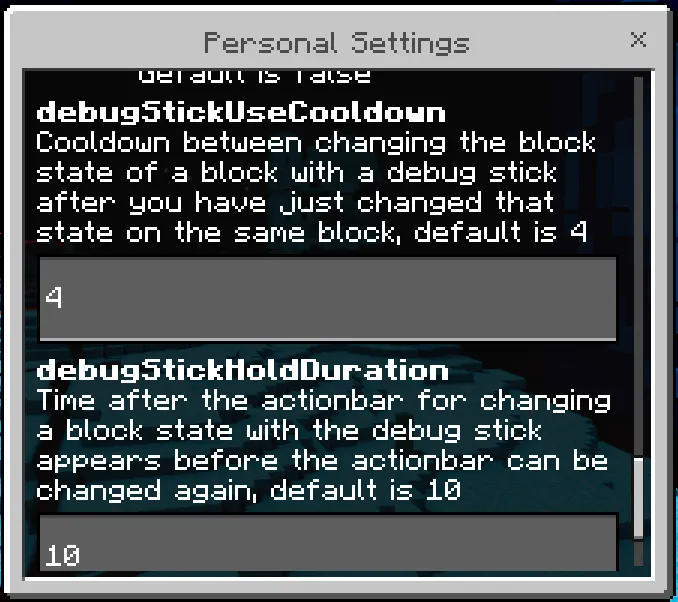
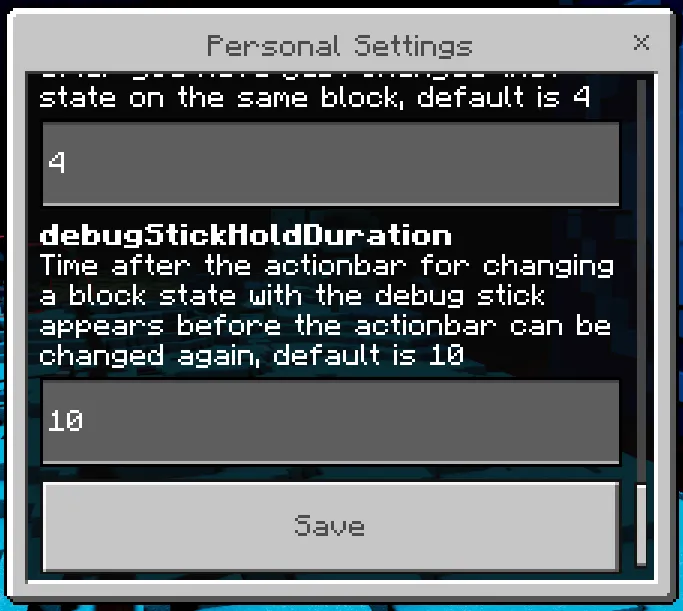
Images of the UI:
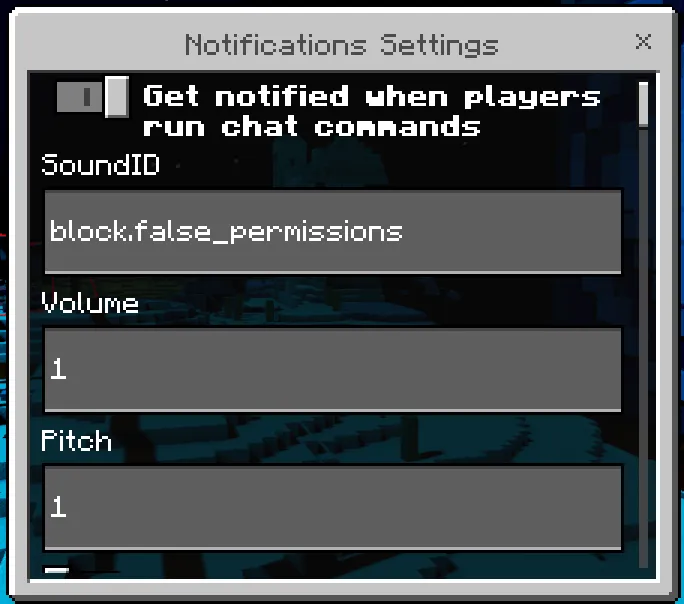
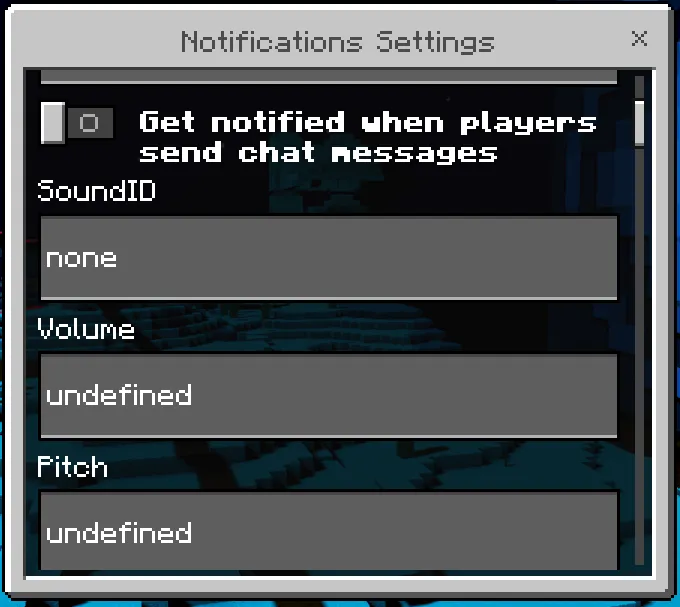
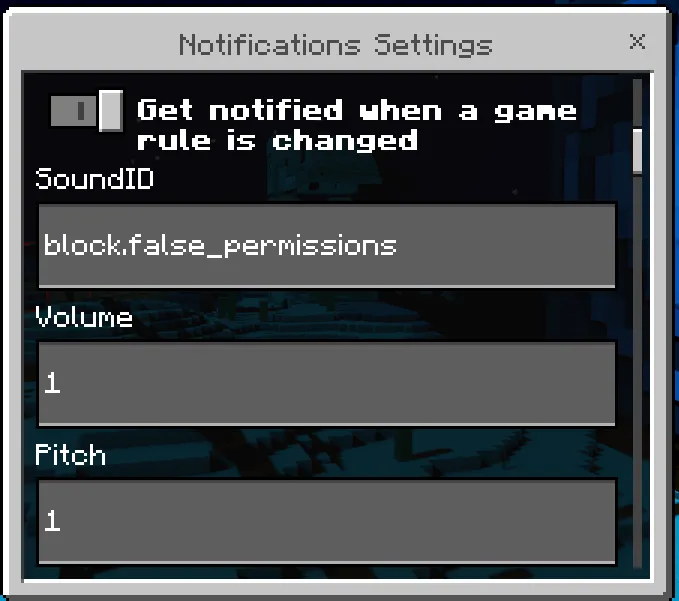
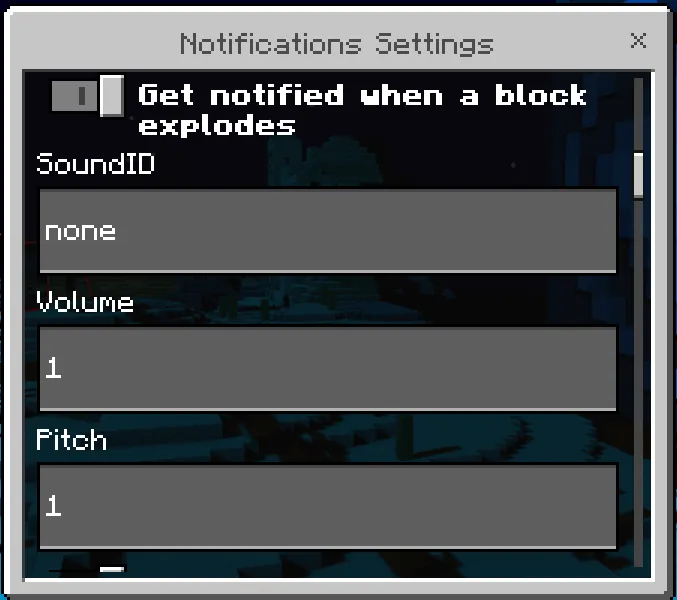
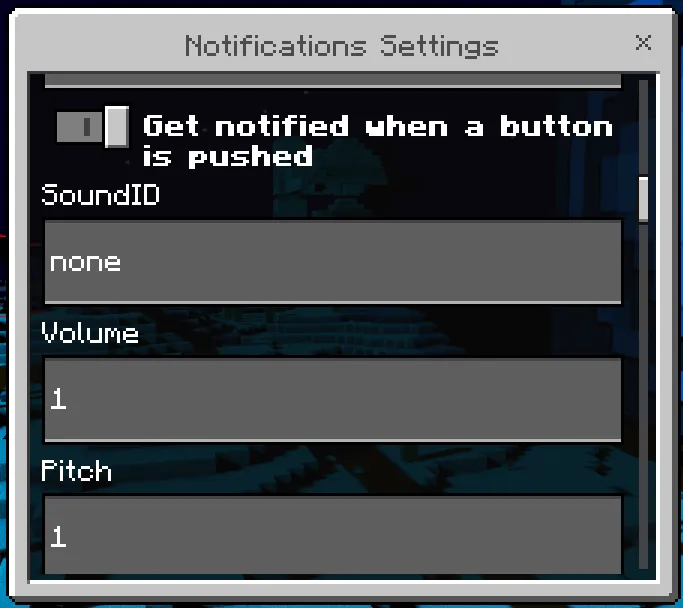
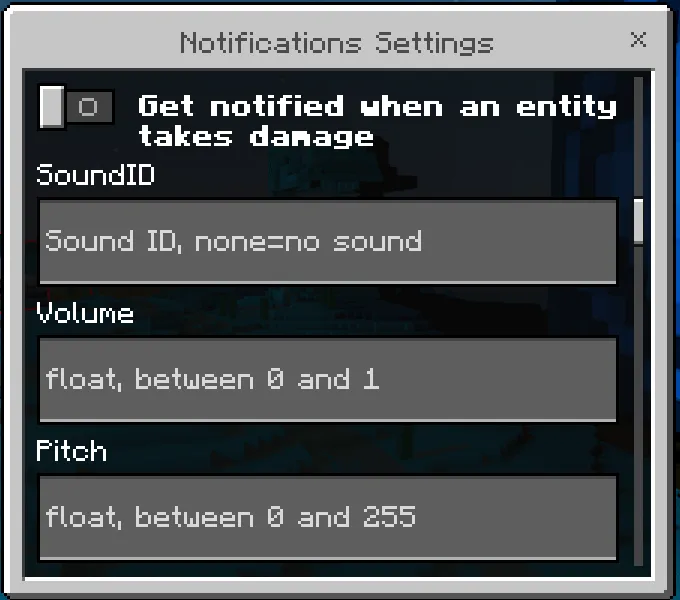
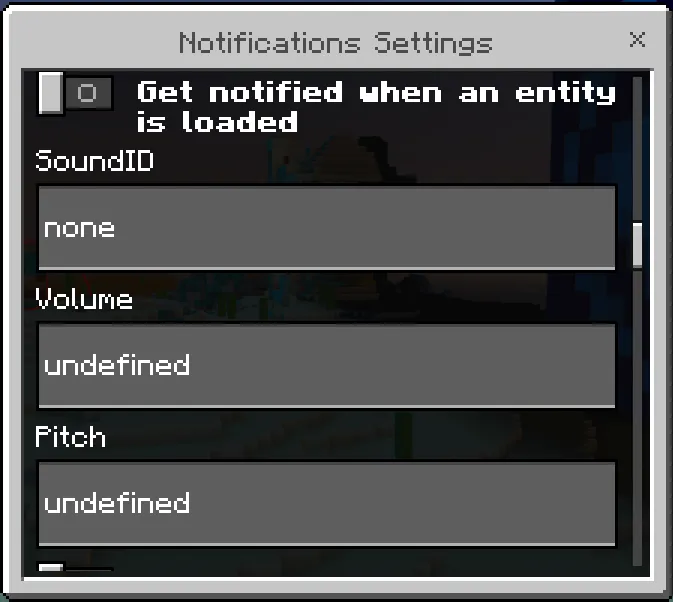
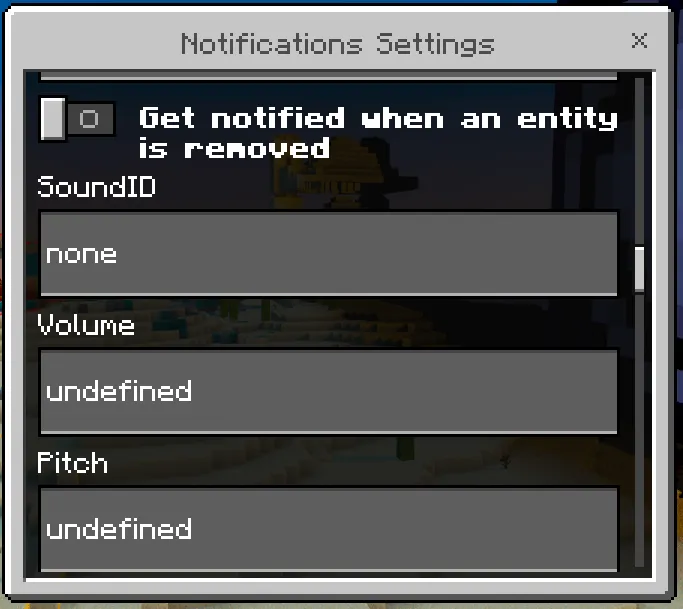
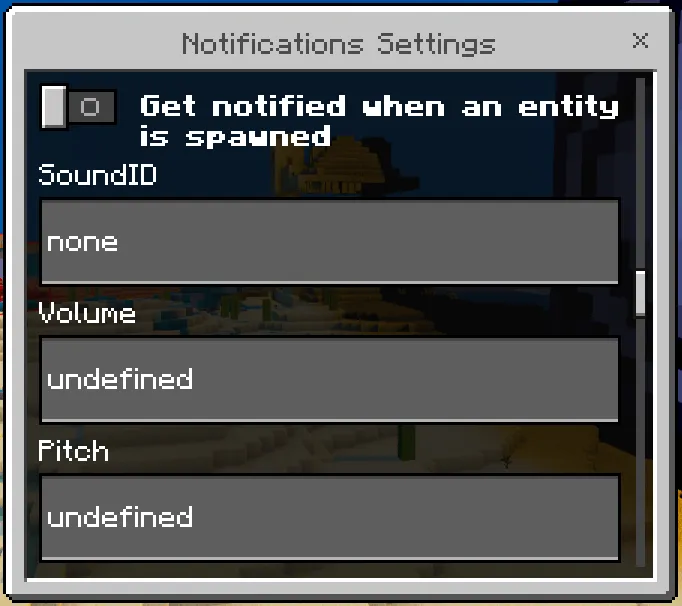
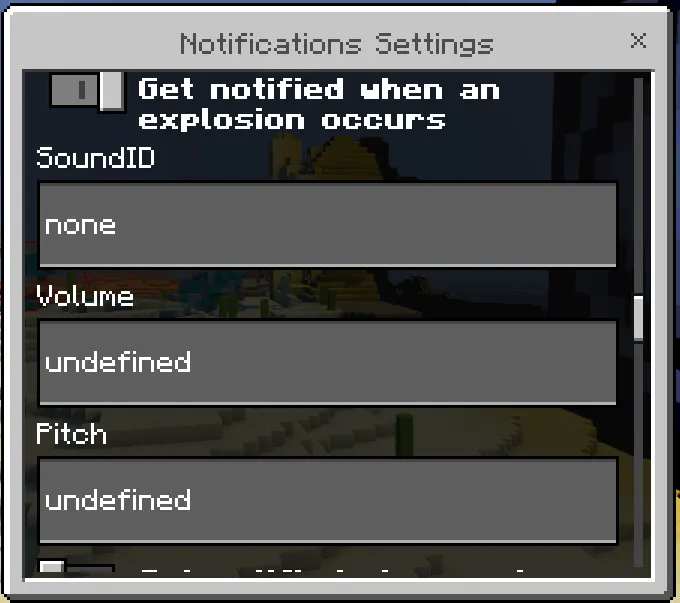
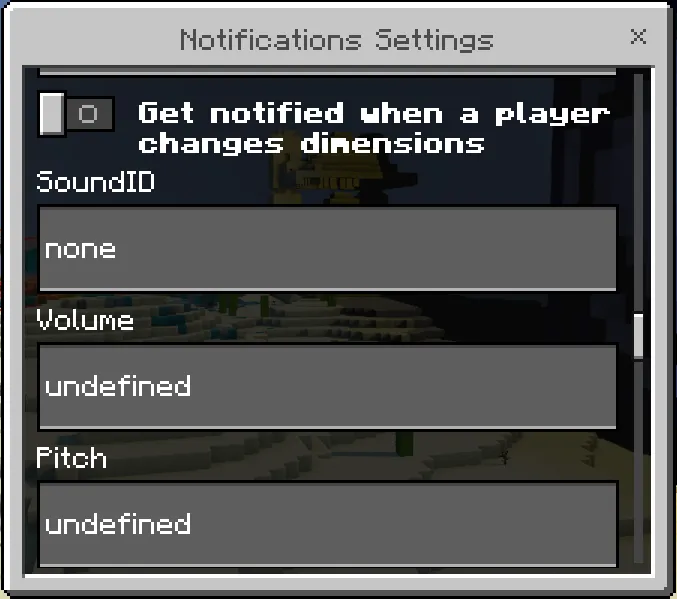
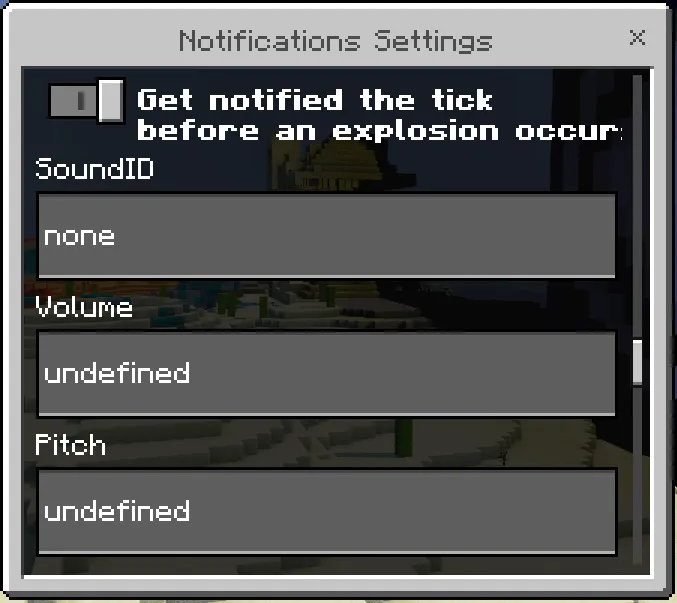
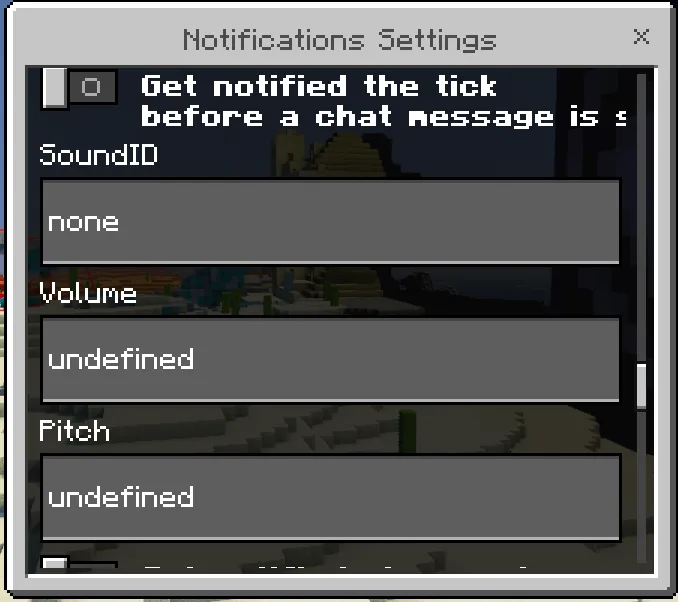
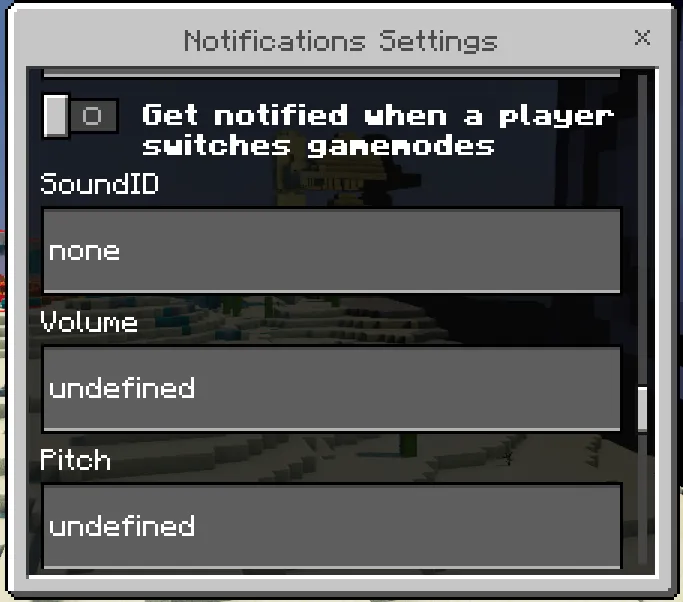
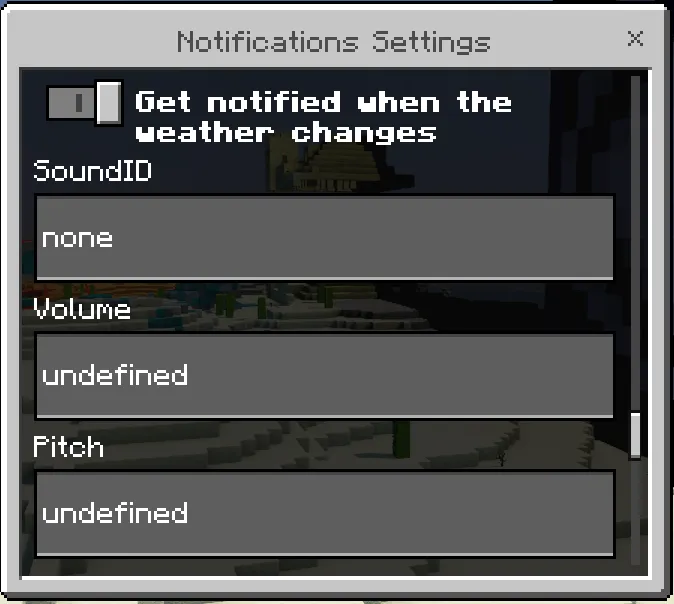
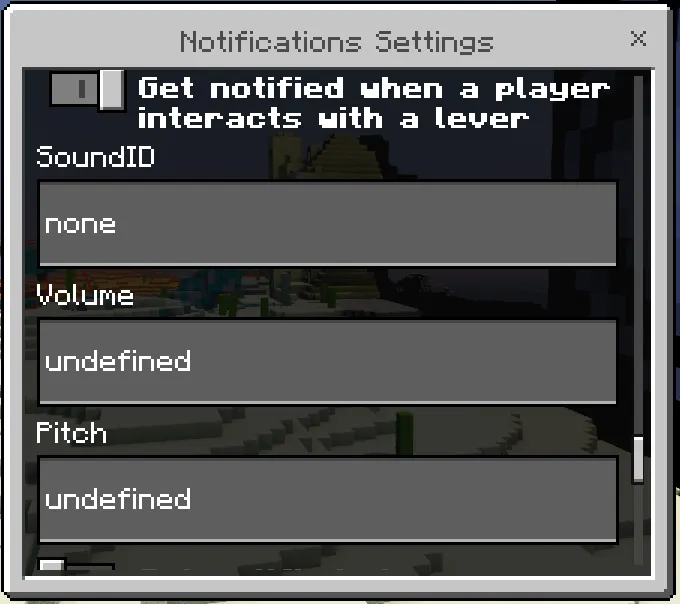
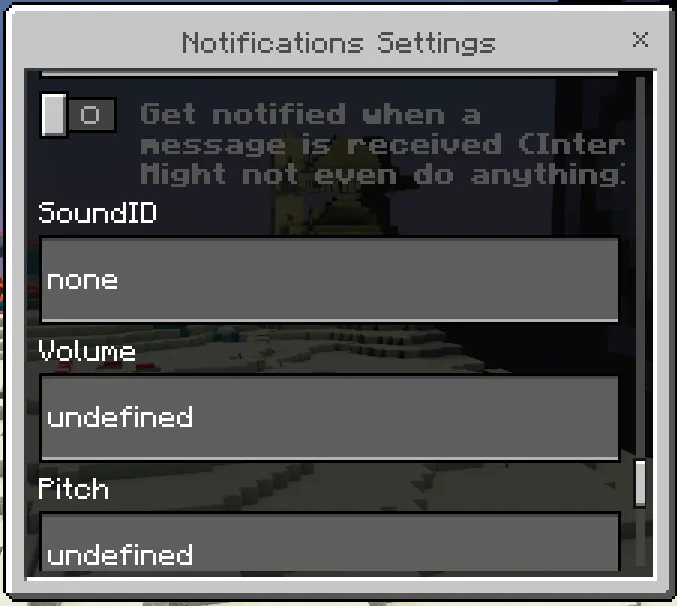
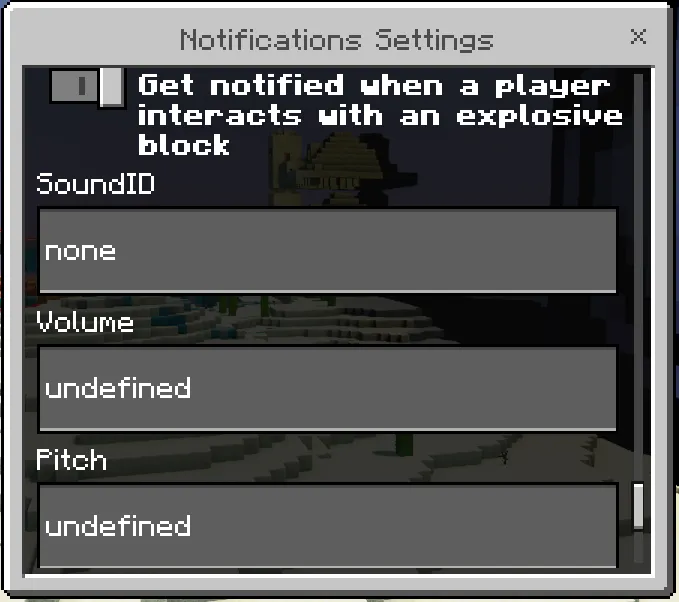
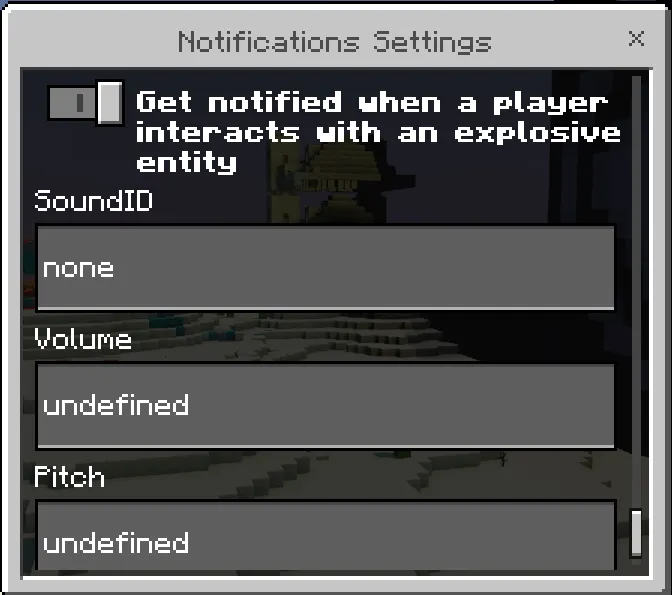
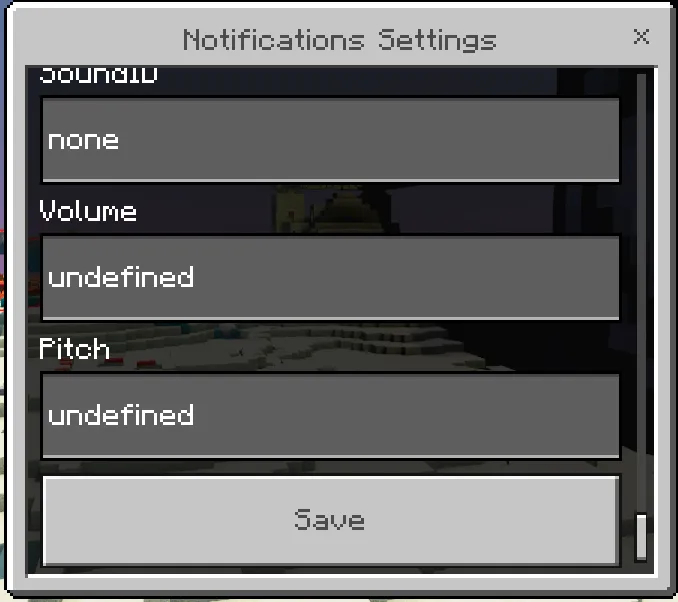
Images of the UI:
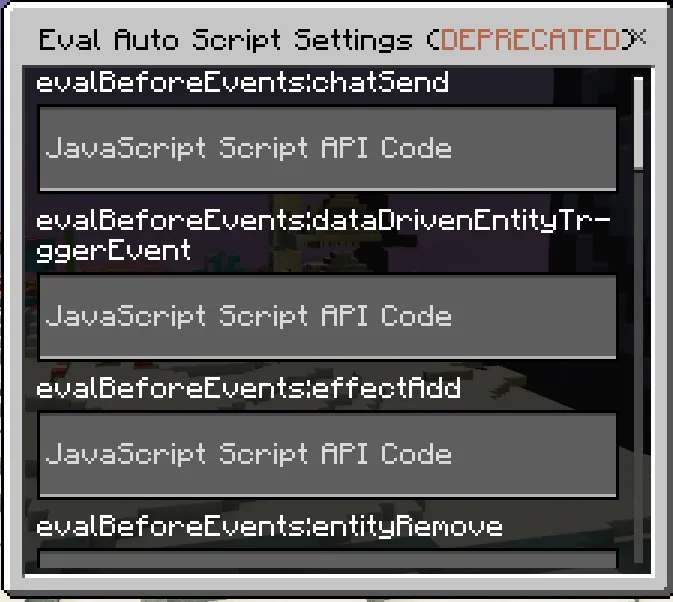
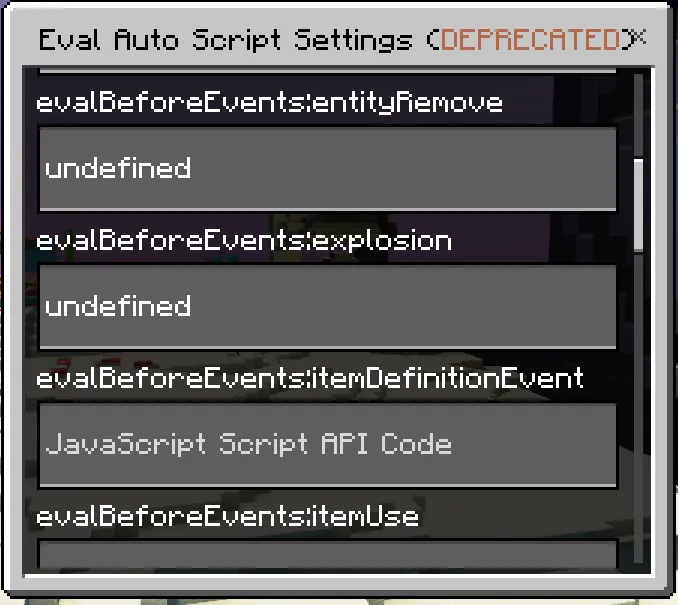
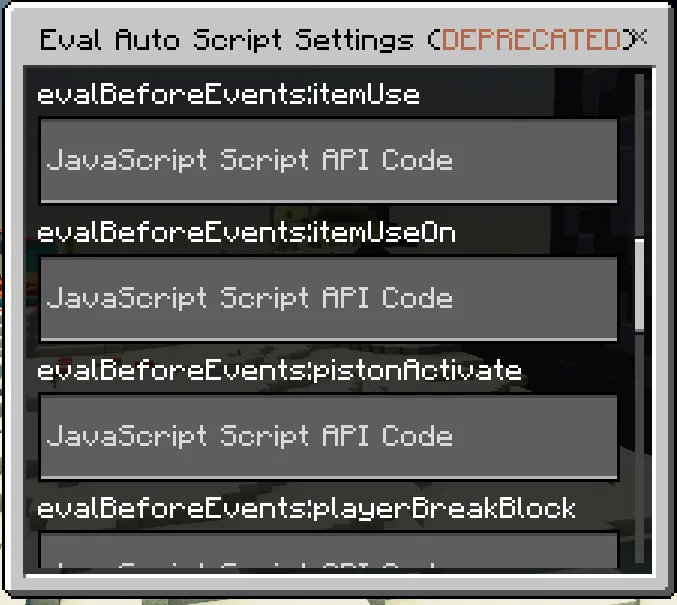
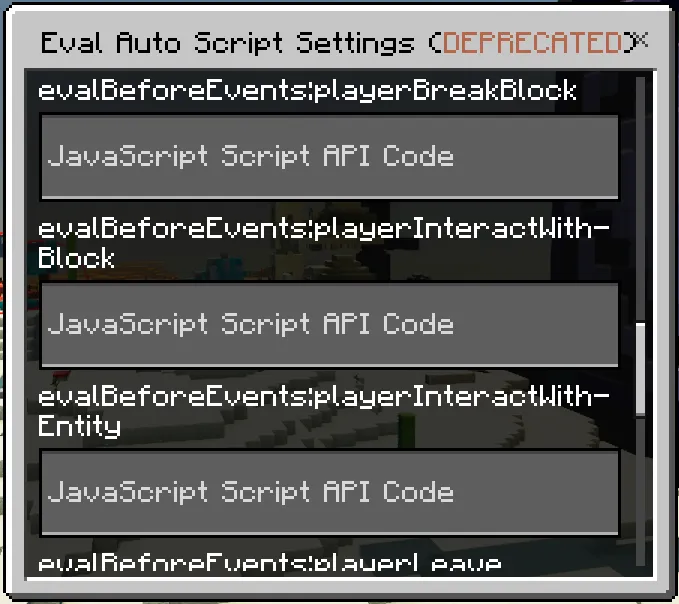
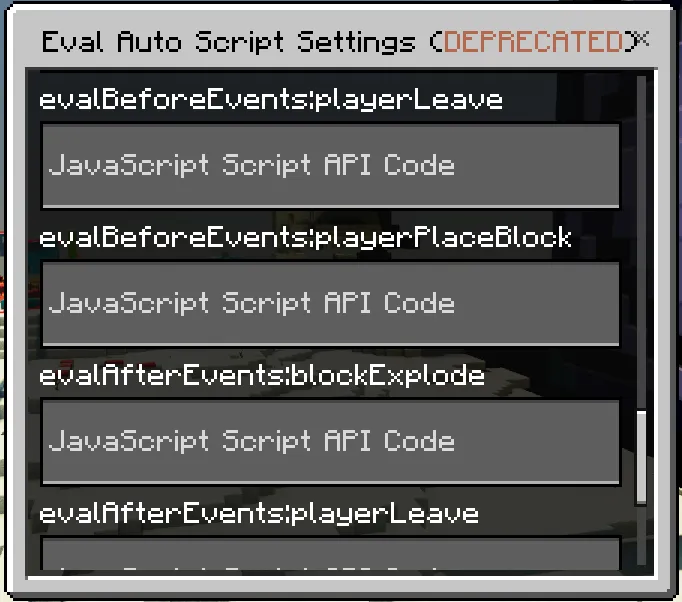
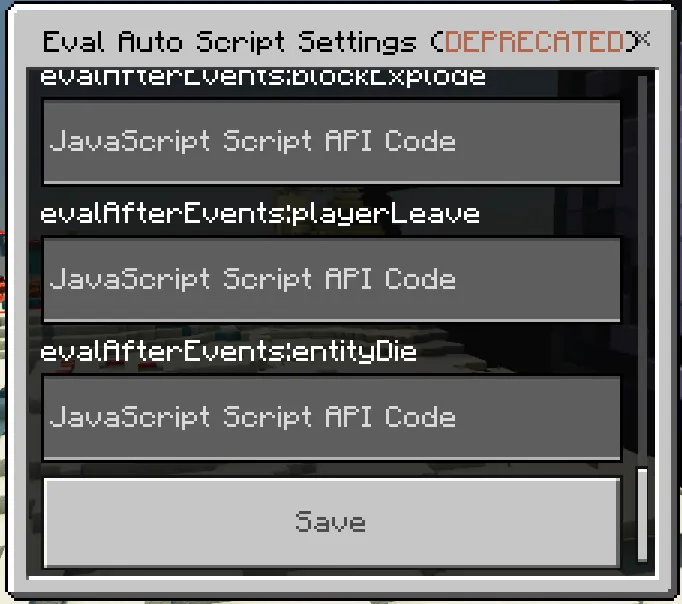
Images of the UI:
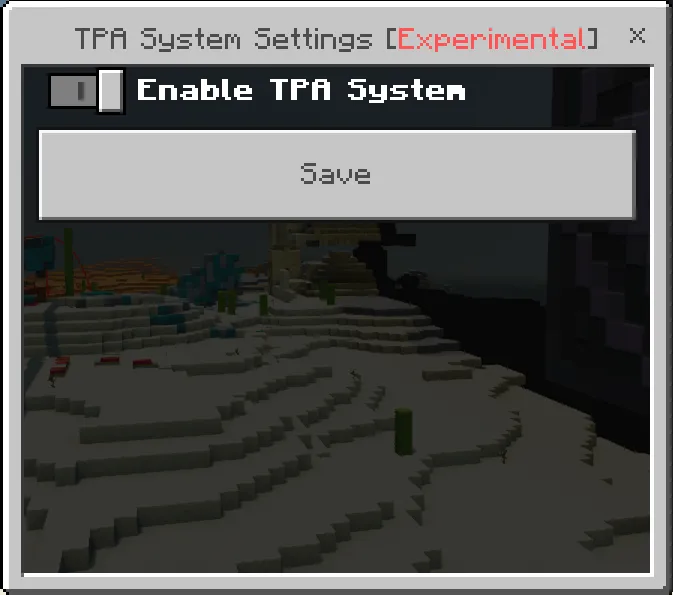
Images of the UI:
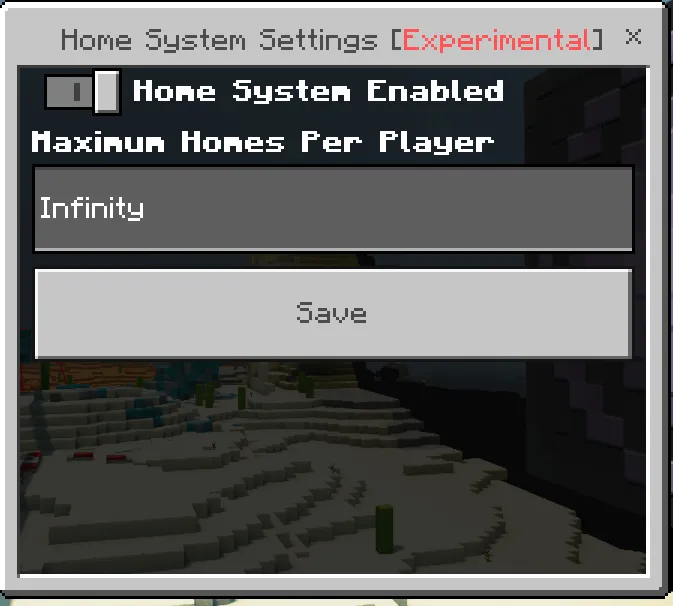
How To Enchant Any Item With Any Enchantment
- Make sure that you have the canUseChatCommands tag.
- Run the command
/structure load andexdb:-2-294_stebor\eb 0for enchantment levels -2 through 294. Run the command/structure load andexdb:-32k_stebor\eb -32768for enchantment levels -32768 and 32767. - Look through the barrels to find the levels of enchantments you want.
- Run the command
\roiefollowed by a list of the enchantments that you want to keep that are currently on the book that you are holding. For example:\roie ["sharpness", "fire_aspect"]. - Repeat steps 2-3 for each of the different levels of enchantments that you want.
- Merge the books together in an anvil.
- Pick the item you want.
- Make sure that you have the canUseChatCommands tag.
- Run the command
\gettransformst <item>(Replace <item> with the namespaced id of the item you want to put the enchantments on. For example:\gettransformst netherreactor). You will get an enchantment transfer smithing template. - Get a "Smithing Table Enchanted Book" and add the enchantments you want on it, to see how to get higher levels of enchantments than normally possible, go the "How to get enchantments with higher levels than are normally possible" section.
- Place a smithing table.
- Put a netherite ingot, the smithing table enchanted book, and the enchantment transfer smithing template into the smithing table. The result is your enchanted item.
Ban System
- Open the main menu (use
\mm, to use this command you need the canUseChatCommands tag) - Go to "Manage Players"
- Go through the pages to find the player you wish to ban and click on them
- Click "Manage Bans"
- Enter the time and reason, and submit it
- Open the main menu (use "\mm", to use this command you need the canUseChatCommands tag)
- Scroll down and click "Manage Bans"
- Click "Add Name Ban"
- Enter the players name, put in the time and reason, and submit it
Anti-Spam System
- Open the main menu (use `\mm`, to use this command you need the canUseChatCommands tag)
- Go to "Moderation" and then click on "Anti-Spam"
- The toggle at the top turns on and off the anti-spam system, which will mute players who send too many messages too fast. Note that commands do not count as messages, but all other chat types do (sending unique messages at a fast pace will also trigger the system).
- The "Wait Time" box contains the amount of time (in seconds) that players will be muted for after triggering the anti-spam.
- The "Maximum Time Between Messages" box contains the amount of time (in seconds) that players need to wait between messages in order to not trigger the anti-spam.
- The "Message Count To Trigger Anti-Spam" slider sets the number of messages that must be sent too fast in order to trigger the anti-spam.
You can make it so that specific players can bypass the anti-spam system by giving them the canBypassAntiSpam tag.
WorldEdit
Get the world edit tool (by default a wooden axe). Hold it and hit the use button (right click) while looking at the block you want as your first selection, then hit the use button while looking at the second area. You can also use the pos1 and pos2 commands to place the first and second selection locations at your current location (specific coordinates can also be used like: "pos1 <x> <y> <z>" and relative coordinates can be used like: "pos1 ~x~y~z"), or use the hpos1 and hpos2 commands to place the selections where you are looking. Lastly, "\\chunk" can be used to set the selection to the entire chunk you are currently in. Note that by default liquid blocks are considered solid. This can be changed by typing "\\selectmode noliquid" while having the selection tool in your first hotbar slot and having that slot be selected. Now if you use that selection tool, it will ignore liquid blocks. The same thing can be done with passable blocks (like vines) using "\\selectmode nopassable".
- "\\replace <block> [mask]" replaces all [mask] with <block>. If unspecified, [mask] defaults to all blocks.
- "\\set <block>" fills the whole selection with <block>
- "\\seti <integrity> <block>" is the same as \\set, but adds the integrity argument
- "\\flood" floods the selected area with water (waterlogs relevant blocks)
- "\\drain" removes all water and lava (unwaterlogs blocks) from the selection
- "\\remove [mask]" sets all blocks in the selection to air
- "\\undo" undoes the last worldedit commands done. Note that the undo command will not work after relog (all clipboard info is deleted when the session is ended).
- You can also fill areas with patterns (replace the "<block: BlockPattern>" in most worldedit commands) like by having multiple blocks separated by commas, like: "diamond_block,iron_block". Adding "s:" to the start of the list causes the blocks to be placed in a predictable pattern (will be the same each time), like: "s:diamond_block,iron_block". Also, adding a "%<int>" after each block name to set the ratio in which to spawn (defaults to 1), like "diamond_block%20,iron_block" will spawn 20 iron blocks for each diamond block (diamond block has a 1/21 = 4.7% weight).
Lastly, adding block states (like you would in a normal command or in JSON syntax) after any block name or weight value will also work, like: "andesite_stairs%20["upside_down_bit"=true]"
- "\\copy" copies the selected area to the clipboard. Flags include "m" (copies to memory instead of storage - gets deleted on relog), "e" (doesn't include entities), "b" (doesn't include blocks).
- "\\paste" pastes the clipboard to the current selection. Flags include "h" (paste clipboard contents at the executor's position instead), w" (waterlogs the structure), "e" (doesn't include entities), "b" (doesn't include blocks), "x" (mirror along the x axis), "z" (mirror along the z axis). It also has arguments similar to the "/structure load" command that can be optionally added.
- "\\seli" gives information about the selection you have
- "\\shift <direction> <# blocks>" moves the selection points in the cardinal direction <direction> by <# of blocks>
- "\\offset <x> <y> <z>" moves the selection points over in each axis
- "\\stack <# of times>" stacks the selection upwards 5 times
- "\\cut" is the same as "\\copy" but it removes the selected area as well.
- "\\sphere <radius> <block> [mask]" makes a sphere of <block> with radius <radius> centered at pos 1
- "\\hsphere <radius> <thickness> <block> [mask]" creates a hollow sphere with thickness <thickness>
- "\\cone <radius> <height> <block> [mask]" creates a cone centered at pos 1. Note that the cones can be a bit lopsided at some radii
- "\\walls <block> [mask]" creates a wall of <block> along the edges of the selected area
- "\\generate <block> <formula>" creates a 3d shape in the selected area based off of the formula put in. Using the flag "sr" makes the <formula> be parsed using pure JаvaScript notation instead of the default method. For example, try:
\\generate -sr stone approxEquals(z, (4e1)**(-(1/4)y**2)*Math.sin(2*x-1), 2)
OR\\generate -sr stone approxEquals(z, x**2/3.84**2+y**2/2.4**2+z**2/1.4**2, 1)
- "\\itfill" does the same things as the "\itfill" command, but within the selected area. Basically, it is a centralized version of all of the previous filling commands (like \\walls, \\sphere, and \\set) but for circles, spheres, domes, cylinders/tunnels, and cones, has the center at pos1 and the radius as the difference between pos1 and pos2, and for all other fill types, uses pos1 as one corner and pos2 as the other corner. Note that it does not work with \\undo at the moment (this will be fixed in a future update). Examples:
- \\itfill 20 x stone cylinder
- \\itfill xy stone circle
- \\itfill 1 glass dome air
- "\\idtfill" is the same as \\itfill but has the added <integrity> argument
- Brushes allow you to fill an area with a custom pattern just by looking at it. The brush will place from the first solid block in the direction that you are looking. Note that modifications done with the brush CANNOT be undone using
\undo. - Brushes can be found in the items tab of the creative inventory. The different brush types are the number of uses per second they support. Brush 2 (no animation) and 4 (with animation) activate once per click, while Brush 1 uses the item 10 times per second when the use button is held, and Brush 3 will use the item every tick while the use button is held (recommended).
- You can use the brush command (
\br,\brush,\\br, or\\brush) while holding a brush to set its settings. Note that the brush command works on all non-stackable items, which will act like Brush 2. - Ex:
\brush sphere stone,ice,diamond_block%4 4. The full syntax can be found by running\help cmd brush. - Using the
-lflag will make it so the item lore on the brush doesn't show up. - The
-hflag after the shape parameter makes the shape hollow (only works on certain shapes, see the help documentation). splatterwill not affect air blocks, but fills in a circle area.splattersurfacedoes the same thing, but only affects the top layer of blocks. Ex:\brush splattersurface s:stone,iron_block,diamond_block%4 5 10. Decay values can be between 0 and 50.
Home System
The home system allows players to set personal warps, regardless of their permissions. The home system is disabled by default, so make sure to turn it on in settings.
A maximum number of homes per player can be set in "Main Menu -> Settings-> Home System Settings -> Maximum Homes per Player"
- Use `\home set <name>` to set a home to the place you are currently standing.
- Use `\gohome <name>` to teleport to a set home location
- Use `\home remove <name>` to remove a saved home location
- Use `\home list` to see all homes you currently have
TPA/Teleport Request System
- Any player can use the TP request system, regardless of permissions. The TP request system is disabled by default, so make sure to turn it on in settings.
- Use
\tpa <target>to request to teleport to a player. This will send a message to that player. If they type "n" in chat or do nothing for 1 minute, the request will be denied. If they type "y" in chat, you will be teleported to them.
Compatibility With Other Chat Command Add-Ons
This add-on has some features to allow for compatibility with other chat command add-ons. To allow other chat command add-ons to work with it, you just go into the main menu, go to the settings, then go to the global settings, then in the text box called validChatCommandPrefixes put in the prefix for the chat commands in that other add-on, if there are multiple or there are multiple different chat commands add-ons with different chat command prefixes, then just put all of the different chat command prefixes into the text box separated by a comma and a space right after the comma.
NOTE: If the chat commands are broken by the other add-on, try putting this add-on on top of the other add-on.
Compatibility With Other Chat Rank Add-Ons
This add-on has some features to allow for compatibility with other chat rank add-ons. To allow other chat rank add-ons to work with it, you just go into the main menu, go to the settings, then go to the global settings, then just disable the toggle called customChatMessagesEnabled, this will disable the chat ranks part of the add-on so that you can use the chat ranks from the other add-on instead.
WARNING: Disabling this will also disable the chat escape codes, and it might also break the chat commands depending on how the other add-on is set up.
NOTE: If the chat commands are broken by the other add-on, try putting this add-on on top of the other add-on.
Required Experimental Toggles
- Upcoming Creator Features
- Beta APIs
- Experimental Creator Camera Features
Terms of Use
You are NOT ALLOWED to:
- Provide your own direct download links to my add-on, you may only share my direct download link (the one that has 8crafter.com in the URL) or this page.
- Provide your own links to my add-on.
- Use any part of my code in your own add-on.
- Claim any of my code as your own.
- Upload this add-on to different sites without my permission.
- Make videos about my add-on without properly crediting me and linking to this page.
You are FREE to:
- Make videos about my add-on if you properly credit me and link to this page.
- Make private modifications to my addon, but do not redistribute those modified versions of my add-on.
Support:
Website: https://www.8crafter.com/
Wiki: https://wiki.8crafter.com/andexdb/
Troubleshooting: https://wiki.8crafter.com/andexdb/general/troubleshooting
If you experience any issues, or are confused about something in the add-on, feel free to contact me through my Discord server or email.
If you have trouble downloading the add-on, contact me through my Discord server or email, and I can send you the file directly.
Discord: https://discord.8crafter.com
Email: [email protected]
Updated on February 14
Version 1.42.0
- Updated the add-on to 1.26.0.
- Full Changelog: https://wiki.8crafter.com/andexdb/changelogs/v1.42.0
Version 1.41.0
- Updated the add-on to 1.21.120.
- Full Changelog: https://wiki.8crafter.com/andexdb/changelogs/v1.41.0
Version 1.40.3
- Full Changelog: https://wiki.8crafter.com/andexdb/changelogs/v1.40.3
Version 1.40.2
- Full Changelog: https://wiki.8crafter.com/andexdb/changelogs/v1.40.2
Version 1.40.1
- Full Changelog: https://wiki.8crafter.com/andexdb/changelogs/v1.40.1
Version 1.40.0
- Updated the add-on to 1.21.110.
- Full Changelog: https://wiki.8crafter.com/andexdb/changelogs/v1.40.0
Version 1.39.0
- Updated the add-on to 1.21.100.
- Full Changelog: https://wiki.8crafter.com/andexdb/changelogs/v1.39.0
Version 1.38.1
- Full Changelog: https://wiki.8crafter.com/andexdb/changelogs/v1.38.1
Version 1.38.0
- Updated the add-on to 1.21.90.
- Full Changelog: https://wiki.8crafter.com/andexdb/changelogs/v1.38.0
Version 1.37.1
- Full Changelog: https://wiki.8crafter.com/andexdb/changelogs/v1.37.1
Version 1.37.0
- Full Changelog: https://wiki.8crafter.com/andexdb/changelogs/v1.37.0
Version 1.36.6
- Full Changelog: https://wiki.8crafter.com/andexdb/changelogs/v1.36.6
Version 1.36.5
- Full Changelog: https://wiki.8crafter.com/andexdb/changelogs/v1.36.5
Version 1.36.4
- Full Changelog: https://wiki.8crafter.com/andexdb/changelogs/v1.36.4
Version 1.36.3
- Full Changelog: https://wiki.8crafter.com/andexdb/changelogs/v1.36.3
Version 1.36.2
- Full Changelog: https://wiki.8crafter.com/andexdb/changelogs/v1.36.2
Version 1.36.1
- Full Changelog: https://wiki.8crafter.com/andexdb/changelogs/v1.36.1
Version 1.36.0
- Updated the add-on to 1.21.80.
- Full Changelog: https://wiki.8crafter.com/andexdb/changelogs/v1.36.0
Version 1.35.0
- Full Changelog: https://wiki.8crafter.com/andexdb/changelogs/v1.35.0
Version 1.34.1
- Updated the add-on to 1.21.70.
- Full Changelog: https://wiki.8crafter.com/andexdb/changelogs/v1.34.1
Version 1.34.0
- Full Changelog: https://wiki.8crafter.com/andexdb/changelogs/v1.34.0
Version 1.33.1
- Full Changelog: https://wiki.8crafter.com/andexdb/changelogs/v1.33.1
Version 1.33.0 (The UI Update)
- Full Changelog: https://wiki.8crafter.com/andexdb/changelogs/v1.33.0
Version 1.32.1
- Full Changelog: https://wiki.8crafter.com/andexdb/changelogs/v1.32.1
Version 1.32.0
- Updated the add-on to 1.21.60.
Additions
Creative Inventory
- Added the vanilla chalkboard items into the items tab of the creative inventory.
Changes
Creative Inventory
- Grouped the items in the creative inventory into item groups. They have been grouped into the following groups:
- Debug Sticks
- WorldEdit Brushes
- Programmable Items
Items
- Updated the format versions of all of the items to 1.21.60.
manifest.json
- Updated the min_engine_version of both the resource and behavior packs to 1.21.60.
Version 1.31.0
Changes
Anti-Spam
- The anti-spam system now tells players how much longer it is until they get unmuted.
Commands
- Massive updates to the
\\regenerateblockscommand.
Command Parameter Types
BlockMask
- Added a new type to block masks: presets! You can specify these presets just like you would specify a regular block type. When you specify a preset, then it will match any of the block types that it includes. Here is a list of the currently supported presets:
preset:leaves: includes all block types that have "leaves" in the name.preset:deforest: includes all block types that have "leaves" or "sapling" in the name, any block with the "log" or "plant" tags,short_grass,tall_grass,vine,dandelion,allium,brown_mushroom_block,red_mushroom_block,mushroom_stem,crimson_roots,warped_roots, andbee_nest. It is still a work in progress and will include more block types in the future.preset:ores: includes all block types that have "ore" in the name, as well as ancient debris.preset:ore_blocks: includes the following block types:coal_blockcopper_blockexposed_copperweathered_copperoxidized_copperwaxed_copperwaxed_exposed_copperwaxed_weathered_copperwaxed_oxidized_copperiron_blockgold_blockemerald_blockdiamond_blocknetherite_blockredstone_blocklapis_blockraw_copper_blockraw_iron_blockraw_gold_block
preset:liquid: includeswater,flowing_water,lava, andflowing_lava.
- Added the ability to use block tags in the block masks. To use a block tag, just put
tag:tagnameas the block type. ex.tag:plantortag:minecraft:is_hoe_item_destructable.
Version 1.30.1
Critical Bug Fixes
Script Form UI Text Boxes
- Fixed an issue where the on-screen keyboard would not appear for players who were on xbox when they were trying to type in the script form UI text boxes. This was caused by the character limit being at 100,000,000, when for some reason, even though every other device can handle a character limit of 100,000,000, the Xbox won't even work with 50,000. So a side-effect of this fix is that for Xbox users, the character limit will be set to 10,000, the character limit for all other devices will still be 100,000,000.
Version 1.30.0 (The BlueMods Anti-Cheat Compatibility Update)
Add-On Connectivity
- The add-on is now fully compatible and integrates with the BlueMods Anticheat Add-On (Versions 5.7.0 and up.).
Critical Bug Fixes
Chat Ranks
- Fixed a bug where the name tag chat ranks would cause errors, causing the editor stick to not work either.
Additions
Commands
- Added the
\bluemodsversioncommand to get the version of BlueMods Anticheat that is currently active on the world realm or server.
Changes
Chat Ranks
- If the chat rank template string causes any errors, you can now see them in chat if you have the
getNameTagRankSettingsErrorstag, and they will no longer cause the editor stick not to work.
Version 1.29.4
Fixes
Chat Ranks
- When the option to show a player's current dimension in the chat ranks is enabled, it now adds a
§rafter the dimension name to remove the coloring of the dimension's name. - Fixed a bug where the
config.chatRanks.nameTagTemplateStringproperty referenced the worldandexdbSettings:messageTemplateStringdynamic property instead of the worldandexdbSettings:nameTagTemplateStringdynamic property, causing the name tags to use the message template string instead of their own custom template string. - Fixed the chat ranks when advanced mode is selected, to use the
andexdbSettings:rankDisplaySeparatorsetting instead of theandexdbSettings:chatNameAndMessageSeparatorsetting to separate the ranks.
Commands
- Fixed a bug where the
\butcherand\butcherdespawncommands would not kill experience bottles when thejflag was specified, this was caused by the entity id for the experience bottles being mistyped asminecraft:xb_bottleinstead ofminecraft:xp_bottle.
Commands Documentation
- Added the missing documentation for the
f,n, andwflags for the\butcherand\butcherdespawncommand.
Version 1.29.3
Additions
UIs
- Added the Money System section to the settings menu (Main Menu > Settings > Money System).
Changes
Money System
- Added the ability to make the money system be scoreboard-based instead of dynamic property-based to allow altering player's money through the /scoreboard command.
- Added the ability to change the scoreboard that the money system uses.
Name Tag Chat Ranks System
- You can now use a template string for the name tag chat ranks, it is stored in the
config.chatRanks.nameTagTemplateStringproperty.
Entities
- The
andexdb:tickingarea_6entity now can be made visible with theandexdb:make_tickingarea_visibleevent and invisible again with theandexdb:make_tickingarea_invisibleevent. It now has its own custom model and animation. The other ticking area entities will have their models and animations added in a future update.
Fixes
UIs
- Fixed the texture for the Module Imports settings button in the settings menu.
Chat Ranks
- Fixed the chat ranks to use the
rankDisplaySeparatorsetting to separate the ranks.
Version 1.29.2
Critical Bug Fixes
Ultra Security Mode
- Fixed a bug where players could still use the debug stick, editor sticks, and entity debug stick, when ultra security mode was on and they did not have the permissions to use them.
Version 1.29.1
Additions
Entities
- Added the
andexdb:make_inventory_not_privateevent to theandexdb:player_inventory_save_storageentity. - Added the
andexdb:make_inventory_privateevent to theandexdb:player_inventory_save_storageentity.
Fixes
Entities
- Fixed a bug where the
andexdb:player_inventory_save_storageentity was not invincible to/kill. - Fixed a bug where players could view the contents of the
andexdb:player_inventory_save_storageentity's inventory by interacting with it. - Fixed a bug where the
andexdb:player_inventory_save_storageentity was not immune to all damage types.
Version 1.29.0
Full Changelog: https://wiki.8crafter.com/andexdb/changelogs/v1.29.0
Version 1.28.5
Critical Bug Fixes
Player Data Auto Save System
- Fixed a bug where the player data auto save system would stop and give a stack overflow error after a period of time.
Additions
Technical
- Added
var errorLog: {playerDataAutoSave: {time: number, error: Error}[] ; [logCategory: string]: {time: number, error: Error}[];};toglobalThis. - Added the following methods to the
Entityclass prototype: - ```ts /** - Retrieves a concatenated string from an entity's dynamic properties. *
- @param {string} propertyName - The base name of the dynamic property to retrieve.
- @param {string} zeroLengthPlaceholder - A placeholder string to return if the dynamic property length is zero. Defaults to an empty string.
- @returns {string} The concatenated string from the entity's dynamic properties, or the zeroLengthPlaceholder if the length is zero.
- @throws {TypeError} If the propertyName is not a string. */ getStringFromDynamicProperties(propertyName: string, zeroLengthPlaceholder?: string): string
- ```ts /** * Saves a string to an entity's dynamic properties, optionally clearing old properties first. * * @param {string} string - The string to save to the entity's dynamic properties. * @param {string} propertyName - The base name of the dynamic property where the string will be saved. * @param {boolean} clearOldProperties - Whether to clear old properties before saving the new string. Defaults to `true`. * @param {number | bigint} chunkSize - The size of each chunk of the string to save. Defaults to `32760`. * * @throws {TypeError} If `propertyName` is not a string. * @throws {TypeError} If `clearOldProperties` is not a boolean. */ saveStringToDynamicProperties(string: string, propertyName: string, clearOldProperties?: boolean, chunkSize?: number | bigint): void- Added the following methods to the
Worldclass prototype: - ```ts /** - Retrieves a concatenated string from dynamic properties based on the provided property name. *
- @param {string} propertyName - The base name of the dynamic property to retrieve the string from.
- @param {string} zeroLengthPlaceholder - A placeholder string to return if the length of the dynamic property is zero. Defaults to an empty string.
- @returns {string} The concatenated string from the dynamic properties, or the zeroLengthPlaceholder if the length is zero.
- @throws {TypeError} If the provided propertyName is not a string. */ getStringFromDynamicProperties(propertyName: string, zeroLengthPlaceholder?: string): string;
- ```ts /** * Saves a string to dynamic properties, optionally clearing old properties first and splitting the string into chunks. * * @param {string} string - The string to save to dynamic properties. * @param {string} propertyName - The name of the property to save the string under. * @param {boolean} clearOldProperties - Whether to clear old properties before saving the new string. Defaults to true. * @param {number | bigint} chunkSize - The size of each chunk to split the string into. Defaults to 32760. * * @throws {TypeError} If `propertyName` is not a string. * @throws {TypeError} If `clearOldProperties` is not a boolean. */ saveStringToDynamicProperties(string: string, propertyName: string, clearOldProperties?: boolean, chunkSize?: number | bigint): void;Changes
Ultra Security Mode
- Reworked the permissions system.
Commands
- Slightly sped up the
\snapshot rollbacksubcommand when the world has a large amount of structures saved.
UIs
- Updated the Security Settings menu.
Fixes
UIs
- Fixed a bug where when viewing raw player data in the manage players menu, you wouldn't be able to see the
inputInfoproperty.
Commands
- Fixed the
\butalias of the\butchercommand. - Fixed the
\butdesalias of the\butcherdespawncommand. - Fixed the \ec alias of the \enderchest command.
Version 1.28.4
Critical Bug Fixes
Player Data Auto Save System
- Fixed a bug where the player data auto save system would stop and give a stack overflow error after a period of time.
Additions
Technical
- Added
var errorLog: {playerDataAutoSave: {time: number, error: Error}[] ; [logCategory: string]: {time: number, error: Error}[];};toglobalThis. - Added the following methods to the
Entityclass prototype: - ```ts /** - Retrieves a concatenated string from an entity's dynamic properties. *
- @param {string} propertyName - The base name of the dynamic property to retrieve.
- @param {string} zeroLengthPlaceholder - A placeholder string to return if the dynamic property length is zero. Defaults to an empty string.
- @returns {string} The concatenated string from the entity's dynamic properties, or the zeroLengthPlaceholder if the length is zero.
- @throws {TypeError} If the propertyName is not a string. */ getStringFromDynamicProperties(propertyName: string, zeroLengthPlaceholder?: string): string
- ```ts /** * Saves a string to an entity's dynamic properties, optionally clearing old properties first. * * @param {string} string - The string to save to the entity's dynamic properties. * @param {string} propertyName - The base name of the dynamic property where the string will be saved. * @param {boolean} clearOldProperties - Whether to clear old properties before saving the new string. Defaults to `true`. * @param {number | bigint} chunkSize - The size of each chunk of the string to save. Defaults to `32760`. * * @throws {TypeError} If `propertyName` is not a string. * @throws {TypeError} If `clearOldProperties` is not a boolean. */ saveStringToDynamicProperties(string: string, propertyName: string, clearOldProperties?: boolean, chunkSize?: number | bigint): void- Added the following methods to the
Worldclass prototype: - ```ts /** - Retrieves a concatenated string from dynamic properties based on the provided property name. *
- @param {string} propertyName - The base name of the dynamic property to retrieve the string from.
- @param {string} zeroLengthPlaceholder - A placeholder string to return if the length of the dynamic property is zero. Defaults to an empty string.
- @returns {string} The concatenated string from the dynamic properties, or the zeroLengthPlaceholder if the length is zero.
- @throws {TypeError} If the provided propertyName is not a string. */ getStringFromDynamicProperties(propertyName: string, zeroLengthPlaceholder?: string): string;
- ```ts /** * Saves a string to dynamic properties, optionally clearing old properties first and splitting the string into chunks. * * @param {string} string - The string to save to dynamic properties. * @param {string} propertyName - The name of the property to save the string under. * @param {boolean} clearOldProperties - Whether to clear old properties before saving the new string. Defaults to true. * @param {number | bigint} chunkSize - The size of each chunk to split the string into. Defaults to 32760. * * @throws {TypeError} If `propertyName` is not a string. * @throws {TypeError} If `clearOldProperties` is not a boolean. */ saveStringToDynamicProperties(string: string, propertyName: string, clearOldProperties?: boolean, chunkSize?: number | bigint): void;Changes
Ultra Security Mode
- Reworked the permissions system.
Commands
- Slightly sped up the
\snapshot rollbacksubcommand when the world has a large amount of structures saved.
UIs
- Updated the Security Settings menu.
Fixes
UIs
- Fixed a bug where when viewing raw player data in the manage players menu, you wouldn't be able to see the
inputInfoproperty.
Commands
- Fixed the
\butalias of the\butchercommand. - Fixed the
\butdesalias of the\butcherdespawncommand. - Fixed the \ec alias of the \enderchest command.
Version 1.28.3
Critical Bug Fixes
- Fixed a bug where you could not adjust players permissions for ultra security mode.
Fixes
- Fixed a bug where the
cullEmptyfunction would remove 0s as well instead of only undefined, void, and null. - Fixed the required security level for Ultra Security Mode for a lot of commands
Version 1.28.2
Critical Bug Fixes
- Fixed a bug where Ultra Security Mode would not assign the name of the owner to the owner variable, causing Ultra Security Mode to not work.
Version 1.28.1
Critical Bug Fixes
- Fixed a bug where the start file was defined as Main.js in the manifest.json instead of index.js, causing the entire add-on to be non-functional.
Version 1.28.0
Critical Bug Fixes
- Fixed a bug where disabling the enable chat commands toggle would not disable chat commands (ANDEXDB-65).
Additions
Security
- Added Ultra Security Mode, which makes the add-on a lot more locked down, in that players need to be given permissions by the owner to be able to use most of the features in the add-on. Instead of using tags for player permissions, instead the owner of the world/realm/server need to go into the Main Menu and go into the manage players menu, then find the player, click manage permissions, and give them the desired permissions. ONLY the owner can do this. To configure the owner, you just go to https://www.8crafter.com/andexdb-security-configurator-generator and enter your username and click generate, it will generate a separate behavior pack that you add to your world/realm/server in addition to this add-on, that pack will hardcode who the owner is. To enable ultra security mode the owner has to go to Main Menu > Security > Settings > Security Mode and then click on the button that says, "Ultra Security Mode". NOTE: This is ONLY recommended for realms and servers, if you are on a private world with friends that you trust then this is not needed, this is only for realms and server where you have admins that you don't trust enough that they won't give random people the tags that would normally allow them to have the permissions. This basically eliminates the risk of admins giving random people permissions. However, if you do have a specific admin that you still want to be able to give other players permissions, then just give them the
andexdb.fullControlpermission, it will give them the ability to give players permissions, as well as use any other Ultra Security Mode features that would normally require the owner to use.
Commands
- Added the
\\mazecommand. - Added the
\\regenerateblockscommand. - Added the
\\saveposcommand. - Added the
\\loadposcommand. - Added the
\\deletesavedposcommand. - Added the
\remexpentitycommand.
UIs
Added the "Security" sub-menu to the Main Menu.
Technical
- Added some new functions to the
Arrayprototype:
/** * Calls a defined async callback function on each element of an array, and returns an array that contains the awaited results. * @param callbackfn An async function that accepts up to three arguments. The map method calls and awaits the completion of the async callbackfn function one time for each element in the array. * @param thisArg An object to which the this keyword can refer in the callbackfn function. If thisArg is omitted, undefined is used as the this value. * @async */ mapAsync<U>(callbackfn: (value: T, index: number, array: T[]) => U, thisArg?: any): Promise<Awaited<U>[]>; /** * Awaits each element in the array. * @returns {Promise<Awaited<T>[]>} The awaited array elements. * @async */ awaitEach(): Promise<Awaited<T>[]>;- Added the
worldandsystemclasses from the@minecraft/servermodule toglobalThis. - Added the following getter to
globalThis:
/** * A class containing configuration detailing which functions, classes, and constants from the modules to import into their respective properties on the global modules object. * @see {https://github.com/link modules.main.moduleImportsConfig} */ static get moduleImportsConfig(): typeof import("init/classes/moduleImportsConfig").moduleImportsConfig;- Added the
worldandsystemclasses from the@minecraft/servermodule toglobalThis. - Added
const optionalModuleObjectImportFilePaths,const moduleOptionalImportPathMap, andtype optionalModuleObjectImportFilePathsImportMapto directoryTree. Player.prototype- Added the following getters to the
Playerclass prototype:get playerPermissions(): PlayerPermissions;get worldEditSelection(): WorldEditSelection;
- Added
get ultraSecurityModeSecurityLevel(): "owner" | "headAdmin" | "admin" | "moderator" | "WorldEdit" | "everyone"to themodules.cmds.commandclass. - Added
get playerPermissions(): PlayerPermissions;to themodules.cmds.executeCommandPlayerWclass. - Added
get worldEditSelection(): WorldEditSelection;to themodules.cmds.executeCommandPlayerWclass. - Added
get inputInfo(): InputInfo;to themodules.cmds.executeCommandPlayerWclass. - Added
lookAt(targetLocation: Vector3): void;to themodules.cmds.executeCommandPlayerWclass.
- Added the following getters to the
Changes
Player Data Save System
- Added the following new properties that are saved by the player data save system:
inputPermissions?: { /** * @deprecated Only exists in format versions below `1.6.0`. * @deprecated Supercceeded by `Camera`. */ cameraEnabled?: boolean; /** * @deprecated Only exists in format versions below `1.6.0`. * @deprecated Supercceeded by `Movement`. */ movementEnabled?: boolean; Camera?: boolean; Movement?: boolean; LateralMovement?: boolean; Sneak?: boolean; Jump?: boolean; Mount?: boolean; Dismount?: boolean; MoveForward?: boolean; MoveBackward?: boolean; MoveLeft?: boolean; MoveRight?: boolean; }; /** * @since format version 1.6.0 * @since v1.28.0-preview.20+BUILD.1 */ inputInfo?: { lastInputModeUsed: Player["inputInfo"]["lastInputModeUsed"]; touchOnlyAffectsHotbar: Player["inputInfo"]["touchOnlyAffectsHotbar"]; }; /** * @since format version 1.6.0 * @since v1.28.0-preview.20+BUILD.1 */ playerPermissions?: ReturnType<PlayerPermissions["toJSON"]>; /** * @since format version 1.6.0 * @since v1.28.0-preview.20+BUILD.1 */ onJoinActions?: SavedPlayerOnJoinActions;UIs
- Started working on an edit module imports config menu, to allow for only importing specific modules or only specific functions and classes from those modules upon startup.
Technical
Classes
- The
commandandcommandSettingsclasses now have a type parameter which specifies the command type:<T extends "built-in" | "custom" | "unknown" = "unknown">.
Other
globalThis- Moved
function getPlayer(playerName: string): Playerfrommodules.cmdstoglobalThis. - Moved
function getPlayerById(playerId: string | number): Playerfrommodules.cmdstoglobalThis.
- Moved
Fixes
Items
- Fixed a bug that has existed since the add-on was released where the Script Runner was not functional (ANDEXDB-66).
- Fixed the interact button text for the Script Runner (
andexdb:script_runner), old Main Menu item (andexdb:selection_menu), and Selection Tool (andexdb:selection_tool).
UIs
- Fixed an issue where the command settings menu would give an error upon opening for custom command.
Ban System
- Fixed a bug that caused the name of the person who banned a player to not be displayed in the kick reason message.
Technical
Classes
- Fixed a StackOverflow error with the setters for some of the properties in the
commandSettingsclass.
Version 1.27.0
- Updated the add-on to 1.21.50.
Version 1.26.0
Additions:
Items:
- Added the Pick Block Stick item (
andexdb:pick_block_stick). - Added the Data Pick Block Stick item (
andexdb:data_pick_block_stick). - Added the Liquid Clipped Pick Block Stick item (
andexdb:liquid_clipped_pick_block_stick). - Added the Liquid Clipped Data Pick Block Stick item (
andexdb:liquid_clipped_data_pick_block_stick).
Entities:
- Added the
andexdb:player_inventory_save_storageentity.
Commands:
- Added the
\pthrucommand, it is the same as \thru except it can also teleport you into 1 block tall spaces. - Added the
\debugstickdyingmode [enabled: bool[?=toggle]]command. - Added the
\enchantmentbarrels [level: number[?=0]]command. - Added the
\stopalldbintervalscommand to allow for stopping all repeating interval (system.runInterval) being run by this add-on. - Added the
\stopallsaintervalscommand to allow for stopping all repeating interval (system.runInterval) being run by my entity scale add-on (requires entity scale version 1.14.0 or later). - Added the
\ground [-lp]command, it teleports you to the highest block that is below you, the purpose of these flags can be found with the\help cmd topcommand. - Added the -l and -p flags to the
\topcommand. - Added the
\ecalias to the\enderchestcommand. - Added the
\entityscaleversioncommand (requires entity scale version 1.14.0 or later). - Added the
worldeditcommand category.
Emojis:
- Added a new emoji sprite sheet (EF).
UIs:
- Added the advanced settings section to the settings menu (Main Menu>Settings>Advanced).
- Added the debug menu to the advanced setting menu to allow stopping certain services such as the banned players checker, protected areas refresher, and the player data save system (Main Menu>Settings>Advanced Settings>Debug).
- Added the Debug Info and Raw Config menus to the Debug menu (Main Menu>Settings>Advanced>Debug).
- Added a search button and full searching functionality to the manage players menu.
- Added multiple new settings options.
Documentation: (How To Play Screen)
- Added documentation on the pick block sticks and brush items to the Items section of the How To Play Screen.
- Added the "Enchant Anything With Anything" section to the in-game documentation.
Technical:
- Added the subscription ids for a lot more of the subscribed events to the global
subscribedEventsproperty. - Added the
structuremappingsmodule. - Added the ability to make the debug info that appears when you sneak while holding the editor stick always appear by giving yourself the
showBlockActionBarDebugInfotag. - Added the global
entity_scale_format_version: stringvariable. - Added the global
multipleEntityScaleVersionsDetectedvariable. - Added the
function colorizeJSONString(json: string | object, options?: { number?: string; key?: string; string?: string; true?: string; false?: string; null?: string; bigint?: string; leftCurlyBracket?: string; rightCurlyBracket?: string; leftSquareBracket?: string; rightSquareBracket?: string; comma?: string; undefined?: string; }): stringfunction. - Added the following properties to
Date.prototype:timezone: numbertoTimezone(timezone?: number|string|boolean|null|undefined): thistoTimezoneTime(timezone?: number|string|boolean|null|undefined, includeMs?: boolean, includeTimeZoneOffset?: boolean): stringtoTimezoneDateTime(timezone?: number|string|boolean|null|undefined, includeMs?: boolean, includeTimeZoneOffset?: boolean): stringtoTimezoneDate(timezone?: number|string|boolean|null|undefined, includeTimeZoneOffset?: boolean): stringformatTime(timeZoneOffset?: number, includeMs?: boolean, includeTimeZoneOffset?: boolean): stringformatDateTime(timeZoneOffset?: number, includeMs?: boolean, includeTimeZoneOffset?: boolean): stringformatDate(timeZoneOffset?: number, includeTimeZoneOffset?: boolean): string
- Added the following properties to
Entity.prototypeandexecuteCommandPlayerW.prototype:get timeZone(): numberset timeZone(timezone: number|string|boolean|null|undefined)
- Added the
static toJSON()function to theconfigclass. - Added
function bcsend(value: any, space?: string | number, options?: Parameters<typeof colorizeJSONString>[1]): voidto globalThis. - Added
function ccsend(value: any, space?: string | number, options?: Parameters<typeof colorizeJSONString>[1]): voidto globalThis. - Added
function dcsend(value: any, space?: string | number, options?: Parameters<typeof colorizeJSONString>[1]): voidto globalThis. - Added
function ecsend(value: any, space?: string | number, options?: Parameters<typeof colorizeJSONString>[1]): voidto globalThis. - Added
function fcsend(value: any, space?: string | number, options?: Parameters<typeof colorizeJSONString>[1]): voidto globalThis. - Added
function pbcsend(player: Player | executeCommandPlayerW, value: any, space?: string | number, options?: Parameters<typeof colorizeJSONString>[1]): voidto globalThis. - Added
function pccsend(player: Player | executeCommandPlayerW, value: any, space?: string | number, options?: Parameters<typeof colorizeJSONString>[1]): voidto globalThis. - Added
function pdcsend(player: Player | executeCommandPlayerW, value: any, space?: string | number, options?: Parameters<typeof colorizeJSONString>[1]): voidto globalThis. - Added
function pecsend(player: Player | executeCommandPlayerW, value: any, space?: string | number, options?: Parameters<typeof colorizeJSONString>[1]): voidto globalThis. - Added
function pfcsend(player: Player | executeCommandPlayerW, value: any, space?: string | number, options?: Parameters<typeof colorizeJSONString>[1]): voidto globalThis. - Added
function breakpoint(): voidto globalThis (only useful when the Minecraft Debugger is connected). - Added the
assetsmodules directory to the global modules object (modules.assets). - Added the
classesmodules directory to theassetsmodules directory (modules.assets.classes). - Added the
constantsmodules directory to theassetsmodules directory (modules.assets.constants). - Added the
charMapsmodule atmodules.assets.constants.charMaps. - Fixed some bugs with JSONB.stringify.
- Added the
declarationsfolder to the behavior pack, the folder contains d.ts typescript declaration files for each of the JS files that are compiled from typescript. - The
structuremappingsandtransformrecipesmodules have been moved frommodules.structuremappingsandmodules.transformrecipestomodules.assets.constants.structuremappingsandmodules.assets.constants.transformrecipesrespectively. - The JSONB class is now also accessible from
modules.assets.classes.JSONB.
Changes:
Editor Stick:
- The editor stick actionbar text now automatically adds extra newlines to the bottom to prevent the actionbar text from going off of the screen.
Items:
- Updated the chargeable item variants to format version 1.21.40
- Updated the Ultra Bundle to format version 1.21.40
- The debug stick now no longer has a cooldown when switching between blocks, or letting go of the use button and then pressing it again, the cooldown now only applies while the button is being actively held down.
Entities:
- The
andexdb:player_shop_recieved_shop_items_storageentity now no longer takes any knockback. - The
andexdb:saved_shop_itementity now no longer takes any knockback. - The
andexdb:player_shop_recieved_shop_items_storageentity now uses the horse inventory type so that all of its slots can be displayed.
UIs:
- Added a Close button to the main menu.
- Made the "Manage Homes" section of the manage player menu functional.
Performance:
- Changed the default player data refresh rate from 5 to 20.
- Changed the default protected areas refresh rate from 20 to 200.
- Reworked the entire player data save system to be much more optimized. Now it spreads the saves out over multiple ticks and limits it to only be able to spend at most 1ms each tick saving the player data. The player data refresh rate option now specifies how long to wait in ticks after it is done saving the data for all of the players. before doing it again. The items in a player's inventory are now also saved inside a custom entity that is saved inside of a structure, which allows for you to be able to get exact copies of a player's inventory (including any special NBT data on those items), even when they are offline, a button has been added in the manage player menu that places down two barrels where you are standing and copies the saved inventory of the player into those barrels (the option will only appear if the player's inventory was last saved with version 1.26.0 or newer of this add-on active), this new inventory saving system can be disabled with the useLegacyPlayerInventoryDataSaveSystem options in the Global Settings section (Main Menu>Settings>Global Settings>useLegacyPlayerInventoryDataSaveSystem), Note: Disabling this new inventory saving system will result in the old player data saving system being used, which will disable all of the optimizations to it, making it much slower.
- A lot of other performance improvements.
Enchant Anything with Anything System:
- Updated the smithing table recipes for enchanting anything with anything to use the new item identifiers and include the new items.
Notifications:
- The
entitySpawnnotification type will no longer trigger for theandexdb:player_inventory_save_storageentity type because it spawns every time the player inventory data auto save system is run. - The notifications for the
world.beforeEvents.playerInteractWithBlockevent now include whether or not it was the first event (as in whether it was the first one triggered since clicking, ones triggered from holding down the use button will have this value set to false.
Technical:
- Added a bunch more of the chat ranks settings to the config class.
- Moved a few more functions from utils over to global.
- Split up the managePlayers function into multiple separate async functions.
- Changed how some of the menus work so that they are async functions that will only go to the menu they were opened from, or if they were not opened from an async function that was made for this, it will just close the whole UI instead of going back.
- TimeoutError is now global.
- ExpireError is now global.
- NoSelectorMatchesError is now global.
- StorageFullError is now global.
- ParseError is now global.
- The
testForObjectExtensionfunction is now global. - The
testForObjectTypeExtensionfunction is now global. - subscribedEvents is now global.
- repeatingIntervals is now global.
- tempVariables is now global.
Fixes:
Items:
- The Selection Tool can now be used on interactable blocks.
- Fixed an issue where the axis particles that surround the selected block when the selection tool is used would z-fight.
- The Ultra Bundle is now grouped with the other bundles inside of the creative inventory.
- The Ultra Bundle is now colored properly when it is dyed.
- Fixed the chargeable item variants.
UIs:
- Fixed an issue where the back button on the world border settings menu would go back to settings, instead of to extra features settings (ANDEXDB-55)
- Fixed an issue where when editing the playerInventoryDataSaveSystemEnabled and/or useLegacyPlayerInventoryDataSaveSystem options in the global settings menu, it would not save and changes to those settings.
Documentation: (How To Play Screen)
- Fixed an issue where it said it was only compatible with 1.21.3x instead of 1.21.4x on the how to play screen.
- Fixed an issue where for 3/4 of the types of pick blocks sticks, the item id of the item was listed before the description of the item instead of after it.
Commands Documentation:
- Fixed an issue where when you used the
\help cmdsub-command to get info about a command has one or more aliases, then there was a missing space between the command name and "(also …)".
Translation Strings:
- Fixed an issue where the translation string for the title of the custom commands section of the in-game documentation was missing.
Technical:
- Fixed an issue where
JSONBcould not stringifyNaN. - Fixed an issue where watchdog critical exception cancelation notifications were missing an
'at the end.
Version 1.25.2
Fixes:
WorldEdit:
Selection Tool:
- Fixed an issue where the pos1 block selection particle would show when you selected pos2 and vice versa.
Version 1.25.1
Additions:
Technical:
- Added the semver node module, it can be accessed with modules.semver or semver (modules and semver are properties on globalThis so they should be available anywhere): https://www.npmjs.com/package/semver
globalThis:readonly modules:- Added the semver module, it is accessible through the semver property (ex.
globalThis.modules.semverormodules.semver).
- Added the semver module, it is accessible through the semver property (ex.
- Added:
readonly semver: modules.semver - Added:
readonly SemVer: class modules.semver.SemVer
Changes:
Player Data Save System:
- Updated the player save format version to
1.4.0with the following changes:- The memory tier of the device the player was playing on is now saved (The value from Player.prototype.clientSystemInfo.memoryTier).
- The platform type that the player was last playing on is now saved (The value from Player.prototype.clientSystemInfo.platformType).
- The maximum render distance of the player is now saved (The value from Player.prototype.clientSystemInfo.maxRenderDistance).
Editor Stick:
- The special info displayed when looking at a cauldron while sneaking is no longer 4 separate components (lavaContainer, waterContainer, snowContainer, potionContainer) that are shown based on the liquid type of the cauldron, instead they are now one singular component (fluidContainer) that has 3 properties: fillLevel, fluidType, and customColor.
- The Editor Stick UI no longer has 4 separate text boxes for the different cauldron components, instead in now has 2 text boxes (customColor and potionType) and a slider (fillLevel). When the block is not a cauldron then the text boxes will say unavailable just like before, but for the slider it becomes a slider with no steps and that is unusable, it just snaps back to the start whenever you drag it to and the value always stays at 0, effectively disabling the slider.
- The Editor Stick UI no longer has toggles above the options for the cauldron, instead it determines whether or not to change anything based on whether or not the values in the text boxes have been changed.
Fixes:
Cauldron:
- Fixed an issue where anything that involved the liquid components of a cauldron was broken.
Version 1.25.0
- Updated the add-on to 1.21.40!
Version 1.24.0 (The Dyeability Update)
Additions:
Items:
- Added the Orange Brush 1 item (
andexdb:orange_brush_1). - Added the Orange Brush 2 item (
andexdb:orange_brush_2). - Added the Orange Brush 3 item (
andexdb:orange_brush_3). - Added the Orange Brush 4 item (
andexdb:orange_brush_4).
Commands:
- Added the
\hcontentscommand. - Added the
\copyitemfrom <fromSlot: int|{head}|{chest}|{legs}|{feet}|{mainhand}|{offhand}> [toSlot: (int|{head}|{chest}|{legs}|{feet}|{mainhand}|{offhand})[?=~]] [fromPlayer: (playerName|~)[?=~]] [toPlayer: (playerName|~)[?=~]]command. - Added the
\blockcommand.- In this version this command only supports getting and setting cauldron fill level, liquid type, and custom color.
- It supports many color spaces for getting the custom color in, and more will be added in future updates.
- You can currently get the color in the following color spaces:
- RGBA HEX [... rgba hex] (ex. #FFFFFFFF)
- RGB HEX [... rgb hex] (ex. #FFFFFF)
- RGBA Fractional (These are the raw color values in floating point numbers from 0.0-1.0) [... rgba frac] (ex. Red: 1, Green: 1, Blue: 1, Alpha: 1)
- RGB Fractional (These are the raw color values in floating point numbers from 0.0-1.0) [... rgb frac] (ex. Red: 1, Green: 1, Blue: 1)
- RGBA Decimal (These are the color values as integers from 0-255) [... rgba dec] (ex. Red: 255, Green: 255, Blue: 255, Alpha: 255)
- RGB Decimal (These are the color values as integers from 0-255) [... rgb dec] (ex. Red: 255, Green: 255, Blue: 255)
- RGBA Raw Decimal (These are the color values as floating point numbers from 0-255, it is the same as RGBA Decimal except it does not round the final result) [... rgba decr] (ex. Red: 255, Green: 255, Blue: 255, Alpha: 255)
- RGB Raw Decimal (These are the color values as floating point numbers from 0-255, it is the same as RGB Decimal except it does not round the final result) [... rgb decr] (ex. Red: 255, Green: 255, Blue: 255)
- HSL (These are the color values as HSL, hue: 0-360, saturation: 0-100, lightness: 0-100) [... hsl] (ex. Hue: 0, Saturation: 0, Lightness: 100)
- HSV/HSB (These are the color values as HSV/HSB, hue: 0-360, saturation: 0-100, lightness: 0-100) [... (hsv|hsb)] (ex. Hue: 0, Saturation: 0, Lightness: 100)
- HSI (These are the color values as HSI, hue: 0-360, saturation: 0-100, intensity: 0-100) [... hsl] (ex. Hue: 0, Saturation: 0, Intensity: 99.60784912)
- Adobe RGB (These are the color values as Adobe RGB, hue: 0-360, saturation: 0-100, intensity: 0-100) [... adobergb] (ex. Red: 0.995944, Green: 0.995944, Blue: 0.995944)
- CIELuv (These are the color values as CIELuv, lightness: 0-100, Chromaticity u: -180-180, intensity: -180-180) [... cieluv] (ex. Lightness: 99.654931, Chromaticity u: -0.00002, Chromaticity v: 0.000013)
- CIExyY (These are the color values as CIExyY, lightness: 0-100, Chromaticity u: -180-180, intensity: -180-180) [... ciexyy] (ex. Chromaticity x: 0.312727, Chromaticity y: 0.329023, Luminance: 99.110233)
- You can currently set the color in the following color spaces:
- ... rgba hex <hexRGBAColor: RRGGBBAA|RGBA>
- ... rgba frac <red: float[min=0.0,max=1.0]> <green: float[min=0.0,max=1.0]> <blue: float[min=0.0,max=1.0]> <alpha: float[min=0.0,max=1.0]>
- ... rgba dec <red: int[min=0,max=255]> <green: int[min=0,max=255]> <blue: int[min=0,max=255]> <alpha: int[min=0,max=255]>
- ... rgba decr <red: float[min=0.0,max=255.0]> <green: float[min=0.0,max=255.0]> <blue: float[min=0.0,max=255.0]> <alpha: float[min=0.0,max=255.0]>
- ... rgb hex <hexRGBAColor: RRGGBB|RGB>
- ... rgb frac <red: float[min=0.0,max=1.0]> <green: float[min=0.0,max=1.0]> <blue: float[min=0.0,max=1.0]>
- ... rgb dec <red: int[min=0,max=255]> <green: int[min=0,max=255]> <blue: int[min=0,max=255]>
- ... rgb decr <red: float[min=0.0,max=255.0]> <green: float[min=0.0,max=255.0]> <blue: float[min=0.0,max=255.0]>
- ... hsl <hue: float[min=0.0,max=360.0]> <saturation: float[min=0.0,max=100.0]> <lightness: float[min=0.0,max=100.0]>
${command.dp}block facing set filllevel <fillLevel: int[min=0,max=6]>
- You can currently get the color in the following color spaces:
- Added the
\item debugsub-command.
Documentation: (How To Play Screen)
- Added the documentation for a few new parameter types:
- RGB
- RGBA
- RRGGBB
- RRGGBBAA
Technical:
Node Modules:
- Added the decimal.js node module, it can be accessed with
modules.DecimalorDecimal(this module is imported as just a class, not as an object,modulesandDecimalare properties onglobalThisso they should be available anywhere): https://www.npmjs.com/package/decimal.js - Added the color-core node module:, it can be accessed with
modules.colorCoreorcolorCore(modulesandcolorCoreare properties onglobalThisso they should be available anywhere) https://www.npmjs.com/package/color-core
Other:
- Added the JSONB object, which is an improved version of JSON that can allow for BigInt, Infinity, -Infinity, undefined, and NaN.
- Main/utilities
- Added the
mcRGBAToColorCoreRGB(rgba: RGBA): colorCore.RGBfunction. - Added the
mcRGBToColorCoreRGB(rgb: RGB): colorCore.RGBfunction.
- Added the
- Added the following properties to the
Decimalclass:static readonly PI: string;static readonly PI_PRECISION: number;static readonly LN10: string;
- Added the following modules to the global
modulesproperty:DecimalcolorCore@minecraft/server(alias ofmcServer)@minecraft/server-is(alias ofmcServerUi)@minecraft/gametest(alias ofGameTest)@minecraft/math(alias ofmcMath)
- globalThis
readonly Decimal: modules.Decimalreadonly Color: modules.colorCore.Colorreadonly colorCore: modules.colorCodestatic get stack(): string- Returns the current call stack from where it was called, just like
new Error().stack.
- Returns the current call stack from where it was called, just like
function dsend(value: any, space?: string | number): voidfunction esend(value: any, space?: string | number): voidfunction fsend(value: any, space?: string | number): voidfunction pdsend(player: Player | executeCommandPlayerW, value: any, space?: string | number): voidfunction pesend(player: Player | executeCommandPlayerW, value: any, space?: string | number): voidfunction pfsend(player: Player | executeCommandPlayerW, value: any, space?: string | number): voidinterface JSONBparse(text: string, reviver?: (this: any, key: string, value: any) => any, options?: {bigint?: boolean, undefined?: boolean, Infinity?: boolean, NegativeInfinity?: boolean, NaN?: boolean}): any;stringify(value: any, replacer?: (this: any, key: string, value: any) => any, space?: string | number, options?: {bigint?: boolean, undefined?: boolean, Infinity?: boolean, NegativeInfinity?: boolean, NaN?: boolean, get?: boolean, set?: boolean, function?: boolean}): string;
Array.prototypeforEachB(callbackfn: (value: T, index: number, array: T[]) => void, thisArg?: any): void;
Changes:
Items:
- Fixed a texture issue with the blue brush items.
- The following items are now dyeable:
- Brush Type 1
- Blue Brush Type 1
- Brush Type 2
- Blue Brush Type 2
- Brush Type 3
- Blue Brush Type 3
- Brush Type 4
- Blue Brush Type 4
- Debug Stick
- Liquid Clipped Debug Stick
- Editor Stick
- Editor Stick B
- Editor Stick C
- Debug Screen
- Main Menu
- Player Controller
- Player Debug Stick
- Script Runner
- Command Runner
- Old Main Menu Item (
andexdb:selection_menu) - Chargeable Items 1-8
- Non-Chargeable Item 1
- Ultra Bundle
Commands:
- Changed the syntax of the
\copyitemcommand from\copyitem [toSlot: int|head|chest|legs|feet|mainhand|offhand|~] [toPlayer: target|~]tocopyitem [toSlot: int|head|chest|legs|feet|mainhand|offhand|~] [toPlayer: (target|~)[?=~]]. - The
\itemcommand can now target the Cursor slot of a player's inventory. However, it cannot modify the item in that slot, only display info about it and delete it. So only thedebugandremovesub-commands work on it. - Updated the syntax of a lot of sub-commands of the
\itemcommand. - The
\invseeand\invseeuuidmodecommands can now see inside of a player's cursor inventory slot.
UIs:
- Added the
SystemandServercommand categories to the manage commands menu.
Technical:
- The @minecraft/math node module now has named exports instead of just one default export.
- globalThis:
- srun is now read-only
- gt is now read-only
- config is now read-only
- Changed
function bsend(value: any): voidtofunction bsend(value: any, space?: string | number): void- The
space?: string|numberparameter acts the same as the space parameter inJSON.stringify().
- The
- Changed
function csend(value: any): voidtofunction csend(value: any, space?: string | number): void- The
space?: string|numberparameter acts the same as the space parameter inJSON.stringify().
- The
- Changed
function pbsend(player: Player | executeCommandPlayerW, value: any): voidtofunction pbsend(player: Player | executeCommandPlayerW, value: any, space?: string | number): void- The
space?: string|numberparameter acts the same as the space parameter inJSON.stringify().
- The
- Changed
function pcsend(player: Player | executeCommandPlayerW, value: any): voidtofunction pcsend(player: Player | executeCommandPlayerW, value: any, space?: string | number): void- The
space?: string|numberparameter acts the same as the space parameter inJSON.stringify().
- The
Fixes:
Commands Documentation:
- Updated the commands documentation for the
\itemcommand to include the\item keepondeath <keepOnDeath: bool>and\item lockmode <lockMode: {none}|{inventory}|{slot}>sub-commands.
Commands:
- When an error is thrown while running a command through the
\executecommand, the error message is now sent to whoever or whatever the sendErrorsTo property was set to.
Version 1.23.0 (The Stop & Shop Update)
Additions:
Commands:
- Added the \viewservershops command.
- Added the \hlist command to list all of your current hotbar presets.
- Added the \closeuis command.
- Added the \extrafeaturessettings command.
- Added the \playershopsystemsettings command.
- Added the \servershopsystemsettings command.
- Added the \shopsystemsettings command.
- Added the "playersOnly" parameter restriction type.
- Added the -f, -s, -q, -b, and -c flags to the \execute command.
- Added the \execute ... sendfeedbackto sub-command.
- Added the \execute ... resetfeedbacktarget sub-command.
Entities:
- Added the andexdb:saved_shop_item entity.
- Added the andexdb:player_shop_recieved_shop_items_storage entity.
Extra Features:
- Added a money system.
- Added a server shop system.
UIs:
- Added an edit money button to the manage player menu.
- Added toggles that appear next to text boxes in the Script API Form UIs to enable/disable multiline and scrollable input.
Technical Changes:
- Added the splitUpStringData() function to split up a string into chunks of a certain size.
- Added the saveStringToDynamicProperties() function to save a string across multiple dynamic properties depending on the size.
- Added the getStringFromDynamicProperties() function to read a string that was split up across multiple dynamic properties.
- Added the showMessage() function to show a warning pop-up message.
- Added the showActions() function to show a pop-up action selection menu.
- Added a bunch of methods and properties to the string, number, boolean, bigint, Error, Entity, ModalFormData, MessageFormData, ActionFormData, and globalThis types.
- string
- toNumber(): number|undefined;
- toBigInt(): bigint|undefined;
- toBoolean(): boolean;
- number
- toNumber(): number;
- toBigInt(): bigint;
- toBoolean(): boolean;
- toRomanNumerals(limits?: [min: number, max: number], valueFor0?: string): string;
- isNaN(): boolean;
- isFinite(): boolean;
- isInteger(): boolean;
- isSafeInteger(): boolean;
- isEven(): boolean;
- isOdd(): boolean;
- floor(): number;
- round(): number;
- ceil(): number;
- boolean
- toNumber(): 0|1;
- toBigInt(): 0n|1n;
- toBoolean(): boolean;
- toFormattedString(): "§aTrue"|"§cFalse"
- toFormattedStringB(): "§2True"|"§4False"
- toFormattedStringED(): "§aEnabled"|"§cDisabled"
- toFormattedStringEDB(): "§2Enabled"|"§4Disabled"
- toFormattedStringIO(): "§aON"|"§cOFF"
- toFormattedStringIOB(): "§2ON"|"§4OFF"
- toFormattedStringIOL(): "§aOn"|"§cOff"
- toFormattedStringIOLB(): "§2On"|"§4Off"
- bigint
- toNumber(): number;
- toBigInt(): bigint;
- toBoolean(): boolean;
- toRomanNumerals(limits?: [min: bigint, max: bigint], valueFor0n?: string): string;
- Error
- stringify(): string
- globalThis
- function srun(callback: () => void): number
- var beforeInitializeTick: number;
- var initializeTick: number;
- var beforeScriptStartTick: number;
- var scriptStartTick: number;
- class InternalError extends Error{}
- var tempVariables: {[key: PropertyKey]: any}
- var gt: typeof globalThis
- function cullNull<T extends any[]>(array: T): any[]
- function cullUndefined<T extends any[]>(array: T): any[]
- function cullEmpty<T extends any[]>(array: T): any[]
- function tryget(callbackfn: () => T): T
- function tryrun(callbackfn: () => any): void
- function catchtry(trycallbackfn: () => any, catchcallbackfn?: (e: Error) => any, finallycallbackfn?: (v: any) => any): any
- function send(message: (RawMessage | string)[] | RawMessage | string): void
- function asend(value: any): void
- function bsend(value: any): void
- function csend(value: any): void
- function psend(player: Player | executeCommandPlayerW, value: string): void
- function pasend(player: Player | executeCommandPlayerW, value: any): void
- function pbsend(player: Player | executeCommandPlayerW, value: any): void
- function pcsend(player: Player | executeCommandPlayerW, value: any): void
- function perror(player: Player | executeCommandPlayerW, error: Error, prefix?: string): void
- function JSONParseOld(text: string, keepUndefined?: boolean): any
- function JSONStringifyOld(value: any, keepUndefined?: boolean, space?: string | number): string
- function JSONParse(JSONString: string, keepUndefined?: boolean): any
- function JSONStringify(JSONObject: any, keepUndefined?: boolean, space?: string | number): string
- function iterateGenerator<TY, TR, TN>(extractorGenerator: Generator<TY, TR, TN>, maxTimePerTick?: number, whileConditions?: boolean | number | string | Function): Promise<TY | TR>
- function completeGenerator<T, TReturn, TNext>(g: Generator<T, TReturn, TNext>, maxTimePerTick?: number, whileConditions?: boolean | number | string | Function): Promise<{
yield: T;
return: TReturn;
}> - function completeGeneratorB<T, TReturn, TNext>(g: Generator<T, TReturn, TNext>, maxTimePerTick?: number, whileConditions?: boolean): Promise<{
yield: T[];
return: TReturn;
}> - function waitTick(): Promise
- function waitTicks(ticks?: number): Promise
- readonly overworld(): Dimension&{typeId: "minecraft:overworld"};
- readonly nether(): Dimension&{typeId: "minecraft:nether"};
- readonly the_end(): Dimension&{typeId: "minecraft:the_end"};
- readonly players(): {[name: string]: Player}
- readonly modules: typeof main.modules
- var config: typeof main.config
- var tempSavedVariables: any[]
- var crashEnabled: boolean
- Entity
- get inventory(): EntityInventoryComponent|undefined
- get equippable(): EntityEquippableComponent|undefined
- get cursorInventory(): PlayerCursorInventoryComponent|undefined
- get heldItem(): ItemStack|undefined
- get activeSlot(): ContainerSlot|undefined
- get moneySystem(): MoneySystem
- get playerNotifications(): PlayerNotifications
- get dimensionLocation(): DimensionLocation
- get locationstring(): `${number} ${number} ${number}`
- get rotationstring(): `${number} ${number}`
- get locationrotation(): RotationLocation
- get directionvector(): Vector3
- get xy(): Vector2
- get yz(): VectorYZ
- get xz(): VectorXZ
- get chunkIndex(): VectorXZ
- get x(): number
- get y(): number
- get z(): number
- get rotx(): number
- get roty(): number
- ModalFormData
- forceShow(player: Player, timeout?: number): Promise
- MessageFormData
- forceShow(player: Player, timeout?: number): Promise
- ActionFormData
- forceShow(player: Player, timeout?: number): Promise
- string
Fixes:
Commands:
- Fixed an issue where the target selectors used in the custom commands would not allow a space between the selector type and its parameters. ex.
@e[r=5]would work but@e [r=5]would not. - Fixed a bug where all commands would always default to requiring the canUseChatCommands tag.
- Fixed an issue where the "string" parameter types would return undefined when provided with two quotation marks "".
- Fixed an issue where the \setnametag command would throw an error if no value was provided for the name tag, instead of setting the name tag to be an empty string.
- Fixed an issue where a lot of the sub-commands of the \execute command were running as the source of the command.
UIs:
- Fixed an issue where in the item editor the lockMode dropdown would always default to none even if the item had it set differently.
- Fixed an issue in the item editor where the amount slider's maximum value was 127 instead of 255.
Changes:
Commands:
- Changed the syntax of the \hset command from
\hset <presetId: float> [dimensionId: string] [x: float] [y: float] [z: float]to\hset <presetId: float> [dimensionId: string[?=~]] [location: x y z[?=~~~]]. - Changed the syntax of the \getuuid command from
\getuuid <target: target[allowMultiple=false]>to\getuuid <targets: target[allowMultiple=true]>. - Changed the default value of the invalidChatCommandAction setting to be "Warn Player" isntead of "Do Nothing".
- Updated the \invsee and \invseep commands to show the contents of the player's cursor inventory.
UIs:
- Added the "Shop System" section to the manage commands menu.
Chat Ranks:
- The chat ranks no longer default to forcing the text to be white, now it uses the selected chat text color unless specified otherwise.
Help Menu:
- Added the bundles experimental toggle to the list of required experimental toggles in the installation section of the how to play screen.
- Added bullets before each item in the list of required experimental toggles in the how to play screen.
- Added a few new sections to the how to play screen.
- Fixed a few typos in the how to play screen.
- Changed the text for the button for the command parameter types sections of the how to play screen to say "Parameter Types" instead of "Commands Parameters".
- Added the translation strings for the titles for the pages of the how to play screen.
Technical Changes:
- Whenever a player joins or leaves, it will now tell you about it inside of the console.
Version 1.22.0 (The Border & Hoarder Update)
NOTE: AS OF THE 1.22.0 UPDATE THE "BUNDLES" EXPERIMENTAL TOGGLE IS NOW ALSO REQUIRED!
Additions:
Items:
- Added the andexdb:ultra_bundle item.
Particles:
- Added the andexdb:custom_glowing_light_particle particle.
- Added the andexdb:falling_border_dust_particle_b particle.
- Added the andexdb:rising_border_dust_particle_b particle.
- Added the andexdb:world_border_red_screen_tint particle.
Settings Menu:
- Added a new Extra Features section to the settings menu.
Extra Features:
- Added a world border system (ANDEXDB-10)
- To set up the world border system just go to
Main Menu > Settings > Extra Features > World Borderand then select the dimension you want to set the world border for, then choose all of the settings that you want.
- To set up the world border system just go to
Changes:
Items:
- The 3 editor stick types now also work when used on an interactable block.
Fixes:
Commands:
- Fixed the \execute in sub-command when using the \execute command to run the \run command.
- The \run command now sends the success number to the source of the \execute command instead of the entity that the \execute command targeted, if the \run command was run using the \execute command.
Technical Changes:
- Fixed an issue where the facingPoint function would treat the x vector of the location property as the negative of what it actually was.
- The editorStickB function will now use the location and dimension of the provided sourceEntity if not specified.
Version 1.21.0
- Updated the add-on to 1.21.30!
Version 1.20.0 (The Documentation & Notification Update)
- ADDED AN ENTIRE IN-GAME DOCUMENTATION MENU IN THE HOW TO PLAY SECTION OF THE SETTINGS MENU!
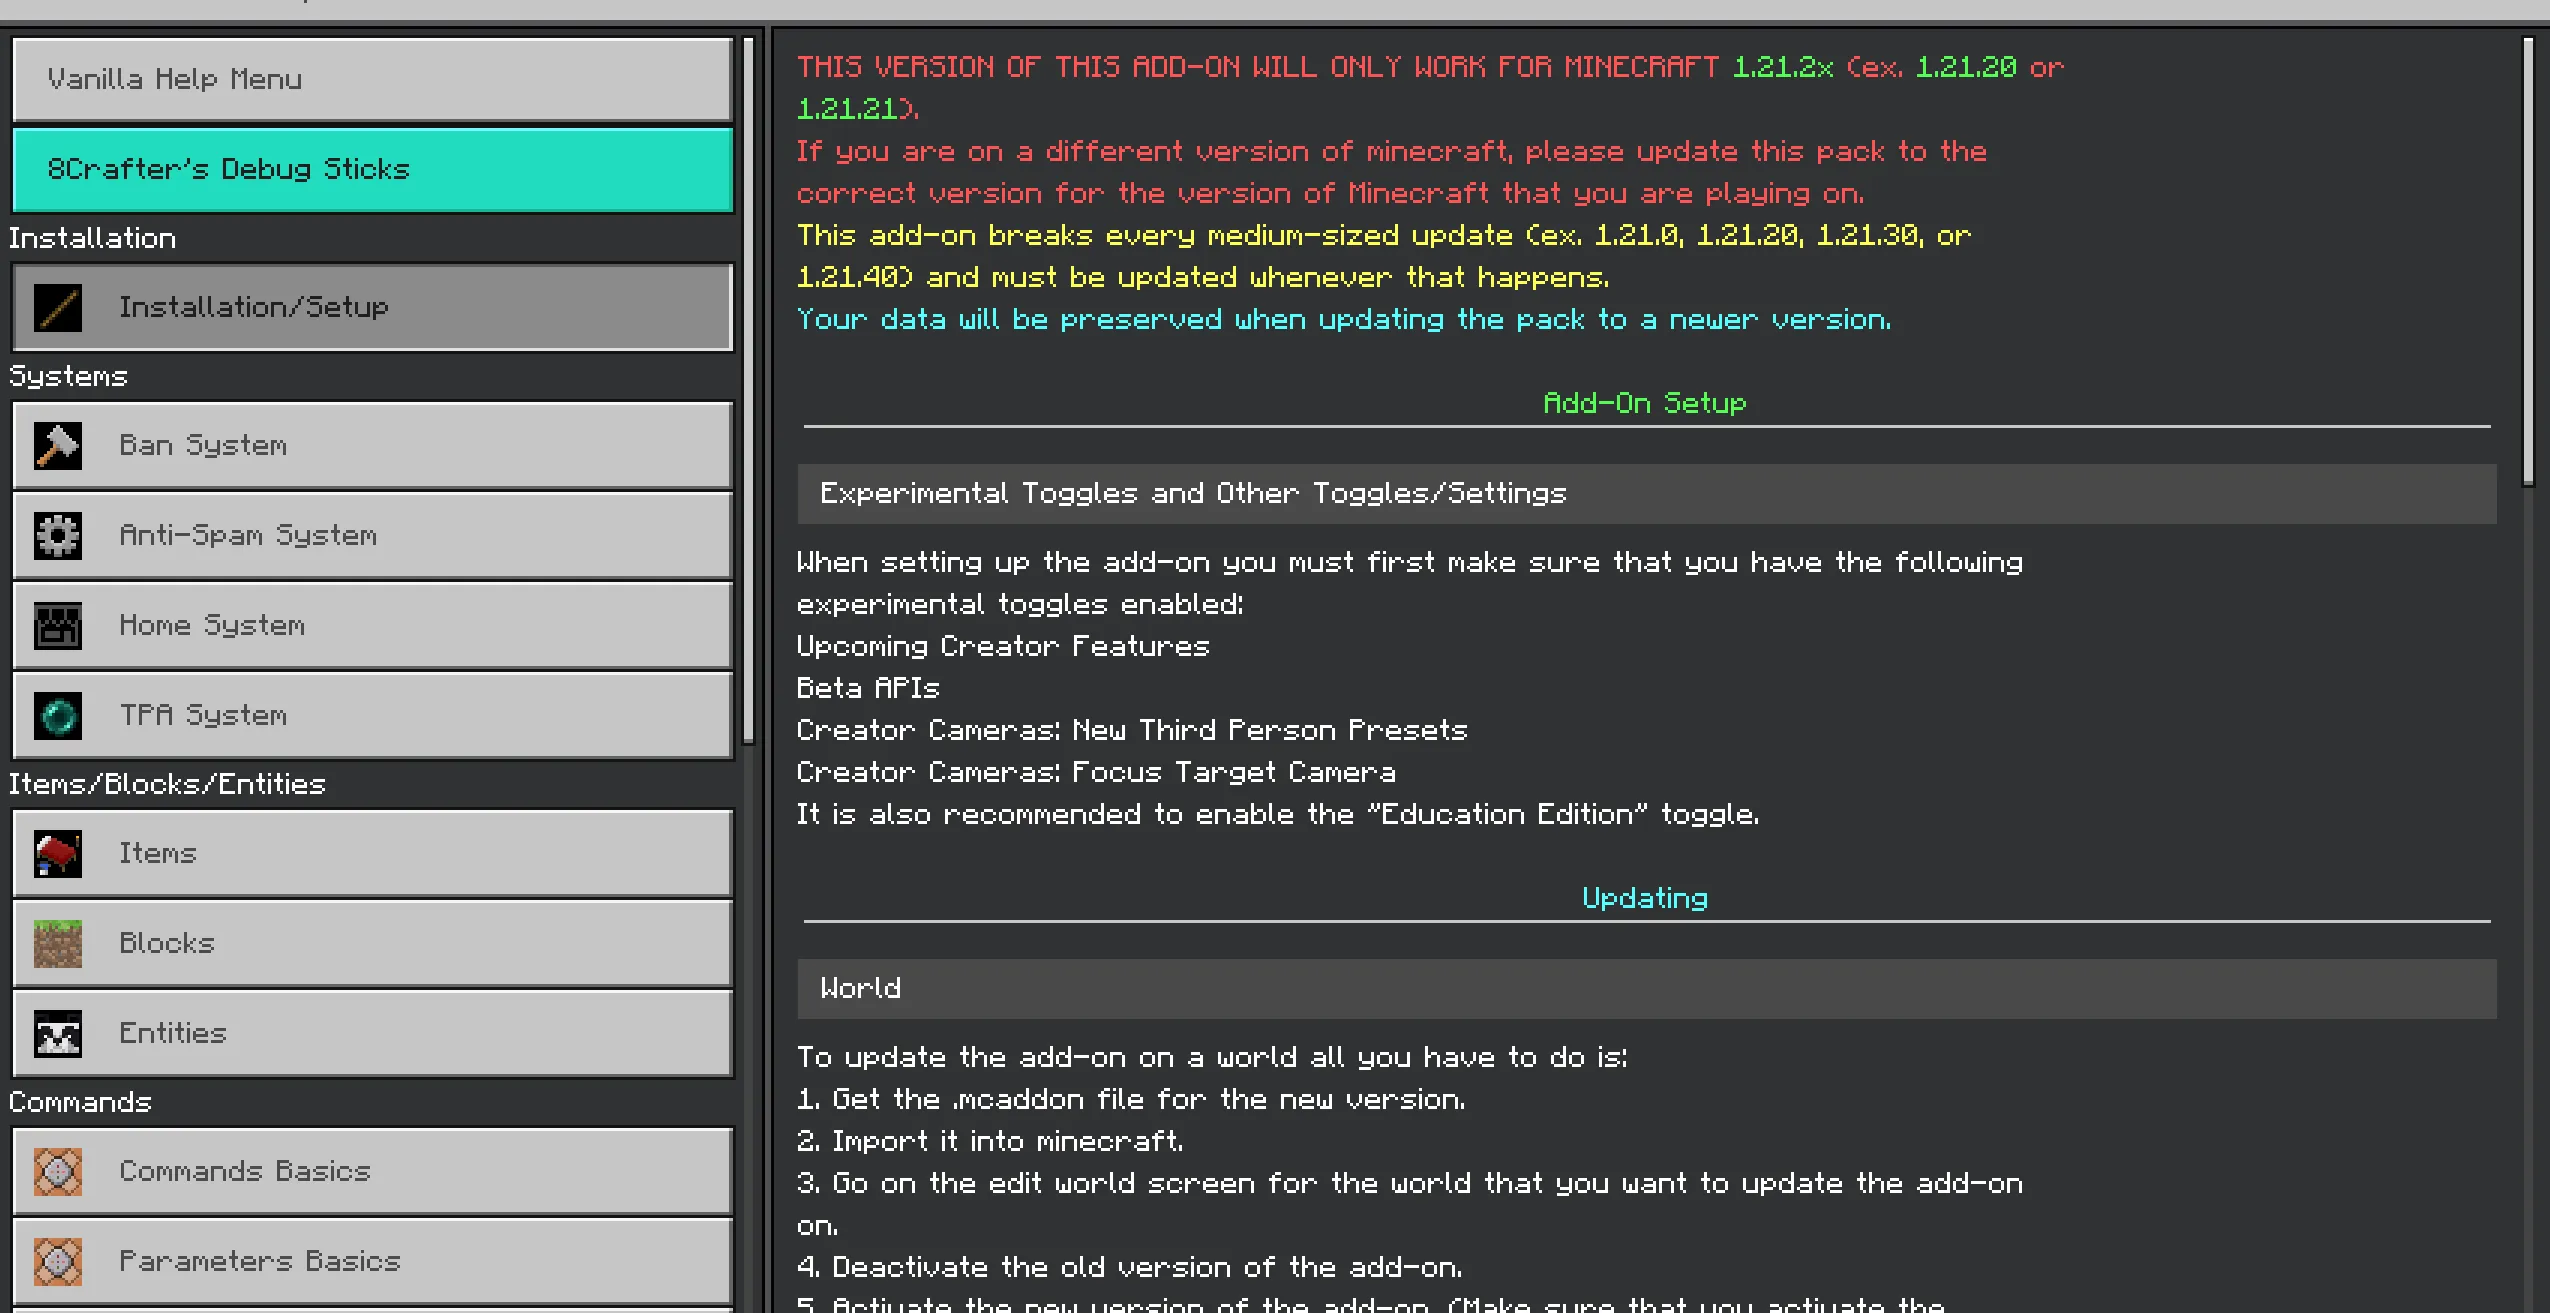
- Added the \spawn command and the spawnCommandLocation settings option.
- Added the \setplayernametag command.
- Added a bunch of new options to the Notifications Settings section. Including the ability to add sounds to the notifications.
- Added the following sub-commands to the \help command: cmdextra, cmddebug, cmddebugplus, and customcmddbug.
- Added the andexdb:silentCmd /scriptevent command to run custom commands without notifying players in the chat, this is very usefull for running custom commands inside of command blocks.
- Added the andexdb:silentBuiltInCmd, andexdb:builtInCmd, andexdb:silentCustomCmd, and andexdb:customCmd /scriptevent commands to allow for pre-defining whether a command is built-in or custom, to increase performance when running custom commands with a command block.
- The \execute command now can target multiple entities at once.
- Added the \execute matchdimension sub-command.
- Added fully functional axis markings to appear on a block for 2 seconds when you select it with the selection tool.
- Added the \attribute and \data commands, but they are still in early development.
- The \help command now tells you when a command is deprecated or non-functional.
- Added the -h flag to the \paste command to make the copied structure be pasted at your current location instead of the selected location.
- Made a massive performance improvement to all of the commands.
- Massive overhaul to the Anti-Spam System, now the anti-spam will only activate if the player sends a number of messages equal to (Message count to trigger anti-spam) and those messages each had a delay of at most (Maximum time between messages) seconds between them. Also, added an option to make it so that when a player tried sending a message while they are muted by the anti-spam system timer, then the timer will restart again, this is to prevent people who are using a bot to spam from being only muted for a certain amount of time, and then sending a few more messages before being muted again.
- Added the \item keepondeath, \item lockmode, \item slot keepondeath, and \item slot lockmode sub-commands to the \item command.
- Added the undoClipboardMode settings option to the script settings section.
- Added the protectedAreasRefreshRate option to the script settings section.
- Added the doNotSetNameTag option to the personal settings section.
- Updated the pack icon.
![]()
The new pack icon
- Fixed the \getuuid command.
- Fixed some of the WorldEdit commands.
- Added the PlayerNotifications class.
- Updated the entity debug stick debug log info.
- Updated the home system format version from
0.0.1-indev.1to0.7.0-beta.72. - Added the SemVerString class.
- Added the cullNull, cullUndefined, and cullEmpty functions.
- Updated the \help cmd sub-command.
- Fixed an issue with the flags for the \cut, \copy, and \paste commands not showing up in the \help cmd sub-command.
- Fixed an issue where many WorldEdit commands would require you to set a block mask in order to work.
- Split up a lot of the typescript files into multiple new typescript files: chat.ts, commands_list.ts, command_utilities.ts, utilities.ts, errors.ts, and commands_documentation.ts.
- Fixed the completion time information for the \drain command.
- Added the NoSelectorMatchesError error type.
- Fixed the \drain command to affect waterlogged blocks.
- Fixed the \flood command to waterlog blocks instead of replacing all non-waterlogged waterloggable blocks with water.
- Changed the parameter type of the \replace command from SingleBlockMask to mask.
- Fixed a typo in the custom settings section for the add-on where the word must was spelled mmust instead of must.
- Updated the custom JSONParse and JSONStringify functions to support the BigInt types.
- Fixed the Global Settings section of the main menu.
- Added a bunch of new options to the notifications settings section.
- Undo clipboard items that were only saved to memory will now be deleted upon a world restart.
- Removed a bunch of unnecessary quotation marks from the commands_list file.
- Added descriptions for the \drain, \itfill, and \idtfill commands to the \help command.
- Updated the syntax that the \help command displays for a few WorldEdit commands.
- Added a new section to the \help chatcommands sub-command for the deprecated commands.
- If a command is marked as hidden in the commands_list file, it will now not show up in the \help commands, and only show up in the new \help cmddebugplus sub-command.
- Fixed a bug where BlockPatterns would not allow for block states to be specified using square brackets (ex. ["my_state"="value","on"=true,"time"=1234]).
- Added the parseSNBT() function.
- Fixed the editor stick information for the jukeboxes.
- Fixed the entity controller's displayed information.
- Deprecated the "Inventory Transfer" section of the main menu.
- The gametestStructureDefaultSpawnLocation settings option now is formatted as "x y z" instead of "x, y, z".
- Finished the notification settings section.
- Deprecated the "Eval Auto Script/Execute Settings" settings section.
- Fixed a bug where when an explosion occured, a block was broken by a player, a block was interacted with by a player, a block was placed by a player, or an entity was interacted with by a player, and there were no restricted/protected areas of that type set, then it would cause errors in the content error log to appear.
- Fixed the version numbers and formatting codes of a bunch of commands.
- The \help cmd and \help cmdextra sub-commands will now show the syntax or description listed in the definition of the command, if it can not find it in the commandsyntaxes or commanddescriptions object.
- When running script eval through the chat with ${se} or ${scripteval}, it will now once again execute it from the commands file. You can still run the script eval from inside the chatMessage function by using ${sel} or ${scriptevallocal} instead.
- Added the global tempVariables object.
- Added the cmdslist and cmdsdocs imports to the Main file.
- Added maxTimeBewteenMessagesToTriggerAntiSpam and protectedAreasRefreshRate to config.
- Fixed a typo in the \shift return statement (ANDEXDB-27)
- Updated the command descriptions and syntaxes for the \visualscale, \scale, and \tint commands.
- Changed the icon for the debug sticks settings section to the new pack icon.
- Added/Updated the syntax and descriptions displayed in the \help command for many commands.
- Fixed a bug where commandSettings class instances would have the wrong number of backslashes in the command names of the WorldEdit commands.
- The getEntityHurtNotifications notifications now also display the velocity of the hurt entity.
- Fixed the \br, \\br, and \\brush aliases of the \brush command (ANDEXDB-40)
- Fixed a bug where RemExp brushes and the \rexemp command would fail to remove explosive entities (ANDEXDB-44)
- Fixed a typo with the following commands and sub-commands where they would say "Seccessfully" instead of "Successfully":
\structure saveempty
\structure createempty
\structure delete
\structure load
\structure copy
\structure copytodisk
\structure copytomemory
\structure savetodisk
\structure movetomemory
\timezone
\\pos1
\\pos2
\\hpos1
\\hpos2
\\selectmode
\\chunk
\\shift
\brush (ANDEXDB-42) - Fixed a bug where the \home command would say you have too many homes if you try and create a home with the same name as an already existing home (ANDEXDB-38)
- Removed censoring for text inputs in the form UI.
- Removed the -h flag from the \bruh command syntax as it is not functional yet.
- Removed the raise and lower sub-commands from the \brush command syntax as they are not functional yet.
Version 1.19.0
- Updated the add-on to 1.21.20!
Version 1.18.2
- Added the \\drain command.
- Updated the \help chatcommands sub-command.
Version 1.18.1
- Fixed the ban system for players with spaces in their names.
- Fixed the \\remove, \\set, \\seti, and \\flood commands.
- Fixed an issue where the block mask parameters of a lot of commands would require the block type to be specified with the namespace, so minecraft:air would work but air would not work.
- Fixed the random and shuffled gradients.
- Added the cycleRGB async function.
- When a command is run by another player though the \execute command, it will now execute regardless of the targeted player's permission levels.
- Fixed the \kick command for player's with spaces in their names.
- Fixed an issue where the hour 12 would display as 00 and the hour 11 would display as -1.
- Fixed the ban system for players with spaces in their names.
Version 1.18.0 (The Chat Ranks Update)
- Added the \\set, \\seti, \\flood, \\remove, \\walls, \\sphere, \\hsphere, and \\cone commands.
- Added the \editorstick, \editorstickb, \editorstickc, and \notificationsettings commands.
- Added the \\shift and \\offset commands.
- Added the \enderchest command.
- The \rtp command and all references to it have now been changed to \tpa.
- Updated the player saving system to now also have a first joined property.
- Added the andexdb:cmd scriptevent which is the same as the andexdb:chatCommands scriptevent except for that it runs the command with the the player input being an executeCommandPlayerW class to allow for running commands from a command block directly.
- Added the s:eb, is:eb, s:elcb, and is:elcb scriptevents.
- Added the \execute command.
- When the chatCommands function is run by an entity, the server notification message will now show the nameTag of the entity or the typeId of the entity if the nameTag is empty, followed by the id of the entity inside of arrow brackets (<>).
- Massive overhaul to the chat ranks system.
- Added the chat ranks settings section to the settings menu.
- Added better tag support for the chat ranks.
- Added gradient, rainbow, random gradient, random rainbow, shuffled gradient, and shuffled rainbow support for player names and message formatting in the chat, and for player name tags.
- Added a tag to show a player's dimension on their name tag and before chat messages.
- Added the config:chatdimension tag to just show the player's dimension in their chat messages.
- Added the config:health tag to show health below a player's name tag.
- There is now an option to show chat ranks on player name tags.
- Added the j, o, c, and v flags to the \butcher and \butcherdespawn commands.
- Added the evalBeforeEvents:chatSendBeforeModifiedMessageEval dynamic property.
- Added a LICENSE.txt file.
- Fixed an issue where the \snapshot listbackups sub-command would list backups multiple times depending on how many structures were used to save that backup.
- Updated the debug info for the entity debug stick.
- Updated the actionbar debug info displayed when sneaking while holding the editor stick.
- Updated the andexdb:chatCommands scriptevent to allow for escaping < and > with \\<\\ and \\>\\ respectively.
- Added the andexdb:xz_axis_particle_pos1 particle.
- Changed the formatting code for the \\generatejs command from §f to §c.
- Major update to the executeCommandPlayerW class.
- Added the parseBlockMatcherType() function.
- Added the "fromExecute?: boolean" property to the params parameter of the chatCommands function.
- The chatCommands function now assigns the player property with an (executeCommandPlayerW & {readonly id: string, readonly typeId: string, readonly name: string}) instance instead of merging the executeCommandPlayerW instance with the player and then assigning the player property with the player.
- Added error catching to the \morph, \tint, \scale, \visualscale, \visualscaleenabled, and \managescriptautoeval commands.
- Updated the \\replace command to use a blockReplacer parameter type for the block mask instead of a string parameter and a blockStates parameter.
- Fixed the sphere generation to not do the repeat generation of each block in the z axis for each block in the z axis.
- Added customizable artificial lag.
- Updated the output text for the entity debug stick.
- The player_save_format_version is now 1.3.0 instead of 1.2.0.
- Fixed the deletebackup, clearbackups, deletearea, listbackups, listareas.
- Fixed the target selector parameters for when the target selector is a player's name without any quotation marks.
- Removed an accidentally left in console.warn() for when a custom chat message is sent.
Version 1.17.0 (The Clipboard & Backup Update)
- ADDED THE cut, copy, and paste COMMANDS TO ALLOW FOR COPYING AND PASTING THE SELECTED AREA.
- ADDED THE undo COMMAND TO ALLOW FOR UNDOING COMMANDS LIKE cut, paste, stack, and replace.
- ADDED AN AREA BACKUP SYSTEM! This system allows you to create backup areas that cover the area in between two sets of coordinates in a certain dimension, these areas can be used in the snapshot command to save backups of certain parts of your world so that if for example someone blew up the spawn on your realm or someone griefed your builds on your creative mode world, then you could use the snapshot command to restore that part of your world from the backup you had saved previously. To create a backup area just get the selection tool and select the two corners of the spawn area or build that you want to backup and then type backuparea followed by a name for the backup area, for example
backuparea spawn. Then to create a backup just type snapshot backup followed by the name that you chose for the backup area, for examplesnapshot backup spawn. Then when you want to rollback the backup area then just first type snapshot listbackups followed by the name that you chose for the backup area, for examplesnapshot listbackups spawn. Then find the number that the time you want to rollback the backup area to is in the list of backup times (number 0 will always be the most recent backup of that area), then type in snapshot rollback followed by the name that you chose for the backup area and then the number of the backup time, for examplesnapshot rollback spawn 0. You can just type insnapshot listto see a list of all of the currently created backup areas. - Added 2 new structures to allow for getting smithing table enchanted books all enchantments with levels from -2 to 294 as well as level -32k: andexdb:-2-294_steb and andexdb:-32k_steb.
- Added a command flags section to the help command info for some of the custom chat commands.
- Added the protectarea command to create a restricted area in the selected area.
- Added the generatef command which is the same as generate except it has very limited access to external JаvaScript variables.
- The following commands no longer require the canUseChatCommands tag to be run: help, gohome, home, tpaccept (non-functional), and tpdeny (non-functional).
- Made the structure save sub-command fully functional.
- Added the Script Settings, UI Settings, and Manage Game Rules sub-menus to the main settings menu.
- Added the following options to the settings sub-menus: playerDataRefreshRate and maxPlayersPerManagePlayersPage.
- Added the aligncenter command.
- Added the ability to spacer text in between [Server] and [playername] in the server notification messages with the world "serverNotificationSpacer" dynamic property.
- Added the ability to fill in the other options for the structure load sub-command.
- Added the structure removeair sub-command.
- The BlockPattern class now allows for putting r: or s: before the pattern text to specify wether the pattern is in random mode (default) or sequence mode respectively.
- Added the removeotheritemenchantments command with the following aliases: remotheritemenchants and roie. This command will remove all other enchantments off of the item that you are holding except for the enchantment types specified, for example the following command will remove every enchantment off of the item that you are holding except for sharpness and knockback:
removeotheritemenchantments ["sharpness", "knockback"]. - Massive internal overhaul to the protected areas / spawn protection system.
- The brush command now also sets the lore of the item to make it show the details of the brush type set.
- Added the -l flag to the brush command, this flag will stop the brush command from setting the lore of the item.
- Added the -l flag to the butcher and butcherdespawn commands to also kill/despawn boss mobs.
- The replace command now has the -c flag to determine whether or not to clear containers before replacing all of the blocks in the area.
- Added the andexdb:green_cube particle.
- Added the backuparea command.
- Added the snapshot command.
- Changed some of the icons for some of the sub-menus in the main settings menu.
- Made a lot of the menus go back to the previous menu when the x button is pressed instead of closing the menu altogether.
- Made the list of structures outputted by the liststructures command be sorted in alphabetical order.
- The x button on several menus now goes back to the previous menu instead of closing the menu altogether; massive overhaul to the add protected area and edit protected area menus; added a back button to the Area Selector menu.
- Added the formats for the save, load, copytodisk, copytomemory, and removeair sub-commands of the structure command to the help command.
- Added/fixed the description for the following commands: generatef, generatejs, generatecallback, generates, generates2d, stack, and selectmode.
- Added error catching to the item command.
- Added error catching to the structure command.
- Added error-catching for the summon command.
- Added error catching to the brush command.
- The rtp command now correctly uses the name of the player who sent the teleport request instead of the person that the teleport request is targeted at in the feedback to the target of the teleport request.
- The rtp command teleport requests now actually expire after a minute instead of only expiring once the player that it was targeted at actually leaves the world/realm/server.
- Updated the feedback messages to the sender of the teleport request for when the teleport request expires or times out.
- Changed the command versions of the tpaccept and tpdeny commands from 1.0.0 to 0.0.1-alpha and changed their command colors to be red instead of white since they are not functional at all yet.
- Fixed an issue where block patterns would end at any block name containing a period.
- Fixed an issue where some players would be missing from the manage players menu.
- Fixed an issue where offline players were not sorted by when they were last online in the manage players menu.
- Fixed an issue where banned offline players did not appear before other offline players in the manage players menu.
- Fixed an issue where the scanenderchest command would display unknown for empty ender chest slots instead of minecraft:air.
- Fixed the jumpto command.
- Fixed/Added the usage syntax info for the following commands: generate, generatef, generatejs, generatecallback, generates, generate2d, generatejs2d, generatecallback2d, and generates2d.
- Fixed the itfill and idtfill commands.
- Fixed the generates command.
- Fixed the up command for when it would teleport you above or below the height limit or for when you are above or below the height limit.
- Fixed the top command for when you are above or below the height limit.
- Fixed the save, createempty, load, copy, copytodisk, copytomemory, and savetodisk sub-commands of the structure command.
Version 1.16.0 (The WorldEdit & Enchantability Update)
New WorldEdit Features:
- Added the selection tool item (andexdb:selection_tool), when clicked this will select either the selected pos1 or pos2 position to the block that you are looking at, this is for use with the other WorldEdit commands.
- Added 4 different brush items and 4 different blue brush items.
- Added the generate command to graph a 3d math equation inside of the selected area between the pos1 and pos2 locations.
- Added the generates command which is the same as the generate command except you can also specify the integrity of the generation.
- Added the pos1 and pos2 commands which set your selected pos1 and pos2 locations respectively to the specified position of your current position if no position is specified.
- Added the hpos1 and hpos2 commands which set your selected pos1 and pos2 locations respectively to the location of the block that you are looking at.
- Added the chunk command which sets your selected pos1 and pos2 locations to select the chunk that you are currently in.
- Added the replace command which filled the selected area with the specified block pattern and optionally only replacing a certain block type if a replace block is specified.
- Added the selectmode command, this command sets the selection mode for the item you are holding, this is used to pick where to set pos1/pos2 to if the held item is a selection tool, or if the brush command was used to make the held item into a custom brush then it will be used to determine what block the brush will target.
- Added the stack command, this command stacks the specified number of copies of the selected area on top of the selected area.
- Added the itfill command, this command is the same as the itfill command except that it will autofill some parameters like from, to, radius, and center.
- Added the itdfill command, this command is the same as the idtfill command except that it will autofill some parameters like from, to, radius, and center.
- Added the brush command, this command sets the held item as the specified brush type or unbinds the brush from the held item.
- Added the selectioninfo command to get information about the currently selected area.
- Added the chunkinfo command to get information about the current chunk.
- Added the butcher command, this command kills mobs within the specified radius or a 10 block radius is no radius is specified (if Infinity is specified as the radius it will be an infinite radius) based on the flags set, if no flags are set it will kill experience orbs and items, the n flag will kill NPCs, the a flag will kill animals, the b flag will kill ambient mobs, the i flag will kill items and experience orbs, the g command will kill golems, the r flag will kill armor stands, the w flag will kill underwater mobs, the p flag will kill players, the c flag will kill cloned players, the t flag will allow the killing of name tagged entities, and the e tag will kill everything. The following example will kill animals, peaceful mobs, armor stands, items, and experience orbs within a 30 block radius: butcher -rabi 30
- Added the butcherdespawn command, this command is the same as the butcher command except that it despawns entities instead of killing them.
- Added the replacenear command which replaces all of the specified block type within the specified radius with the specified block type.
- Added the jumpto command, this command teleports you to the block that you are looking at.
Enchanting ANYTHING:
- Added the ability to enchant anything, this is done by first getting an andexdb:smithing_table_enchanted_book item and enchanting it with all of the enchantments that you want on the item you want enchanted, then you type in the following command
findtransformdvindex <identifier of the type of item you want to put the enchantments on to>, then type the command (replace<returnedValue>with the number returned from the findtransformdvindex command)/give @s andexdb:enchantment_transfer_smithing_template <returnedValue>, now just place down a smithing table, get a netherite ingot, then in the smithing table UI combine the enchantment transfer smithing template, the smithing table enchanted book, and the netherite ingot, then take the result, the result should be the item you wanted with the enchantments that you added on to the smithing table enchanted book, this will work with any item type that is in vanilla minecraft, including the secret ones like minecraft:netherreactor, minecraft:item.skull, minecraft:bubble_column, minecraft:glowingobsidian, minecraft:stonecutter, minecraft:client_request_placeholder_block, etc. (It took me adding a total of 1996 different recipe files to make this work lol) - Added the findtransformdvindex command.
- Added the transformresultatdvindex command.
Other Features:
- New type: block pattern, this parameter type allows you to specify a list of comma-separated block types, optionally including block states after the block ids, and optionally including the weight (chance) for the block type to spawn, ex. stone%30,iron_block,oak_slab%90["minecraft:vertical_half"="top"],oak_stairs["weirdo_direction"=1],diamond_block,grass_block
- The manage players menu now has pages, each can display up to 50 players, this is to fix an issue where it would take forever to open the manage players menu if a lot of different players have joined your world/realm/server.
- Players in the manage players menu are now sorted in descending order of when they were last online.
- Added the ignite command, which sets blocks within the specified radius on fire.
- The remexp command now also removes lit tnt and tnt minecarts within the specified radius.
- Added the remexpne command which is the same as the remexp command except that it only removes explosive blocks and not explosive entities.
- Added the align command which teleports you to the center of the block that you are currently at.
- Added the getworldspawnpoint command which tells you the location of the current world spawn point.
- Fixed the map art generator.
- Fixed an issue where critical features like the debug stick did not work.
- The structure command is now functional.
- Fixed the liststructures command.
- The liststructures command now can also show a list of the vanilla structures too. (WARNING: ATTEMPTING TO LOAD SOME OF THE VANILLA STRUCTURES WITH THE structure load COMMAND WILL CAUSE THE GAME TO CRASH!)
- The psend(), pasend(), pbsend(), and pcsend() functions now only send the specified message to the specified player instead of to all players.
- The touch screen interact button for the command runner now says "Open Terminal" instead of "Use Item".
- Removed the touch screen interact button for the debug stick and liquid clipped debug stick as it did not do anything.
- The player debug stick, editor stick, editor stick b, and editor stick c items are now available from in the creative inventory.
- The touch screen interact button for the inventory controller now says "Open Menu" instead of "Use Item".
- The touch screen interact button for the script runner now says "Open Console" instead of "Use Item".
- The touch screen interact button for the main menu stick item now says "Open Main Menu" instead of "Use Item".
- There is now an option to display a timestamp next to players chat messages in the global settings menus.
- Added an experimental anti-spam system, this can be enabled at Main Menu>Moderation>Anti-Spam Settings.
- Added the Moderation section to the Main Menu.
- When banning a player from the manage players menu, the default ban reason message is now the same as when banning a player from the manage bans menu.
- Updated the icons in the Settings section of the main menu.
- Added the andexdb:main_menu item which is the same as the andexdb:selection_menu item.
- Added the andexdb:chargeable_item_6, andexdb:chargeable_item_7, and andexdb:chargeable_item_8 items.
Version 1.15.0
- Updated the add-on to 1.21.0!
Version 1.14.0
- Added a map art generator, instructions on how to use it can be found at https://sites.google.com/view/8craftermods/debug-sticks-add-on/andexdbnbtstructureloader.
- Added an RTP/teleport request system.
- Added a home system.
- Added the following commands msgui, sendui, cmdui, summon. heal, health, maxhealth, minhealth, defaulthealth, liststructures, home, gohome, rtp, kick, disconnect, thru, vthru.
- Added two new aliases for the mainmenu command: menu and mm.
- Added 2 new Main Menu sections: "Map Art Generator" and "Java NBT Structure Loader".
- Added 3 new settings sections: "Home System Settings", "RTP System Settings", and "Notifications Settings".
- The integrity option is now functional for all modes of the idtfill command.
- Added the mngcmds alias for the managecommands command.
- Added the mngplyrs alias for the manageplayers command.
- The new liststructures command lists all saved structures (the ones from structure blocks and the /structure command).
- The new kick command is the same as the vanilla /kick command, except this one can kick multiple players at once.
- The new heal command instantly heals you, or if you specify a target selector, then all matching targets will get instantly healed.
- The new minhealth command sets your health to your minimum health value (usually zero), or if you specify a target selector, then all matching targets will get their health set to their minimum health value.
- The new maxhealth command sets your health to your maximum health value, or if you specify a target selector, then all matching targets will get their health set to their maximum health value.
- The new health command sets your health to the specified health value, or if you specify a target selector, then all matching targets will get their health set to the specified health value.
- The new disconnect command disconnects the specified players by triggering an event which makes them get disconnected with an unexpected packet error.
- The new summon command summons a specified number of mobs, so that you can summon more than one at a time.
- The new thru command lets you teleport to the other side of whatever obstruction that you are looking at, vthru is the same except it can also go into the void, regular thru will give an error instead of teleporting you into the void.
- Added the
item removeanditem slot <slot: int>remove sub-commands. - The
help JаvaScriptfunctionssub-command now has the module names color coded in aqua. - Added a back button to the settings section of the main menu.
- Fixed a bug where the
andexdbHelp:spawnSimulatedPlayer/scriptevent command gave the format for theandexdb:spawnWithNoAI/scriptevent command instead when there was a source entity.
Version 1.13.0
- Fixed an issue where the item enchantment command did not work.
Version 1.12.2
- Fixed an issue where the submit button for the private settings menu said "SaVE" instead of "Save".
Version 1.12.1
- Fixed an issue where many imports were missing from the script files.
- Fixed an issue where the
andexdb:tickingareaentity was missing from the files. - Fixed an issue where the
andexdb:ifill_command_placeholder_blockblock was missing from the files. - Fixed an issue where the chargeable item and non-chargeable item items were missing from the files.
Version 1.12.0
- Updated the add-on to 1.20.80!
- Fixed an issue where the button for the debug sticks settings menu section would not appear, causing the menu to always be open and visible behind all of the other menus.
- Changed the text on the submit buttons for the global settings, personal settings, edit command, and command settings menus to be "Save" instead of "Submit".
- Changed the text on the submit buttons for the run command and script runner menus to be "Run" instead of "Submit".
- Changed the text on the submit button for the create command menu to be "Create Command" instead of "Submit".
- Changed the text on the submit button for the create explosion menu to be "Create" instead of "Submit".
- Changed the text on the submit buttons for the edit item and edit item code menus to be "Done" instead of "Submit".
- Removed the evalBeforeEvents:dataDrivenEntityTriggerEvent because it no longer works because sadly it was removed in the 1.20.80 update.
Version 1.11.0
MASSIVE OVERHAUL UPDATE!
- Added command categories, so you can find commands easier in the manage commands menu. The menu is now split up into different sections for each category, as well as a custom category for the custom commands, and an all category which is the same as the old version of the menu where it has all of the commands there.
- Commands in the manage commands menus are anow sorted in alphabetical order.
- Added command aliases so you can just type in a shorter version of some commands instead of typing out the whole thing!
MASSIVE UPDATES TO THE HELP COMMANDS!:
- The help chatcommands sub-command now just displays a list of all of the available command and there descriptions just like the autocomplete for vanilla commands when you type / in the chat text box. To access the old version of it just type in help chatcommandsb, however the chatcommandsb one will NOT be updated.
- Added a new
help cmd <command: CommandName>subcommand to the help command, to use this just type help cmd and then the name of the command (you can also put the name of one of its aliases too), then it will display info on the command including it's description, syntaxes, and it's aliases, in the exact same style/format as the vanilla /help command does.

Here is an example of what it displays when you type in help cmd scanenderchest.
MASSIVE UPDATES TO THE IFILL COMMANDS!
- Added the ability to generate circles, cylinders, spheres, hollow spheres, domes, semi-spheres, ovoids (3d ovals), and hollow ovoids, skygrids, and inverse skygrids with the ifill commands.
- Added the walls mode to the ifill command which only fills in the walls of an area, similar to the //walls command in world edit in java edition.
- Added the hollow mode to the ifill command which only fills in the sides, so it makes a hollow rectangular prism, silimar to the hollow option in the vanilla /fill command.
- Added the outline mode to the ifill command which only fills in the outline, so it makes a outline of a rectangular prism, silimar to the outline option in the vanilla /fill command (though the vanilla one doesn't actually work anymore for some reason.
- Added the pillars mode to the ifill command which only fills in the pillars on the corners of the shape.
- Added the itfill command which is the same as the ifill command except it spawns in a tickingarea first to load in the chunks around it so the whole shape can generate.
- Added the idtfill command which is the same as the itfill command but it allows you to specify the integrity of the fill, whatever value you put for the integrity will be the chance of each block actually generating, so if you put 100 all of them will generate, but if you put 50 then only half of the blocks will generate, and if you put 0 then none of the blocks will generate.
- Updated the fill and ifill commands so now you can just type in
fillorifillwith no parameters to get a full list of their syntaxes. - Added the ihollow, ithhollow, ioutline, itoutline, ipillars, and itpillars commands.
- The format of the ifill command has been changed from
ifill <from: x y z> <to: x y z> <tileName: Block> <blockStates: block states|JSON|Array> [replaceTileName: Block] [replaceBlockStates: block states|JSON|Array]
toifill <from: x y z> <to: x y z> <tileName: Block> <blockStates: block states> <ifillMode: replace|fill|cube|keep|walls|hollow|outline|pillars> <replaceTileName: Block> [replaceBlockStates: block states] [clearContainers: boolean] ifill <from: x y z> <to: x y z> <tileName: Block> <blockStates: block states> <ifillMode: replace|fill|cube|keep|walls|hollow|outline|pillars> <replaceTileName: Block> [clearContainers: boolean] ifill <from: x y z> <to: x y z> <tileName: Block> <blockStates: block states> [ifillMode: replace|fill|cube|keep|walls|hollow|outline|pillars] [clearContainers: boolean] ifill <from: x y z> <to: x y z> <tileName: Block> <blockStates: block states> [clearContainers: boolean] ifill <from: x y z> <to: x y z> <tileName: Block> <ifillMode: replace|fill|cube|keep|walls|hollow|outline|pillars> <replaceTileName: Block> [replaceBlockStates: block states] [clearContainers: boolean] ifill <from: x y z> <to: x y z> <tileName: Block> <ifillMode: replace|fill|cube|keep|walls|hollow|outline|pillars> <replaceTileName: Block> [clearContainers: boolean] ifill <from: x y z> <to: x y z> <tileName: Block> [ifillMode: replace|fill|cube|keep|walls|hollow|outline|pillars] [clearContainers: boolean] ifill <from: x y z> <to: x y z> <tileName: Block> [clearContainers: boolean] ifill <from: x y z> <to: x y z> <skygridSize: float> <tileName: Block> <blockStates: block states> <mode: skygrid|inverseskygrid> <replaceTileName: Block> [replaceBlockStates: block states] [clearContainers: boolean] ifill <from: x y z> <to: x y z> <skygridSize: float> <tileName: Block> <blockStates: block states> <mode: skygrid|inverseskygrid> <replaceTileName: Block> [clearContainers: boolean] ifill <from: x y z> <to: x y z> <skygridSize: float> <tileName: Block> <blockStates: block states> <mode: skygrid|inverseskygrid> [clearContainers: boolean] ifill <from: x y z> <to: x y z> <skygridSize: float> <tileName: Block> <blockStates: block states> <mode: skygrid|inverseskygrid> [clearContainers: boolean] ifill <from: x y z> <to: x y z> <skygridSize: float> <tileName: Block> <mode: skygrid|inverseskygrid> <replaceTileName: Block> [replaceBlockStates: block states] [clearContainers: boolean] ifill <from: x y z> <to: x y z> <skygridSize: float> <tileName: Block> <mode: skygrid|inverseskygrid> <replaceTileName: Block> [clearContainers: boolean] ifill <from: x y z> <to: x y z> <skygridSize: float> <tileName: Block> <mode: skygrid|inverseskygrid> [clearContainers: boolean] ifill <from: x y z> <to: x y z> <tileName: Block> [clearContainers: boolean] ifill <from: x y z> <to: x y z> clear [clearContainers: boolean] ifill <from: x y z> <to: x y z> drain ifill <center: x y z> <radius: float> <axis: x|y|z|xy|yz|xz|xyz> <tileName: Block> <blockStates: block states> circle [replaceTileName: Block] [replaceBlockStates: block states] [clearContainers: boolean] ifill <center: x y z> <radius: float> <axis: x|y|z|xy|yz|xz|xyz> <tileName: Block> <blockStates: block states> circle [replaceTileName: Block] [clearContainers: boolean] ifill <center: x y z> <radius: float> <axis: x|y|z|xy|yz|xz|xyz> <tileName: Block> <blockStates: block states> circle [clearContainers: boolean] ifill <center: x y z> <radius: float> <axis: x|y|z|xy|yz|xz|xyz> <tileName: Block> circle [replaceTileName: Block] [replaceBlockStates: block states] [clearContainers: boolean] ifill <center: x y z> <radius: float> <axis: x|y|z|xy|yz|xz|xyz> <tileName: Block> circle [replaceTileName: Block] [clearContainers: boolean] ifill <center: x y z> <radius: float> <axis: x|y|z|xy|yz|xz|xyz> <tileName: Block> circle [clearContainers: boolean] ifill <center: x y z> <radius: float> <tileName: Block> <blockStates: block states> <mode: circlex|circley|circlez|circlexy|circleyz|circlexyz|sphere|semisphere> <replaceTileName: Block> [replaceBlockStates: block states] [clearContainers: boolean] ifill <center: x y z> <radius: float> <tileName: Block> <blockStates: block states> <mode: circlex|circley|circlez|circlexy|circleyz|circlexyz|sphere|semisphere> <replaceTileName: Block> [clearContainers: boolean] ifill <center: x y z> <radius: float> <tileName: Block> <blockStates: block states> <mode: circlex|circley|circlez|circlexy|circleyz|circlexyz|sphere|semisphere> [clearContainers: boolean] ifill <center: x y z> <radius: float> <tileName: Block> <mode: circlex|circley|circlez|circlexy|circleyz|circlexyz|sphere|semisphere> <replaceTileName: Block> [replaceBlockStates: block states] [clearContainers: boolean] ifill <center: x y z> <radius: float> <tileName: Block> <mode: circlex|circley|circlez|circlexy|circleyz|circlexyz|sphere|semisphere> <replaceTileName: Block> [clearContainers: boolean] ifill <center: x y z> <radius: float> <tileName: Block> <mode: circlex|circley|circlez|circlexy|circleyz|circlexyz|sphere|semisphere> [clearContainers: boolean] ifill <center: x y z> <radius: float> <thickness: float> <tileName: Block> <blockStates: block states> <mode: hollowsphere|dome> <replaceTileName: Block> [replaceBlockStates: block states] [clearContainers: boolean] ifill <center: x y z> <radius: float> <thickness: float> <tileName: Block> <blockStates: block states> <mode: hollowsphere|dome> <replaceTileName: Block> [clearContainers: boolean] ifill <center: x y z> <radius: float> <thickness: float> <tileName: Block> <blockStates: block states> <mode: hollowsphere|dome> [clearContainers: boolean] ifill <center: x y z> <radius: float> <thickness: float> <tileName: Block> <mode: hollowsphere|dome> <replaceTileName: Block> [replaceBlockStates: block states] [clearContainers: boolean] ifill <center: x y z> <radius: float> <thickness: float> <tileName: Block> <mode: hollowsphere|dome> <replaceTileName: Block> [clearContainers: boolean] ifill <center: x y z> <radius: float> <thickness: float> <tileName: Block> <mode: hollowsphere|dome> [clearContainers: boolean] ifill <center: x y z> <radius: float> <length: float> <tileName: Block> <blockStates: block states> <mode: cylinderx|cylindery|cylinderz|cylinderxy|cylinderyz|cylinderxz|cylinderxyz> <replaceTileName: Block> [replaceBlockStates: block states] [clearContainers: boolean] ifill <center: x y z> <radius: float> <length: float> <tileName: Block> <blockStates: block states> <mode: cylinderx|cylindery|cylinderz|cylinderxy|cylinderyz|cylinderxz|cylinderxyz> <replaceTileName: Block> [clearContainers: boolean] ifill <center: x y z> <radius: float> <length: float> <tileName: Block> <blockStates: block states> <mode: cylinderx|cylindery|cylinderz|cylinderxy|cylinderyz|cylinderxz|cylinderxyz> [clearContainers: boolean] ifill <center: x y z> <radius: float> <length: float> <tileName: Block> <mode: cylinderx|cylindery|cylinderz|cylinderxy|cylinderyz|cylinderxz|cylinderxyz> <replaceTileName: Block> [replaceBlockStates: block states] [clearContainers: boolean] ifill <center: x y z> <radius: float> <length: float> <tileName: Block> <mode: cylinderx|cylindery|cylinderz|cylinderxy|cylinderyz|cylinderxz|cylinderxyz> <replaceTileName: Block> [clearContainers: boolean] ifill <center: x y z> <radius: float> <length: float> <tileName: Block> <mode: cylinderx|cylindery|cylinderz|cylinderxy|cylinderyz|cylinderxz|cylinderxyz> [clearContainers: boolean] ifill <center: x y z> <radius: float> <length: float> <axis: x|y|z|xy|yz|xz|xyz> <tileName: Block> <blockStates: block states> <mode: tunnel|cylinder> [replaceTileName: Block] [replaceBlockStates: block states] [clearContainers: boolean] ifill <center: x y z> <radius: float> <length: float> <axis: x|y|z|xy|yz|xz|xyz> <tileName: Block> <blockStates: block states> <mode: tunnel|cylinder> [replaceTileName: Block] [clearContainers: boolean] ifill <center: x y z> <radius: float> <length: float> <axis: x|y|z|xy|yz|xz|xyz> <tileName: Block> <blockStates: block states> <mode: tunnel|cylinder> [clearContainers: boolean] ifill <center: x y z> <radius: float> <length: float> <axis: x|y|z|xy|yz|xz|xyz> <tileName: Block> <mode: tunnel|cylinder> [replaceTileName: Block] [replaceBlockStates: block states] [clearContainers: boolean] ifill <center: x y z> <radius: float> <length: float> <axis: x|y|z|xy|yz|xz|xyz> <tileName: Block> <mode: tunnel|cylinder> [replaceTileName: Block] [clearContainers: boolean] ifill <center: x y z> <radius: float> <length: float> <axis: x|y|z|xy|yz|xz|xyz> <tileName: Block> <mode: tunnel|cylinder> [clearContainers: boolean] ifill <center: x y z> <radius: x y z> <offset: x y z> <length: float> <tileName: Block> <blockStates: block states> hollowovoid [replaceTileName: Block] [replaceBlockStates: block states] [clearContainers: boolean] ifill <center: x y z> <radius: x y z> <offset: x y z> <length: float> <tileName: Block> <blockStates: block states> hollowovoid [replaceTileName: Block] [clearContainers: boolean] ifill <center: x y z> <radius: x y z> <offset: x y z> <length: float> <tileName: Block> <blockStates: block states> hollowovoid [clearContainers: boolean] ifill <center: x y z> <radius: x y z> <offset: x y z> <length: float> <tileName: Block> hollowovoid [replaceTileName: Block] [replaceBlockStates: block states] [clearContainers: boolean] ifill <center: x y z> <radius: x y z> <offset: x y z> <length: float> <tileName: Block> hollowovoid [replaceTileName: Block] [clearContainers: boolean] ifill <center: x y z> <radius: x y z> <offset: x y z> <length: float> <tileName: Block> hollowovoid [clearContainers: boolean]
OTHER CHANGES!
- Added the givec command which lets you specify an item based on ItemJSON, you can include all the data of the item in this, such as name, lore, stack size, dynamic properties, enchantments, durability, canDestroy, canPlaceOn, lockMode, keepOnDeath, etc. To get the full format of this command as well as some examples just type in
givecwith no parameters. - Added the setitemb command which lets you specify an item to be put in the specified slot based on ItemJSON, you can include all the data of the item in this, such as name, lore, stack size, dynamic properties, enchantments, durability, canDestroy, canPlaceOn, lockMode, keepOnDeath, etc. To get the full format of this command as well as some examples just type in
setitembwith no parameters. - Updated the item command so now you can just type in item with no parameters to get a full list of its syntaxes.
- Added the
item candestroy <blockTypes: string[]>,item canplaceon <blockTypes: string[]>,item json <itemJSON: ItemJSON>anditem jsonb <itemJSON: ItemJSON> sub-commands, type inhelp itemjsonformatto see the full format for the ItemJSON as well as some examples. - The cloneitem, transferitem, shuffleinventorym swapitems, and scanenderchest commands now use target selectors instead of player names.
- Added the drain command to drain liquids in the specified radius, the radius defaults to 10 if not specified.
- Added the createexplosion command to create an explosion. To get the full format of this command just type in
createexplosionwith no parameters. - Made the create explosion section of the main menu functional.
- Removed the block states from the
andexdb:ifill_command_placeholder_blockblock to make it less laggy. - Added a new
andexdb:tickingareaentity to create tickingareas without having to use the /tickingarea command, it has a andexdb:tick_radius property to determine how big the tickingarea is, it ranges from 0-6, values 0 and 1 are just 0, it has 6 aliases:andexdb:tickingarea_0,andexdb:tickingarea_2,andexdb:tickingarea_3,andexdb:tickingarea_4,andexdb:tickingarea_5, andandexdb:tickingarea_6. - Fixed a bug where the explosion protected areas did not work if the explosion had no source and would instead just produce an error in the console.
- Fixed an issue where custom commands set to use JаvaScript Code did not work.
- Fixed a bug where the edit code and edit properties menus in the item editor menu only opened for stackable items when it was actually only supposed to open for non-stackable items.
Version 1.10.2
- Added a new preset block for the ifill commands.
- Added 2 new items
andexdb:chargeable_item_5andandexdb:non_chargeable_item_1. - Added a new srun function, it is exactly the same as system.run so you can use it anywhere you would normally use system.run to make it shorter.
- Added a new invseep command, it is the same as invsee except for the fact that it also displays the dynamic properties of the items.
- Added a new einvseeb command, (it is actually the old version of the einvsee command).
- Added the terminal command to open up the command runner UI.
- Added the managecommands command to open up the manage commands UI.
- Added the manageplayers command to open up the manage players UI.
- Updated the invsee command to include the equipment of the player as well.
- Updated the binvsee command and changed its syntax to
binvsee <dimension: dimension|~> <block: x y z>. - Updated the einvsee and invseeuuidmode commands to include the equipment of the entity as well.
- Added the
item propertyanditem slot <slot: int> propertysub-commands to modify the dynamic properties on non-stackable items. - Changed the mainmenu and settings commands to open up the menu by directly running the function to open up the UI instead of using the /scriptevent command to make it faster.
- Updated the fill command to give command feedback saying how many blocks were filled.
- Updated the ifill command to match blocks where a block state that was not specified was the default value, so if you specify a block type to replace without any block states it will replace all blocks of that type instead of only the ones with the default block states.
- Updated the ifill command to include the time in milliseconds that it took to complete the ifill command in the command feedback.
- Some Minor Bug Fixes.
- Added the iwalls command to fill in the walls of an area.
- Added the igfill command which is the same as the ifill command but it uses a generator function so that is will never trigger a script hang error if the fill takes longer than 10 seconds.
- Added the stopgen command to stop a generator function such as the igfill command.
- Added the ifillb command which is just the old version of the ifill command.
- Added the clear to clear player's inventories of any item type including NBT Editor only ones, however it is currently mostly non-functional and extremely buggy, so it is not recommended to use it in this version.
- Updated the swapinventories command to not always require quotation marks around players names so that you can just use it normally, it will work with or without quotation marks now, however if the players name contains a space then you will need to include the quotation marks.
- Added the swapinventoriesb command which is just the old version of the swapinventories command.
- Added the compressitems command which compresses your entire inventory into 2 chests and then inserts those chests into your inventory.
- Added the compressitemsshulker command which compresses your entire inventory into 2 shulker boxes and then inserts those shulker boxes into your inventory, and yes, this command can put shulker boxes inside of other shulker boxes.
- Added the compressitemscontainer command which compresses your entire inventory into whatever container block type you specify and then inserts those container blocks into your inventory, if the block is not a container block type then it will give you an error saying that it is not a container block, some valid container types include: jukeboxes, chests, barrels, shulker boxes, dyed shulker boxes, beacons, lecterns, trapped chests brewing stands, furnaces, blast furnaces, smokers, hoppers, droppers, dispensers, etc. WARNING!: If you choose brewing stand some of your items may be deleted because it tries to put some of the items in the blaze powder slot and instead of producing an error which would make it try again in another slot, it instead just deletes the items, also if you choose a beacon all of your items will be deleted because even though it has 1 inventory slot, the items in it just get deleted for some reason!
- Added the compressitemscontainerb command which is the same as the compressitemscontainer command but it lets you specify block states too, but it is very buggy.
- Added the scanenderchest command which scans the contents of a player's ender chest and then displays them.
- Added the clearenderchestslot command which clears a slot of a player's ender chest.
- Added the clearenderchest command which clears a player's ender chest.
- Added the filljunk command which a fills player's inventory with junk items.
- Added the fillrandom command which a fills player's inventory with random items.
- Added the fillop command which a fills player's inventory with op items.
- Added the fillillegal command which a fills player's inventory with illegal items.
- Added the chunkban command which fill a shulker box with the item in the specified slot, and then put the shulker box in that slot, and repeats this the specified number of times. WARNING!: This command can actually chunk ban you if you are not careful, that is why this command requires additional tags to be used that the other commands don't require, it is not recommended to use this command!
- Updated the extinguish command to be able to put out all of the different block states of the fire.
- Updated the remexp command to be able to put out all of the different block states of the explosive blocks.
Version 1.9.0
- CRITICAL BUG FIX!
- Fixed a bug where custom chat commands were able to be run by any player if the prefix was set to the default.
- Fixed a bug where the custom commands editor would always have the command type dropdown default to commands even if it is actually set to JаvaScript.
- Added 4 new chat commands: copyitem, extinguish, remexp, swapinventoriesb.
Version 1.8.0
- CRITICAL BUG FIX!
- Fixed a bug where chat commands settings defaulted to not requiring players to have the canUseChatCommands tag, which caused any player to be able to run the chat commands.
- Fixed a bug where the run command button in the main menu did not do anything.
- Added 6 new chat commands: cloneitem, dupeitem, transferitem, swapitems, takeitem, swapinventories.
Version 1.7.0
- Added in the descriptions and formats of some more of the commands, as well as adding in a few of the commands that were missing.
- Added 2 new chat commands: fill and ifill.
- The new fill command is similar to the vanilla /fill command except that it can be used with any block in the game, even nbt editor only ones, so for example if you wanted to replace every Nether Reactor Core in a ~-5~-5~-5~5~5~5 block radius around you with a top half stone slab, you would just do this command right here:
fill ~-5~-5~-5~5~5~5 stone_stairs ["top_half_bit"=true] netherreactor, or if you wanted to replace every top half stone slab in a ~-5~-5~-5~5~5~5 block radius around you with Glowing Obsidian, you would just do this command right here:fill ~-5~-5~-5~5~5~5 glowingobsidian stone_stairs ["top_half_bit"=true]. - The new ifill command is the same as the new fill command except for the fact that it has ABSOLUTELY NO SIZE LIMIT so you could fill an area as large as you wanted without getting an error message saying that there were too many blocks in the area to fill. For example if you tried the following command with fill or /fill instead of ifill then it would give you an error, but with ifill it actually works:
ifill ~-50~-50~-50~50~50~50 stone. - Added a bunch of new JаvaScript functions for launching/shooting entities/projectiles:
export function shootProjectile(entityType, location, velocity, shootOptions = {}, setProjectileComponentPropertiesCallbackFn=(a)=>{}){let entityProjectileComponent = location.dimension.spawnEntity(String(entityType), location).getComponent("projectile"); try{setProjectileComponentPropertiesCallbackFn(entityProjectileComponent)}catch(e){console.error(e, e.stack)}; entityProjectileComponent?.shoot(velocity, shootOptions)};export function shootEntity(entityType, location, velocity, setProjectileComponentPropertiesCallbackFn=(a)=>{}){let entity = location.dimension.spawnEntity(String(entityType), location); try{setProjectileComponentPropertiesCallbackFn(entity)}catch(e){console.error(e, e.stack)} ; entity.applyImpulse(velocity)};export function shootProjectileB(entityType, location, rotation, power, shootOptions = {}, setProjectileComponentPropertiesCallbackFn=(a)=>{}){let entityProjectileComponent = location.dimension.spawnEntity(String(entityType), location).getComponent("projectile"); try{setProjectileComponentPropertiesCallbackFn(entityProjectileComponent)}catch(e){console.error(e, e.stack)}; entityProjectileComponent?.shoot(caretNotationC(Vector.zero, Vector.multiply(Vector.forward, power), rotation), shootOptions)};export function shootEntityB(entityType, location, rotation, power, setProjectileComponentPropertiesCallbackFn=(a)=>{}){let entity = location.dimension.spawnEntity(String(entityType), location); try{setProjectileComponentPropertiesCallbackFn(entity)}catch(e){console.error(e, e.stack)}; entity.applyImpulse(caretNotationC(Vector.zero, Vector.multiply(Vector.forward, power), rotation))};
Version 1.6.0
- MASSIVE OVERHAUL TO COMMANDS! Commands now each have their own settings sections with options such as settings where the person running them need to have op to use them, the minimum required permission level to use the commands (still a work in progress), the required tags to use it (so you can make it so even players who do not have the canUseChatCommands tag can still use it), and whether or not it is enabled. You can also see a list of every command that can be used in the new main menu section for Manage Commands, in there if you click on a command you can see info like the version of the command, the name of it, the format of it, the description, etc. , in there are also options to manage the settings of that specific command, in the main menu section for Manage Commands you can also create your own custom commands, and even set a custom command prefix for them, and so much more.
- Made it so that the add-on now also saves a player's GameMode and Spawn Point in the savedPlayer data so you can now also check that even when that player is offline.
- Fixed an issue where the back button in one of the sections of the restricted areas manager main menu section did not work.
- Fixed a bug with the debug stick where it would not cycle through all of the block states options with certain blocks, such as wool, and it would just cycle back and forth through a few of the options but never the others.
Version 1.5.1
- IMPORTANT CRITICAL HOTFIX UPDATE! Fixed a critical bug in version 1.5.0 where the scripts of the add-on would not start if the add-on was used on a realm because for some reason it doesn't work on realms if it has the
@minecraft/debug-utilitiesmodule being imported, so in this update that was removed to fix the issue.
Version 1.5.0
- Updated add-on To 1.20.70!
- Fixed the eval command.
Version 1.4.0
- MASSIVE INTERNAL SCRIPTING OVERHAUL! This will make it much easier and quicker to add much bigger and better features in the future. The main part of this overhaul is that the Main.js file was split into 6 different files:
Main.js,Main/ban.js,Main/commands.js,Main/coordinates.js,Main/player_save.js,Main/spawn_protection.js, andMain/ui.js. - Started switching the UIs from using /scriptevent to using functions to increase performance and reduce delays between the UIs opening.
- ADDED A NEW SECTION TO THE MAIN MENU: Manage Players! This main menu section shows all players who have ever joined your world/realm/server while you have had version 1.4.0 of this add-on added onto the world, this new UI section allows you to do things like ban players, check their inventories, check when they were last online, check all of their saved player data, such as where their last known location and rotation was, their last gamemode, etc. , and the best part is that this all works even when those players are offline, so you can check them for illegal items even if they have already logged of and are offline.
- ADDED A TON OF NEW SETTINGS OPTIONS, IN BOTH THE GLOBAL AND PERSONAL SETTINGS SECTIONS!
- Added the ability to have a global settings option be different for a specific user, such as the chat rank prefix, by adding duplicates of the options into the personal settings section that override those global settings for that specific user!
- ADDED A NEW SECTION TO THE VANILLA SETTINGS MENU TO SHOW YOU THAT THE ADD-ON IS ACTIVE AND WHAT VERSION YOU HAVE ON! It also has the URLs to the add-on page (this page), and in a future update might also have some tutorials on how to use the add-on in it!
Version 1.3.6
- Removed an extra added comma in some console error messages.
- Fixed an issue with the binvsee command where it would error because of an accidentally left in
.locationproperty on the stringified JSON for the block location and dimension. - Fixed lots of bugs with the item command.
Version 1.3.5
- Fixed an issue where the item command did not work properly.
- Changed the item lore sub-command to parse the inputted text as JSON before evaluating any escape characters in it.
- Added the item lorne sub-command which does not evaluate the escape characters again after the JSON is parsed (which already evaluates JаvaScript escape characters).
- Added the item property sub-command which is currently non-functional.
- Added the item enchantments sub-command which modifies item enchantments (it has many sub-commands including add, addList, remove, set (non-functional), list, get, clear, and test (non-functional)).
Version 1.3.4
- Reverted an accidental reversion in v1.3.3 for the fix for the binvsee command in v1.3.2.
- Fixed an issue with the binvsee command not parsing the coordinate values properly.
- Changed the invseeuuidmode command so that it can invsee into entities now too instead of just only players.
- Added a new tps command (requires ["8Crafter's Entity Scale, NBT, and Behavior Modifier, Bossbar, and Morph Addon"] in order to actually function properly).
Version 1.3.3
- Changed the invseeuuidmode command to reset the formatting codes between every item so that if the selected player has an item in their inventory with an obfuscated name, then it won't cause all the rest of the item data to also be obfuscated as well.
- Fixed an issue where the binvsee command did not work properly.
- Reverted a fix for the einvsee command did not parsing the target selector properly, because it was not broken before, and the fix actually just broke it.
- Changed the binvsee, einvsee, invseeuuidmodle commands so that it also displays the enchantments of the items.
Technical changes (JаvaScript/Script Eval):
- Added a new JаvaScript function (and it can be used in script eval):
function getArrayElementProperty(array, property){array.forEach((v, i, a)=>{array[i]=eval(`v.${property}`)}); return array}
Version 1.3.2
- Changed the invsee command to that if the item is not enchantable is shows the enchantments as
[]instead of asundefined.
Version 1.3.1
- Changed the invsee, binvsee, einvsee, offlineinvsee, and offlineuuidinvee commands to reset the formatting codes between every item so that if the selected player has an item in their inventory with an obfuscated name, then it won't cause all the rest of the item data to also be obfuscated as well.
- Fixed an issue where the binvsee command did not work properly.
- Fixed an issue where the einvsee command did not parse the target selector properly.
Technical changes (JаvaScript/Script Eval):
- Added a new JаvaScript function (and it can be used in script eval):
function arrayModifier(array, callbackfn){array.forEach((v, i, a)=>{array[i]=callbackfn(v, i, a)}); return array} - Made the JаvaScript ban class able to parse the inputted format version instead of always outputting the current format version.
Version 1.3.0
- Fixed a bug where the option to add a list of chat command prefixes for compatibility other add-ons did not work properly.
- Changed the invsee, offlineinvsee, offlineuuidinvsee commands so that it also displays the enchantments of the items.
- Changed the offlineinfo and offlineuuidinfo commands to reset the formatting codes between every property so that if the selected player has an item in their inventory with an obfuscated name, then it won't cause all the rest of the data to also be obfuscated as well.
- Changed the offlineinvsee and offlineuuidinvsee commands to also display the format version that the selected player's data was saved in.
- Replaced the mostly useless settings commands with a new one that just opens up the settings menu.
- Added settings and datapickblock to the list of commands shown in the help chatcommands command.
- Fixed a bug where the run command did not run the very first part of the command.
- Fixed a bug where the tint command couldn't use the target selectors.
- Fixed a bug where the new options to change the prefixes and suffixes for displaying chat ranks and also player names, as well as the custom separator between the player's name and the message, did not work in a majority of situations, especially for the player name prefixes and suffixes and the separator for the player's name and message.
- Added the new custom eval before event dynamic property:
evalBeforeEvents:chatSendBeforeModifiedMessageSend. - Fixed a bug where the UI for editing the restricted areas selected the areas for the type of area below the one that you actually selected.
Version 1.2.2
- Fixed a bug with version 1.2.0 where the add-on did not work on realms.
- Fixed a bug with version 1.2.1 where the add-on did not work at all.
- WARNING!: a change in the UUID of the behavior pack was required to fix the issues so any data stored in the dynamic properties of the add-on on versions 1.2.1 and below WILL NOT BE TRANSFERRED to versions 1.2.2 and above so make sure that you write down any variable that you want to transfer so that you can manually set them again.
Version 1.2.0
- Fixed a bug where the eval chat command did not work.
- Fixed a few bugs where the caret notation (^^^) coordinates were not evaluating properly.
- Added new script functions for calculating / modifying coordinates in the same ways as the /execute command.
- Added the ability for the add-on to save player data so that you can see info like when a certain player was last online and also invsee into a player's inventory even when they are offline.
- Added the offlineinvsee chat command to invsee into the inventory of a player who is offline.
- Added the offlineuuidinvsee chat command to invsee into the inventory of a player who is offline by using their uuid.
- Added the offlineinfo chat command to see data of a player who is offline.
- Added the offlineuuidinfo chat command to see data of a player who is offline by using their uuid.
- Added the personal settings section to the settings menu, currently the only option is timeZone which lets you set the time zone that the time is displayed in when invseeing into an offline player's inventory of using offlineinfo to see the data of an offline player.
Version 1.1.0
- Updated the add-on to 1.20.60!