𝗠𝘂𝗹𝘁𝗶𝗽𝗹𝗮𝘆𝗲𝗿 𝗪𝗮𝘆𝗽𝗼𝗶𝗻𝘁 𝗦𝘆𝘀𝘁𝗲𝗺 [Always latest files]
![Thumbnail: 𝗠𝘂𝗹𝘁𝗶𝗽𝗹𝗮𝘆𝗲𝗿 𝗪𝗮𝘆𝗽𝗼𝗶𝗻𝘁 𝗦𝘆𝘀𝘁𝗲𝗺 [Always latest files]](/uploads/posts/2023-06/multiplayer-waypoint-system-main-cover.webp) Go to files
Go to files
Create waypoints for quick teleportation! Public waypoints system with "my favorites" list! Each player can have and publish up to 999 waypoints! The number of players online is unlimited! Compatible with any addons! Cool camera effects when teleporting!
A Waypoint is a point in the world to which you can always teleport from any distance. You can create a waypoint anywhere in the world, in any dimension. Not only you can have waypoints, all the players who are online in your world can have them too! And the number of such players is unlimited!
With this addon, every new player who joins the world will be given the item "Waypoint Menu". When you use it, a UI window opens where you can create, teleport, delete, rename, and many more different actions with waypoints.
🧩 Fully compatible with almost all addons! Without any player.json or anything else!
🌍 Waypoints publishing system! Each player can publish their waypoints for a specific period of time, and any player in your world can visit them! With excellent moderation tools, "my favorites" list, and more! All limits, cooldowns, and restrictions are customizable on a per-dimension level!
⛔ Blacklist for public waypoints! You can view who has visited your published waypoints and when, and you can blacklist specific players to prevent them from visiting your waypoints! The blacklist is separate for each waypoint!
💵 Economic system! You can enable fees (spending XP levels or scoreboard) for teleportation, creation, or updating of waypoint coordinates! They depend on the distance to the waypoint, dimension, and many other factors! Everything is configurable!
📱 User-friendly UI and beautiful animations! The menu is well-designed and categorized, with each button having its own icon. Camera animation during teleportation to a waypoint, which has 2 variations depending on the distance to the waypoint!
🚓 Moderation system! The player-administrator has full access to the waypoints of all players, as well as many other useful tools! Additionally, a published waypoint has a "report" button, so players can notify the admin about a suspicious waypoint!
🛠️ Extremely extensive addon configuration options! Maximum number of waypoints per player, duration of countdowns during teleportation, creation, or updating of waypoints, camera effect toggling, and many more! Each option can be individually configured for each dimension!
👌 Ensuring fair gameplay! To teleport, create, or update a waypoint, the player must remain still and connected to the world. This prevents cheating in PvP and other scenarios!
🎨 Each player can customize their preferences! Customize your experience with options like changing the UI language, disabling sounds, adjusting text fonts, and more!
⚡ Very good performance! Capable of handling hundreds of online players and thousands of waypoints!
🚨 Handling all edge cases! Rest assured that no fool or cheater will break this addon!
🌐 Translated into many languages! You can even translate it into your own language!
💎 Reliable stuff! Each version is thoroughly tested, and any bugs are eliminated with a 95% probability before publication! However, if you still manage to find a bug, feel free to report it in the comments!
【📦Download 𝗕𝗣】- required for the addon to work
【📦Download 𝗥𝗣】- required for the addon to work
Download BP and RP and put these 2 packs into your Minecraft world!
- Enable these experiments: "Beta APIs"
- Only release Minecraft versions are supported. (not beta or preview)
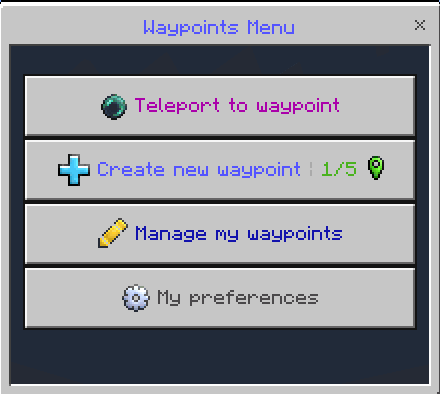
After entering the world with this addon, you will have a new item in your inventory: "Waypoint Menu"
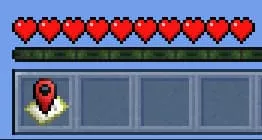
Use it (Short tap on a block or long tap or right mouse button) to open the menu:
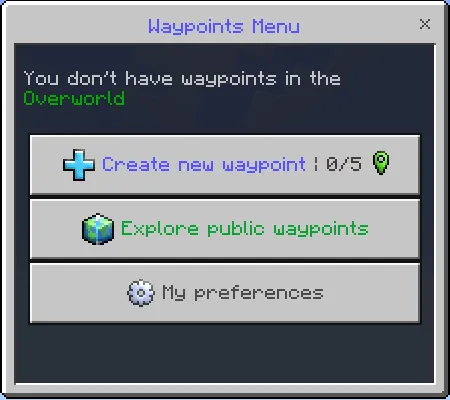
As we see we don't have any waypoints yet, let's create our first waypoint!
Note: You can create, teleport to and manage only those waypoints that are in your current dimension. For example, to create or teleport to a waypoint in Nether, you need to be in Nether.
The button also displays which dimension we are in (green waypoint = overworld) and how many waypoints we have (0/5)
As we see we are now in Overworld, so the waypoint will be created in Overworld
Click the "Create new waypoint" button
Then enter a name for your waypoint. Or you can leave the default name:
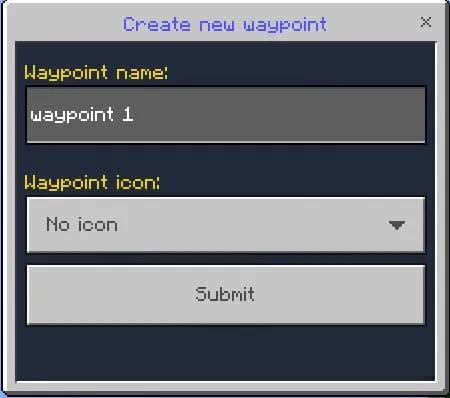
The length of the name is limited to 100 characters, and it also supports paragraph colors (e.g., §4)
Also, here you can choose an icon for your waypoint:
![]()
Finally, click "Submit" to create a waypoint in the dimension where you are.
And the countdown will start, during which you have to be immovable:
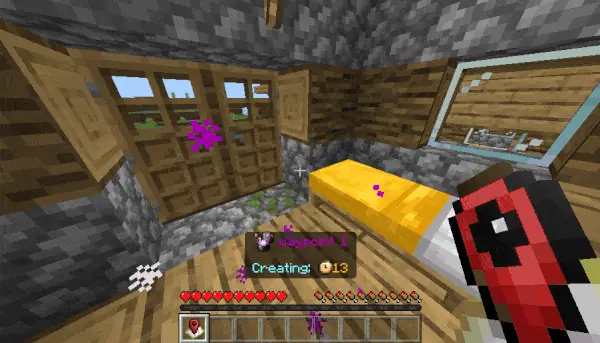
Particles also spawn during the countdown, and they can be seen by other players:
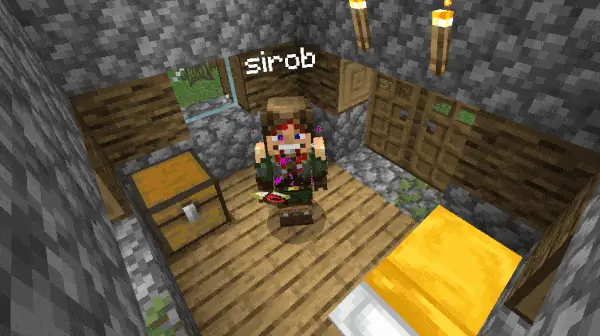
What happens if I start moving? The waypoint creation will be canceled, and you will have to recreate the waypoint from the menu.
Does countdown seem too long? Don't worry, this addon is fully customizable, we'll look at the settings in the last section.
A new waypoint will be created when the countdown is over! Open the menu again:
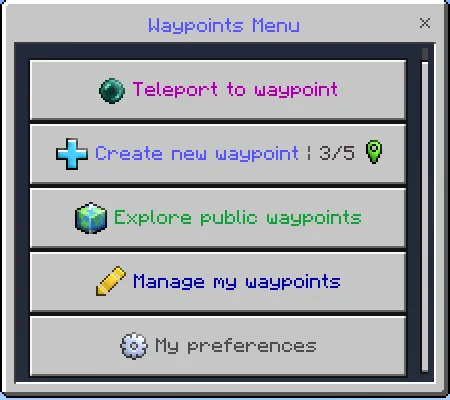
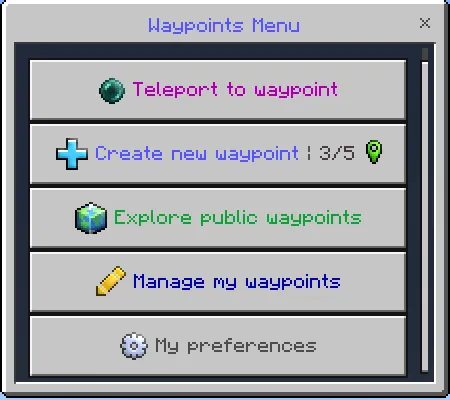
Now we see 2 new buttons: "Teleport to waypoint" and "Manage my waypoints"
Let's teleport to our new waypoint! Press the "Teleport to waypoint" button
Here you will see a list of your waypoints:
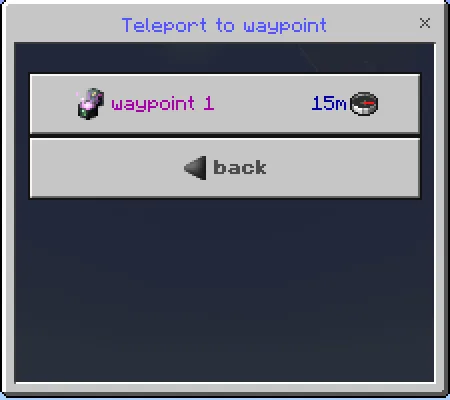
The distance and direction to each waypoint is written next to its name.
Distance in meters (1m = 1 block)
And the direction of a compass in which direction the waypoint is from you
Click on the waypoint you want to teleport to
After selecting a waypoint, the countdown will start, at the end of which you will be teleported to the waypoint:
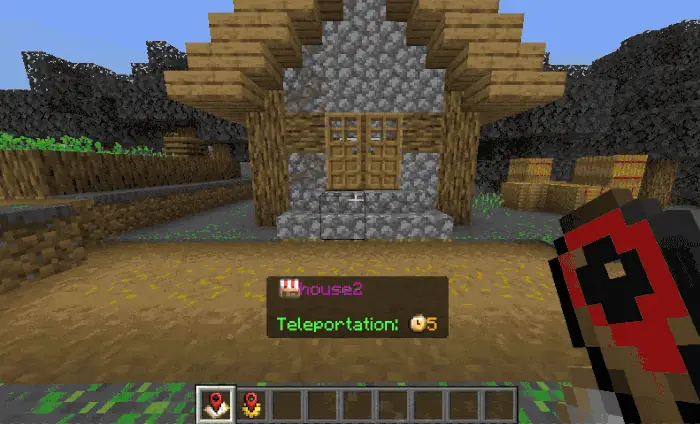
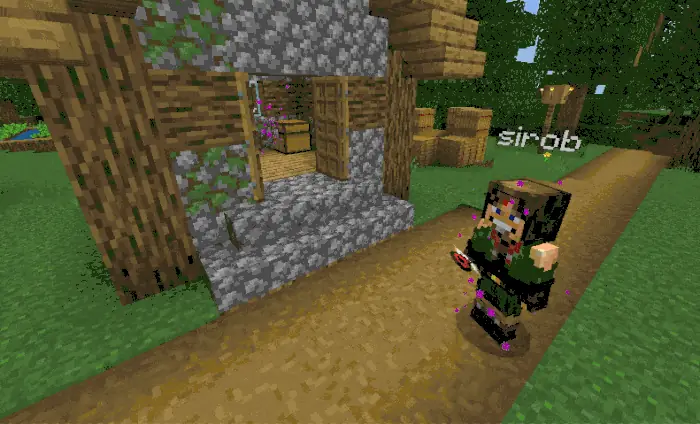
During the countdown, particles are spawn near you and near the place where you are teleported to. And at the end of the countdown, a beautiful teleportation animation appears.
Third-person view:
If the distance to the waypoint is more than 150 blocks, the teleport animation looks different:
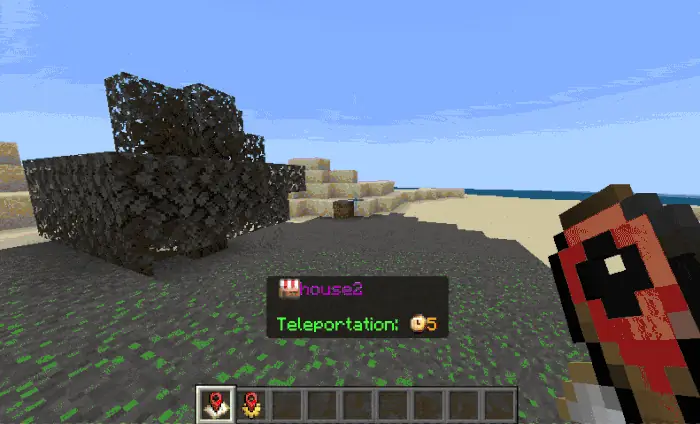
Don't like particles or camera effects? You can turn them off in the settings, too, which we'll cover in the last section.
In the menu, click "Manage my waypoints":
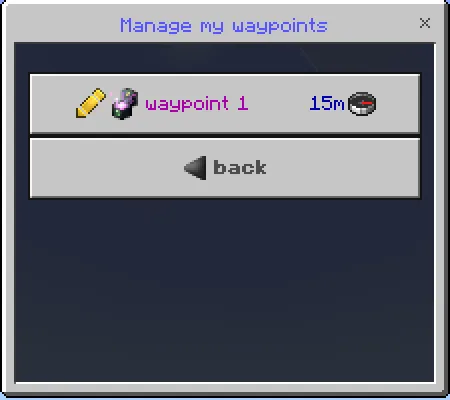
Then select the waypoint you want to change:
And here you can rename, update coordinates and delete the selected waypoint:
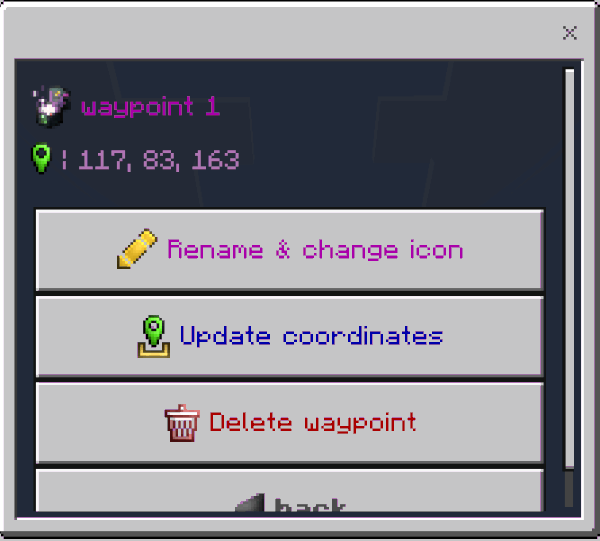
The "Rename & change icon" option allows you to rename the selected waypoint
The "Update coordinates" option will set the coordinates of the selected waypoint to where you are now. There is a countdown like when you create a waypoint.
The "Delete waypoint" option allows you to delete the selected waypoint.
Also near the dimension icon you can see the coordinates of the waypoint.
In the menu, click "Explore public waypoints", and this window will open:
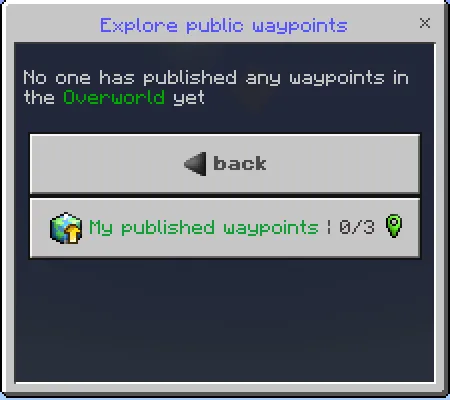
As we can see, no one has published a waypoint yet, so let's do it!
Click on "My published waypoints" and then on "Publish new waypoint". You will see a list of your waypoints that you can publish:
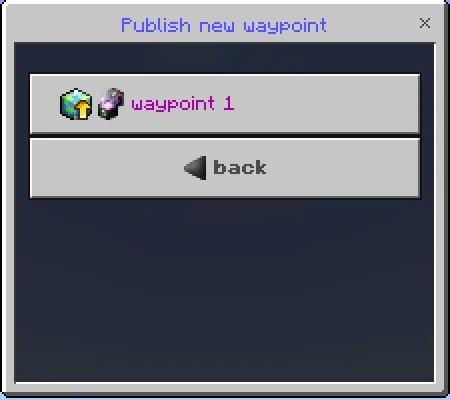
Click on the waypoint you want to publish. Now you can specify the duration for which it will be published. By default, the maximum duration available for this dimension is entered. (The administrator can change the maximum duration in the addon config)
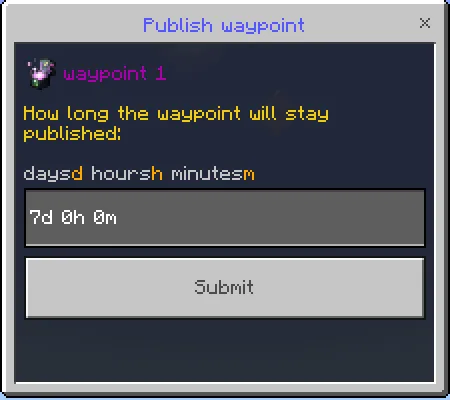
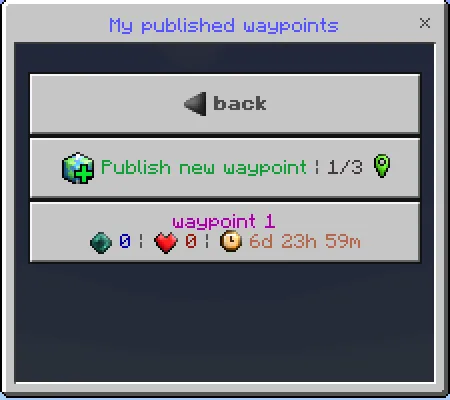
Click on "Submit", and you have published your first waypoint! Now you see a list of your published waypoints. Under the name of each waypoint, its statistics are displayed: the number of visits, how many players have added it to favorites, and the remaining expiration time.
In the menu, click "Explore public waypoints", and this window will open:
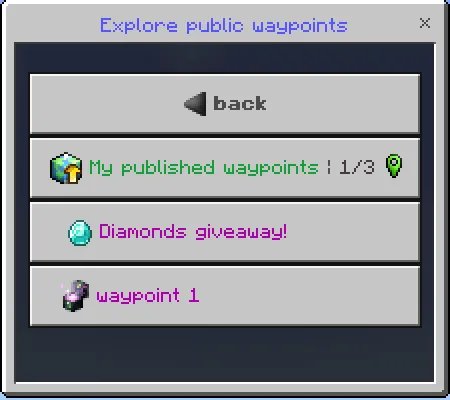
You see a list of public waypoints available in the current dimension. Click on the waypoint you would like to view.
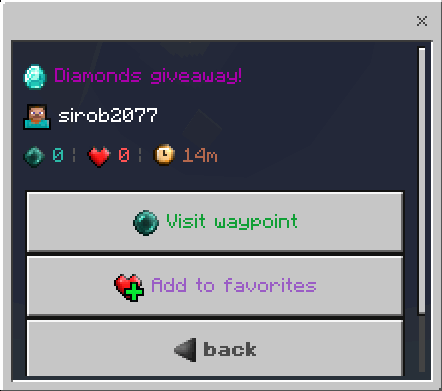
And here you can see the nickname of the waypoint owner and its statistics: the number of visits, how many players have added it to favorites, and the remaining expiration time.
To visit a waypoint, click on the corresponding button. Additionally, you can add the waypoint to your favorites to make it easier to find and teleport to. When you have waypoints in your favorites, you will see a "My favorites" button in the "Explore public waypoints" menu:
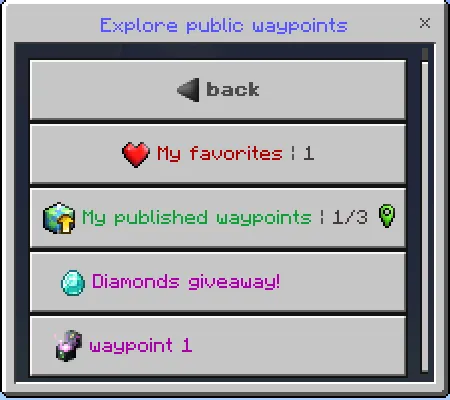
In the menu, click "Explore public waypoints", then click on "My published waypoints". Select the waypoint for which you want to add a visitor to the blacklist:
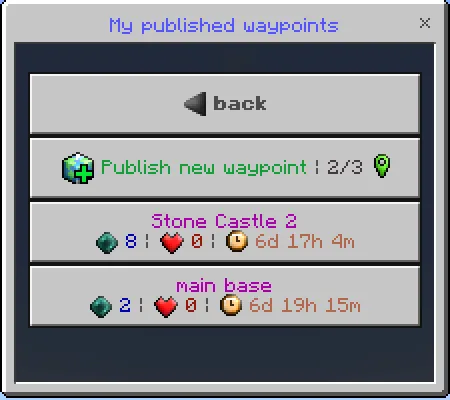
Then click on the "Manage visitors" button to see who and when visited this published waypoint:
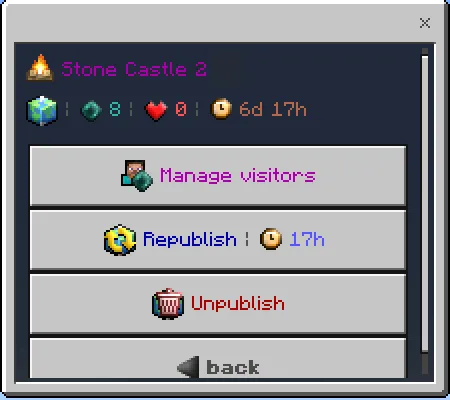
Now select the visitor you want to add to the blacklist:
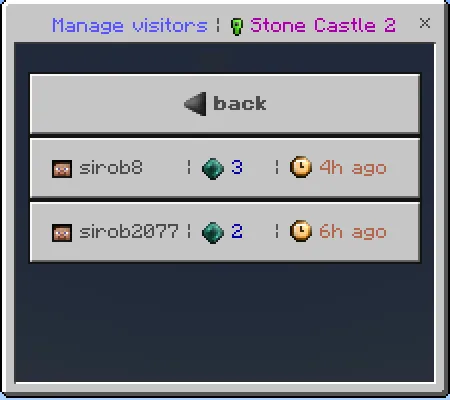
Also, in addition to the visitor's nickname, this list shows how many times the visitor has visited this waypoint, and how long ago the last visit was.
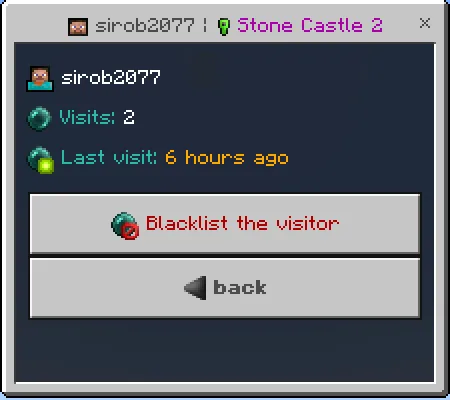
Now, finally, you see the button for adding to the blacklist. Click on it.
The final step is to briefly describe the reason why you are adding this player to the blacklist. The player who is added to the blacklist will see this reason when they attempt to visit this waypoint.
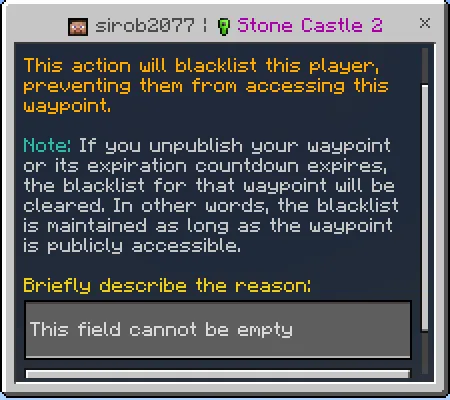
Lastly, just click "Submit," and you can be sure this player won't visit your waypoint anymore!
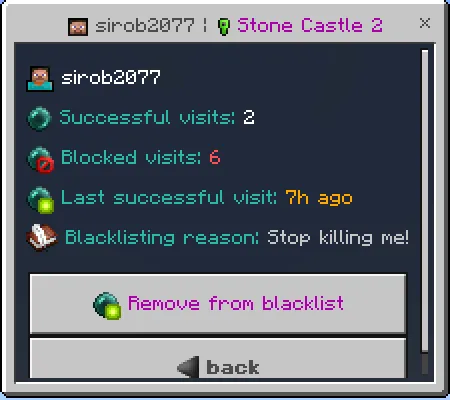
For players who have been blacklisted, you will also see the number of "blocked visits" - this indicates how many times the player attempted to visit your waypoint, but the visit was blocked by the blacklist:
In the menu, click "Explore public waypoints". Then select the waypoint you want to report:
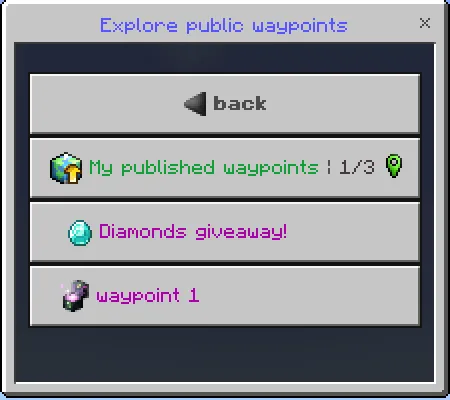
Scroll down a bit, and you will see the "Report" button. Click on it:
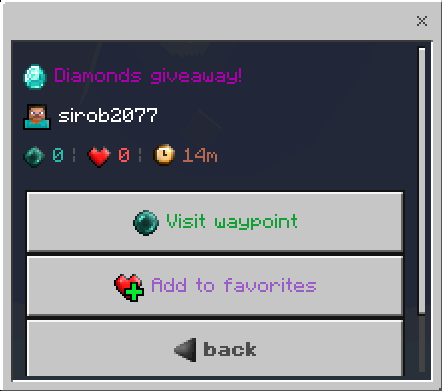
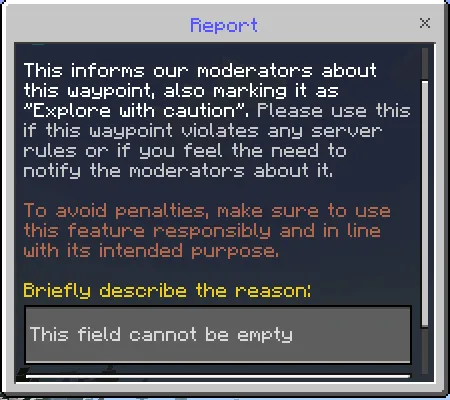
The final step is to briefly describe the reason why you are reporting this waypoint. Waypoint admins (those who have access to the "Waypoints Control Panel" item) will see it. Then click "Submit," and the report will be sent!
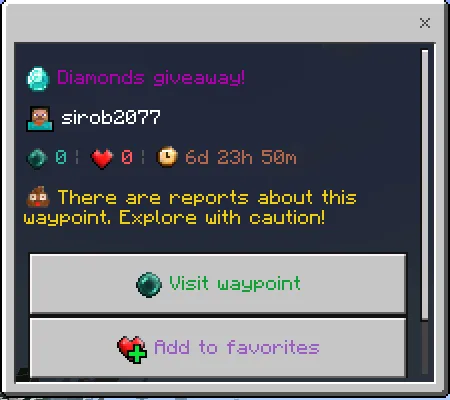
Now, everyone who views this waypoint will see a warning:
Also, in the list of public waypoints, it will have a poop icon and a gray name:
![]()
In the control panel menu, click "View waypoints reports". Then select the report you want to view:
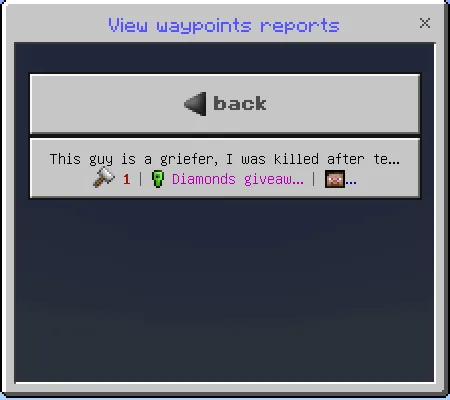
Also, in this list, under each report, it displays the number of reports on this waypoint, its name, and the nickname of its owner.
When you click on a report, you will see detailed information about the waypoint, such as the owner's full nickname, the number of visits, how many players have added it to their favorites, and so on. Additionally, in the "Reports" section, you can read all reports about this waypoint (since multiple players may report the same waypoint).
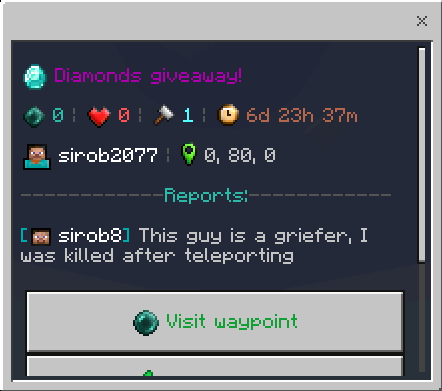
Also, this menu contains these buttons:
Visit waypoint — allows you to visit the reported waypoint so that you can verify if the report is indeed justified.
Delete reports — This will delete all reports for this waypoint, and remove the "Explore with caution" label and poop icon. Use it if you're sure this waypoint complies with server rules and the reports were baseless.
Punish the owner — Contains various methods of punishment, such as "Unpublish waypoint," "Delete waypoint," and so on. Use them last, as any of these actions will also remove all reports about this waypoint, and you will no longer see it in the reports list!
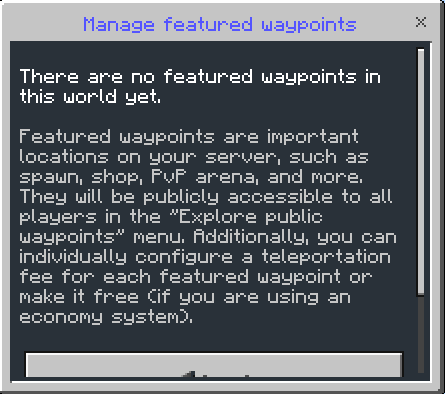
In the control panel menu, click "Manage featured waypoints". A window will open:
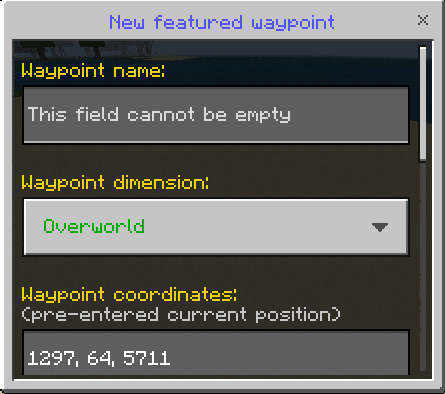
Then click on "New featured waypoint", and a waypoint creation form will open. Now you can set the name, icon, coordinates, dimension, etc. Most of the parameters are automatically filled or have default values, so you don't have to fill them all:
In the menu, click "My preferences". And here you can customize your player preferences (these are not addon settings):
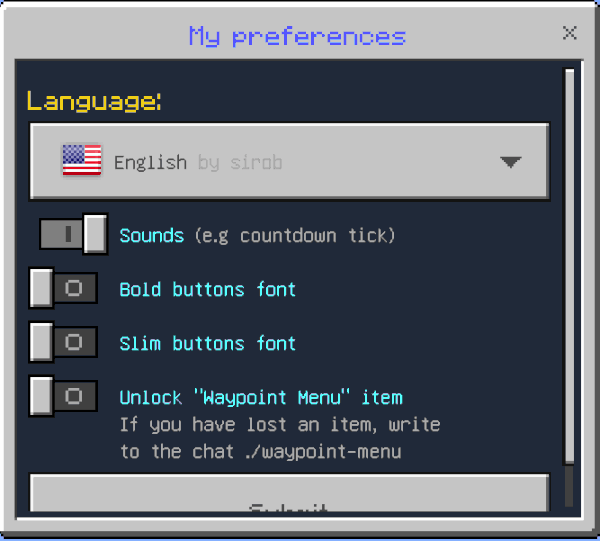
Most of the settings are self-explanatory, we will focus on the "Unlock waypoint menu item".
The "Waypoint Menu" item that you are given when you first enter the world is locked by default. What does this mean? It means that you cannot get rid of the item in any way. Even when you die, it doesn't drop from you. But if you want for example to put this item in the chest, you can activate this option.
But if you lose this item, don't worry, just type ./waypoint-menu into the chat, and you will get a new item.
First, enter /function sirobwaypoints_admin into the chat to become a waypoints' admin:

There can be any number of players as waypoints admins
To revoke the waypoint admin rights, just enter the above command again
After that you will become a waypoints admin and in the chat will write the following:

You also get a new item: "Waypoint Control Panel":
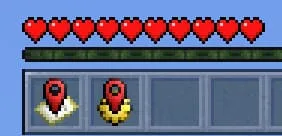
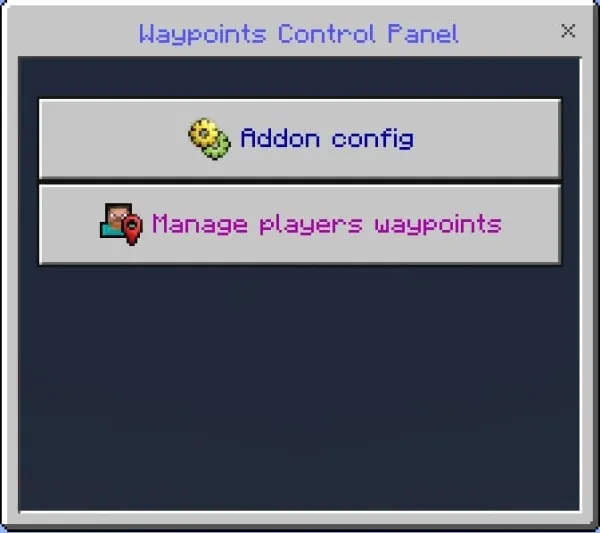
Use it to open the control panel UI:
Click the "Addon config" button and the addon settings window will open:
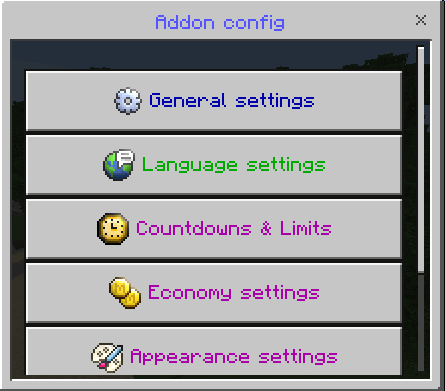
Here is the documentation for all available settings:
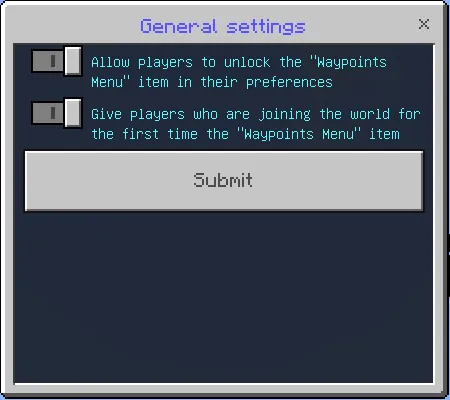
Contains the basic settings of the addon.
Description of the options:
- 🔧"Allow players to unlock the "Waypoints Menu" item in their preferences" - If enabled, a "unlock waypoint menu item" toggle will be displayed in players' preferences, which will unlock the waypoint menu item for the player. If the player activates it, they will be able to drop the waypoint menu item, put it in a chest, etc., and it will also drop upon their death.
- 🔧"Give players who are joining the world for the first time the "Waypoints Menu" item" - If enabled, every new player who joins the world for the first time will receive a waypoints menu item. If the player has visited the world before, they will not receive the item.
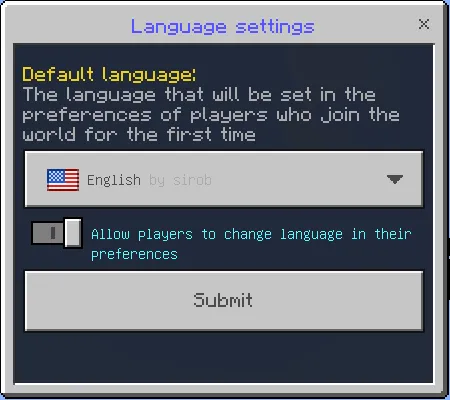
Contains language-related settings.
Description of the options:
- 📃"Default language" - The language that will be set in the preferences of players who join the world for the first time
- 🔧"Allow players to change language in their preferences" - If disabled, players will not be able to change the language of their waypoints menu in their preferences.
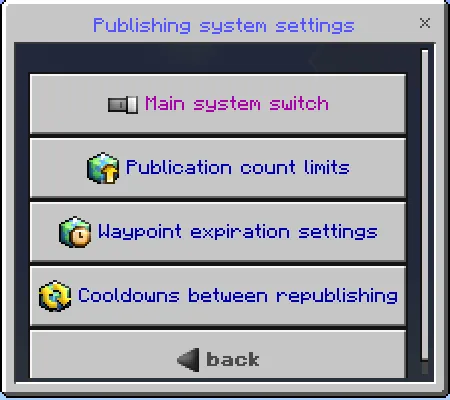
Here you can configure the waypoint publishing system, its limits and restrictions, or completely disable it for a specific dimension.
This menu contains the following submenus:
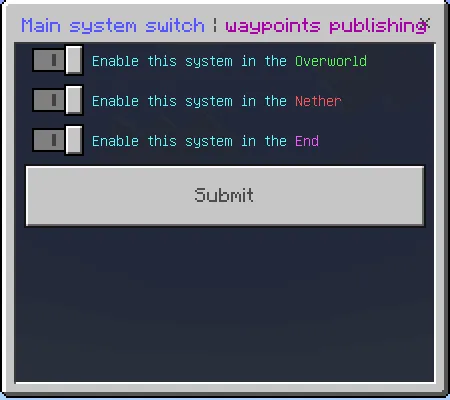
Here you can enable or disable the publishing system for a specific dimension. If it is disabled, the "Explore public waypoints" button will not be displayed in the "Waypoints Menu".
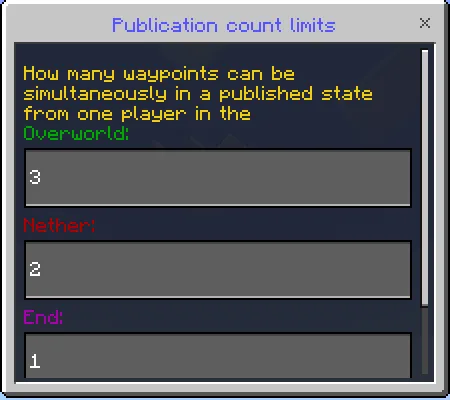
Here you can configure how many waypoints can be simultaneously in a published state from one player in a specific dimension.
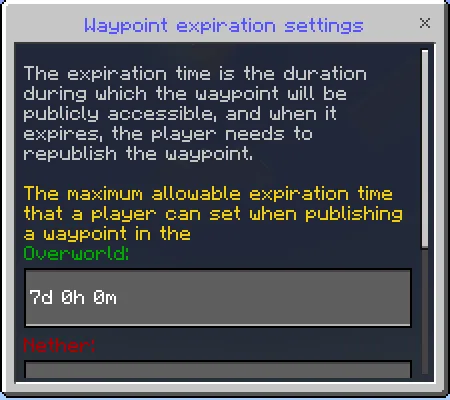
Here you can configure the maximum allowable expiration time that a player can set when publishing a waypoint in a specific dimension.
The expiration time is the duration during which the waypoint will be publicly accessible, and when it expires, the player needs to republish the waypoint.
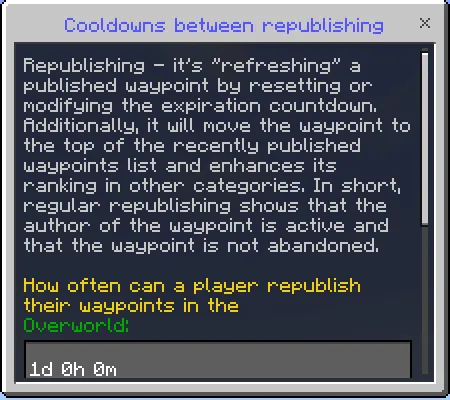
Here you can configure how often can a player republish their waypoints in a specific dimension.
Republishing - it's "refreshing" a published waypoint by resetting or modifying the expiration countdown. Additionally, it will move the waypoint to the top of the recently published waypoints list and enhances its ranking in other categories. In short, regular republishing shows that the author of the waypoint is active and that the waypoint is not abandoned.
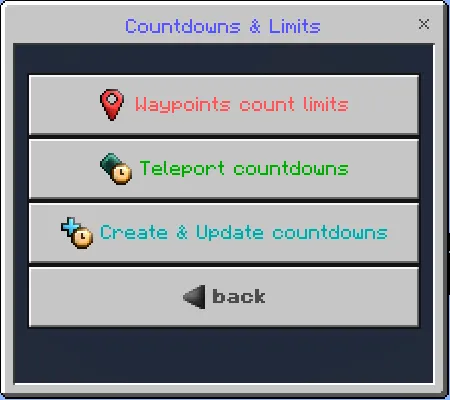
Contains settings that control the limit of waypoints a player can have in a specific dimension, as well as the duration of countdowns during teleportation or when creating waypoints.
This menu contains the following submenus:
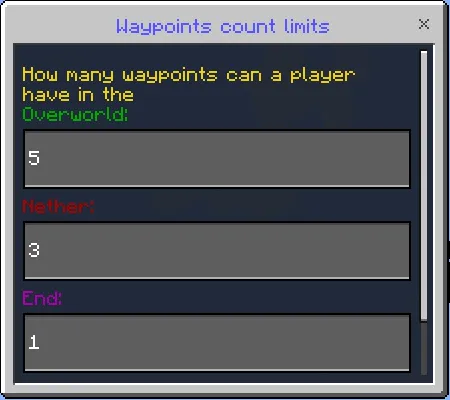
Controls how many waypoints each player can have in a specific dimension. The range of values is from 0 to 999, and if it's set to 0, the player won't be able to use waypoints in that dimension.
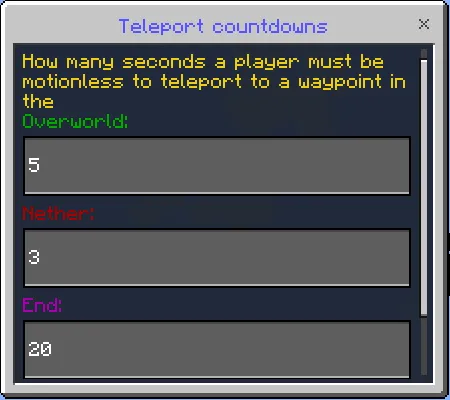
Controls how many seconds a player must remain still to teleport to a waypoint in a specific dimension. The range of values is from 0 to 999, and if it's set to 0, the teleportation will be instant, without particles or any camera effects.
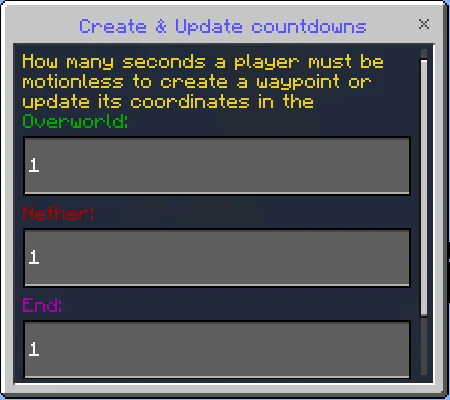
Controls how many seconds a player must remain still to create or update a waypoint's coordinates in a specific dimension. The range of values is from 0 to 999, and if it's set to 0, the creation or update of a waypoint will be instant, without particles or any camera effects.
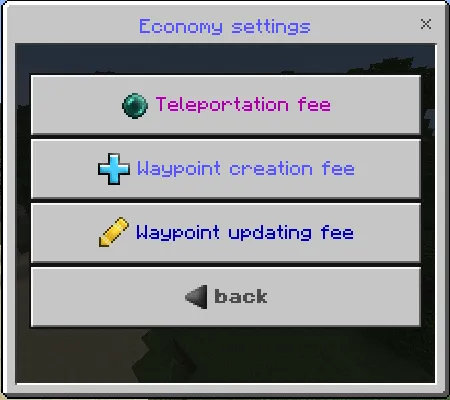
Here you can configure fees that will be charged to players for certain actions with waypoints. Each fee is configured separately for each dimension. By default, all of them are turned off (using the addon for players is free).
Actions for which you can enable fees:
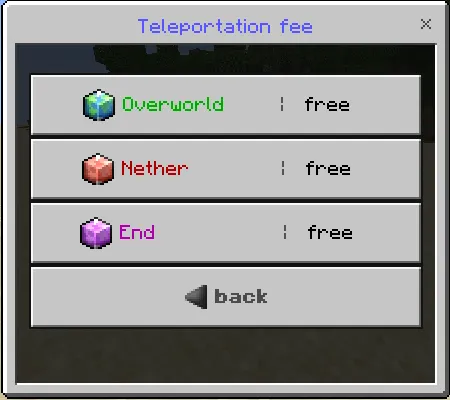
Choose the dimension for which you want to configure the fee. Also, on the right side, icons of active fee types in this dimension are displayed (or free if there is none). After you have chosen a dimension, you will see a list of available fee types for this action in this dimension:
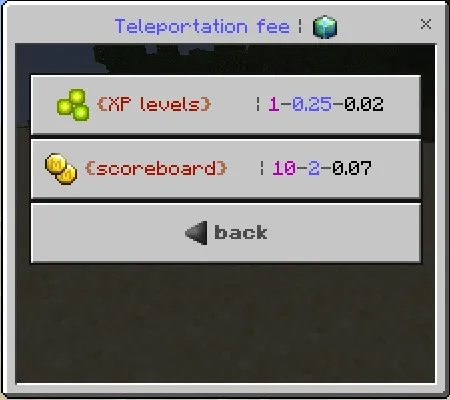
Now choose the fee type you want to enable. The fee type determines what the player will pay for this action (XP or scoreboard). Also, pay attention to the color. If the name of the fee type is red, it is turned off, and if it is green, it is turned on. On the right side, a preview of the costs is displayed (you will learn about them below).
Available fee types:
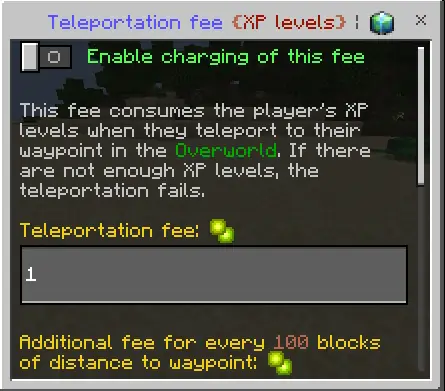
This fee consumes the player's XP levels when they teleport to their waypoint in the selected dimension. If there are not enough XP levels, the teleportation fails.
List of variables for this fee:
- Teleportation fee - Determines the initial cost, which is also the minimum cost under ideal conditions.
- Additional fee for every 100 blocks of distance to waypoint - Adds this value to the initial cost for every 100 blocks of distance from the player to the waypoint to which they are teleporting.
- Additional fee for every 100 blocks of distance from the player to the center of the current dimension - Adds this value to the initial cost for every 100 blocks of distance from the player to the center of the dimension.
- Position of the dimension center - The coordinates that will be considered the center of the dimension, and from which additional fees will be calculated from the center of the dimension. By default, these are 000 coordinates, but if this dimension has a "spawn" or "hub", enter its coordinates.
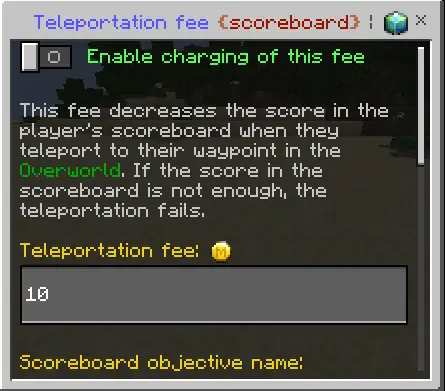
This fee decreases the score in the player's scoreboard when they teleport to their waypoint in the selected dimension. If the score in the scoreboard is not enough, the teleportation fails.
List of variables for this fee:
- Teleportation fee - Determines the initial cost, which is also the minimum cost under ideal conditions.
- Scoreboard objective name - Enter the name of the objective from which the fee will be deducted from the player. This is not the "display name," but rather the name you used in the command "/scoreboard objectives add <name>". Also, the player must be present in the objective (have any score), otherwise this fee will be ignored for this player.
- Additional fee for every 100 blocks of distance to waypoint - Adds this value to the initial cost for every 100 blocks of distance from the player to the waypoint to which they are teleporting.
- Additional fee for every 100 blocks of distance from the player to the center of the current dimension - Adds this value to the initial cost for every 100 blocks of distance from the player to the center of the dimension.
- Position of the dimension center - The coordinates that will be considered the center of the dimension, and from which additional fees will be calculated from the center of the dimension. By default, these are 000 coordinates, but if this dimension has a "spawn" or "hub", enter its coordinates.
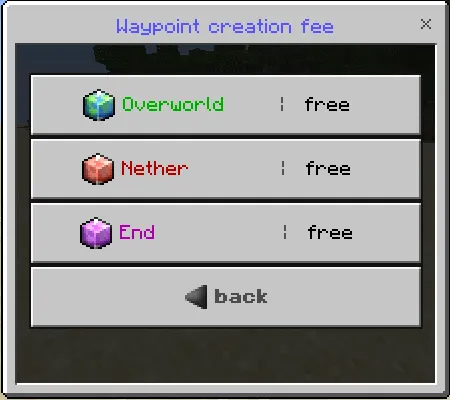
Choose the dimension for which you want to configure the fee. Also, on the right side, icons of active fee types in this dimension are displayed (or free if there is none). After you have chosen a dimension, you will see a list of available fee types for this action in this dimension:
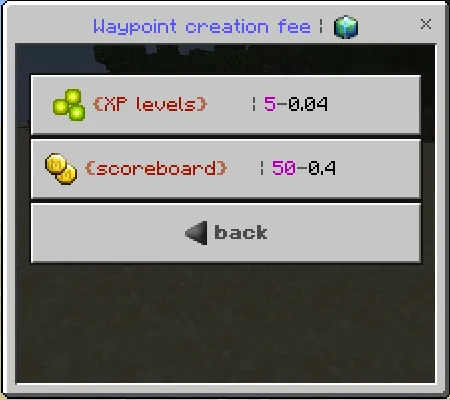
Now choose the fee type you want to enable. The fee type determines what the player will pay for this action (XP or scoreboard). Also, pay attention to the color. If the name of the fee type is red, it is turned off, and if it is green, it is turned on. On the right side, a preview of the costs is displayed (you will learn about them below).
Available fee types:
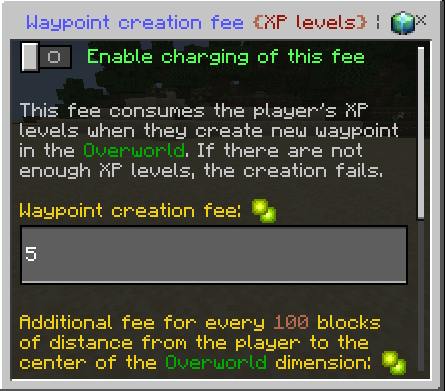
This fee consumes the player's XP levels when they create new waypoint in the selected dimension. If there are not enough XP levels, the creation fails.
List of variables for this fee:
- Waypoint creation fee - Determines the initial cost, which is also the minimum cost under ideal conditions.
- Additional fee for every 100 blocks of distance from the player to the center of the current dimension - Adds this value to the initial cost for every 100 blocks of distance from the player to the center of the dimension.
- Position of the dimension center - The coordinates that will be considered the center of the dimension, and from which additional fees will be calculated from the center of the dimension. By default, these are 000 coordinates, but if this dimension has a "spawn" or "hub", enter its coordinates.
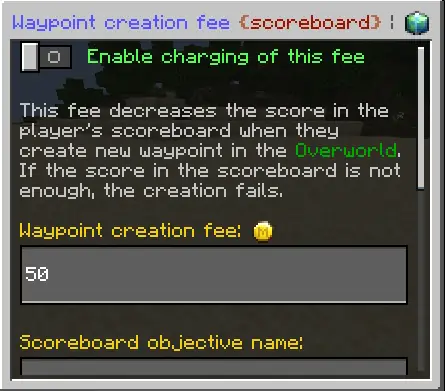
This fee decreases the score in the player's scoreboard when they create new waypoint in the selected dimension. If the score in the scoreboard is not enough, the creation fails.
List of variables for this fee:
- Waypoint creation fee - Determines the initial cost, which is also the minimum cost under ideal conditions.
- Scoreboard objective name - Enter the name of the objective from which the fee will be deducted from the player. This is not the "display name," but rather the name you used in the command "/scoreboard objectives add <name>". Also, the player must be present in the objective (have any score), otherwise this fee will be ignored for this player.
- Additional fee for every 100 blocks of distance from the player to the center of the current dimension - Adds this value to the initial cost for every 100 blocks of distance from the player to the center of the dimension.
- Position of the dimension center - The coordinates that will be considered the center of the dimension, and from which additional fees will be calculated from the center of the dimension. By default, these are 000 coordinates, but if this dimension has a "spawn" or "hub", enter its coordinates.
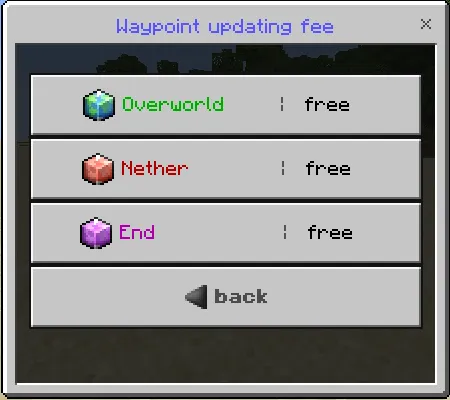
Choose the dimension for which you want to configure the fee. Also, on the right side, icons of active fee types in this dimension are displayed (or free if there is none). After you have chosen a dimension, you will see a list of available fee types for this action in this dimension:
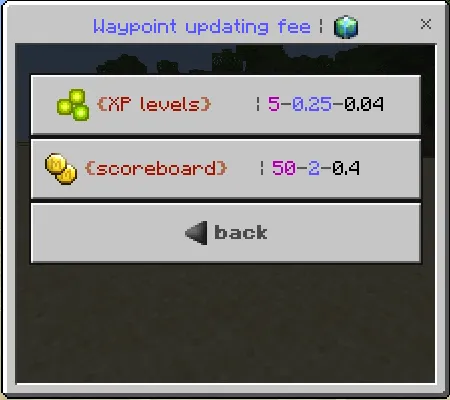
Now choose the fee type you want to enable. The fee type determines what the player will pay for this action (XP or scoreboard). Also, pay attention to the color. If the name of the fee type is red, it is turned off, and if it is green, it is turned on. On the right side, a preview of the costs is displayed (you will learn about them below).
Available fee types:
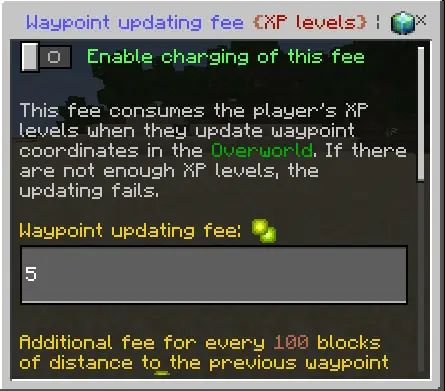
This fee consumes the player's XP levels when they update waypoint coordinates in the selected dimension. If there are not enough XP levels, the updating fails.
List of variables for this fee:
- Waypoint updating fee - Determines the initial cost, which is also the minimum cost under ideal conditions.
- Additional fee for every 100 blocks of distance to the previous waypoint coordinates - Adds this value to the initial fee for every 100 blocks of distance from the player to the previous waypoint coordinates.
- Additional fee for every 100 blocks of distance from the player to the center of the current dimension - Adds this value to the initial cost for every 100 blocks of distance from the player to the center of the dimension.
- Position of the dimension center - The coordinates that will be considered the center of the dimension, and from which additional fees will be calculated from the center of the dimension. By default, these are 000 coordinates, but if this dimension has a "spawn" or "hub", enter its coordinates.
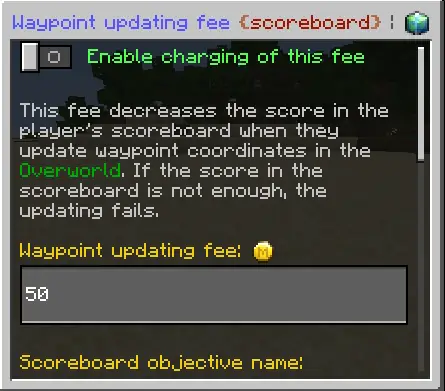
This fee decreases the score in the player's scoreboard when they update waypoint coordinates in the selected dimension. If the score in the scoreboard is not enough, the updating fails.
List of variables for this fee:
- Waypoint updating fee - Determines the initial cost, which is also the minimum cost under ideal conditions.
- Scoreboard objective name - Enter the name of the objective from which the fee will be deducted from the player. This is not the "display name," but rather the name you used in the command "/scoreboard objectives add <name>". Also, the player must be present in the objective (have any score), otherwise this fee will be ignored for this player.
- Additional fee for every 100 blocks of distance to the previous waypoint coordinates - Adds this value to the initial fee for every 100 blocks of distance from the player to the previous waypoint coordinates.
- Additional fee for every 100 blocks of distance from the player to the center of the current dimension - Adds this value to the initial cost for every 100 blocks of distance from the player to the center of the dimension.
- Position of the dimension center - The coordinates that will be considered the center of the dimension, and from which additional fees will be calculated from the center of the dimension. By default, these are 000 coordinates, but if this dimension has a "spawn" or "hub", enter its coordinates.
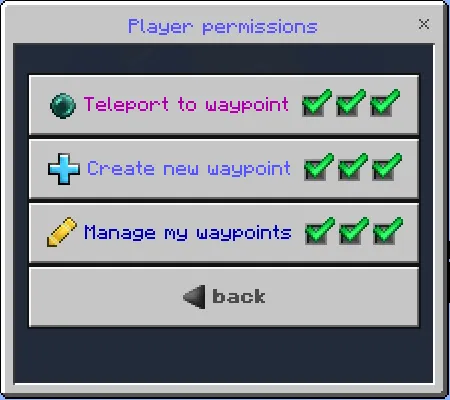
Controls the permissions that a players will have in a specific dimension. By permission, I mean a specific button in the "Waypoints Menu" for players.
The checkboxes in each button indicate the permission state for that button in each dimension. The first checkbox in the row is for the overworld, the second for the nether, and the third for the end.
To change permissions for a specific button, simply click on it, and the permission menu for that button will open:
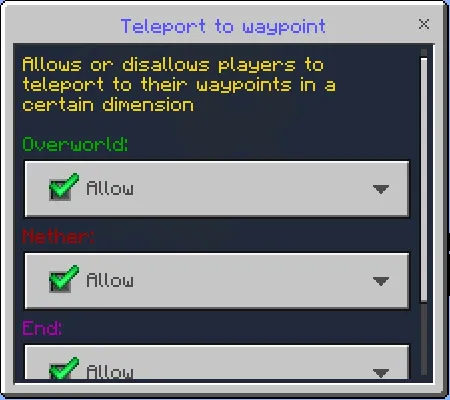
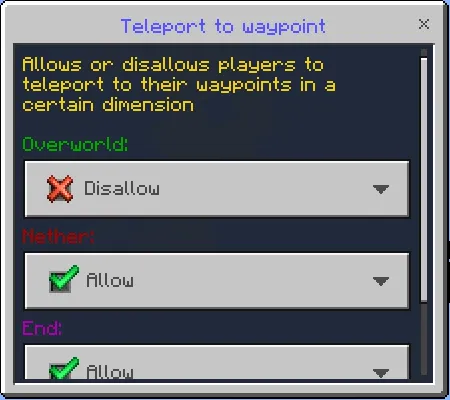
For example, if I disallow the "teleport to waypoint" button in the overworld, it will not be displayed for players who are in the overworld:

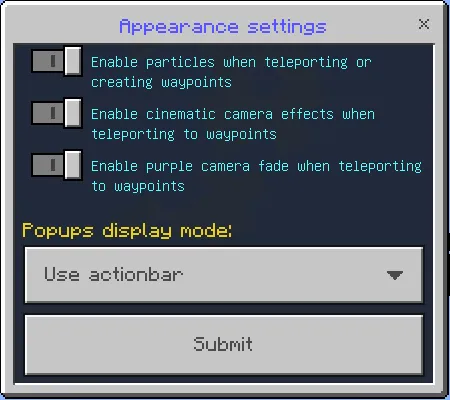
Contains settings related to appearance, effects, and the way pop-ups are displayed. They are applied globally to all players and cannot be changed in their preferences (to prevent cheating by disabling particles and other things).
Description of the options:
- 🔧"Enable particles when teleporting or creating waypoints" - If disabled, particles will not appear around the player and the waypoint during the countdown.
- 🔧"Enable cinematic camera effects when teleporting to waypoints" - If disabled, there will be no camera effects during teleportation to a waypoint, making it more abrupt.
- 🔧"Enable purple camera fade when teleporting to waypoints" - If disabled, the camera will not have a purple fade for a few seconds during teleportation to a waypoint.
- 📃"Popups display mode" - Controls the way pop-ups are displayed during countdown. By pop-up, I mean a small semi-transparent window above the hotbar that displays the countdown, the name of the waypoint, its icon, and other information. It has three display options, each of which affects the size of the pop-up. This setting is mainly used to resolve compatibility issues with addons that use the same method for displaying pop-ups.
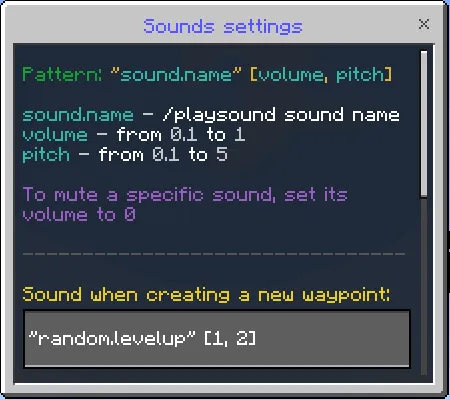
Contains strings with sounds played during various events (teleportation, waypoint creation, countdown ticking, etc). The value of each input field should follow this pattern:
"sound.name" [volume, pitch]
- sound.name - The name of the sound to be used in /playsound
- volume - Volume of the played sound (value ranging from 0.1 to 1).
- pitch - Speed multiplier of the played sound (value ranging from 0.1 to 5). A value of 1 equals normal speed.
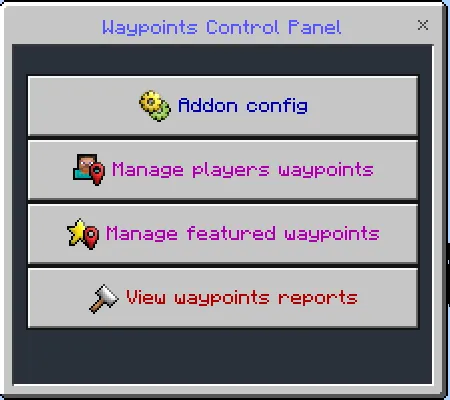
In the control panel, click "Manage players waypoints" button:
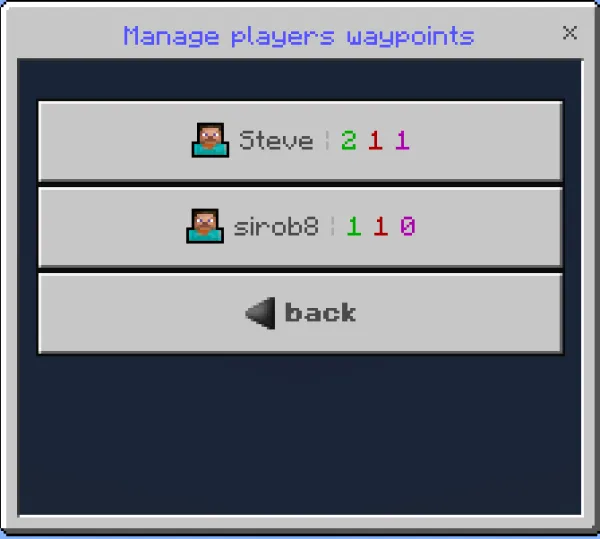
Then select a player. Next to the nickname, it says how many waypoints the player has in each dimension:
Only players who are online are displayed in the list.
Then select the waypoint. Next to the name of the waypoint, it says the dimension in which it is located:
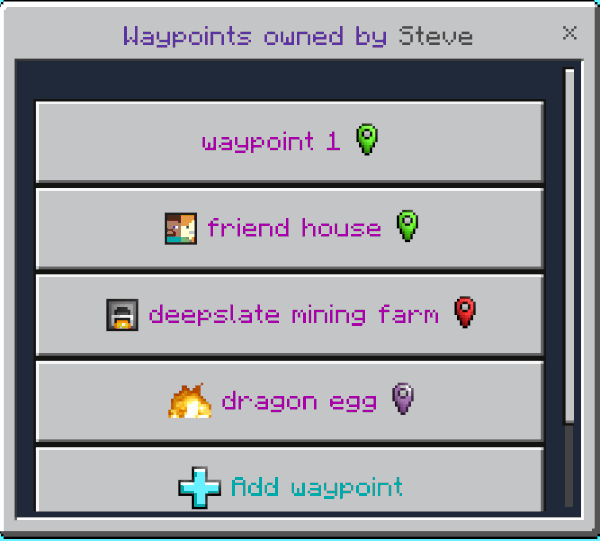
This list also contains a "waypoints management" button, which has the following menus:
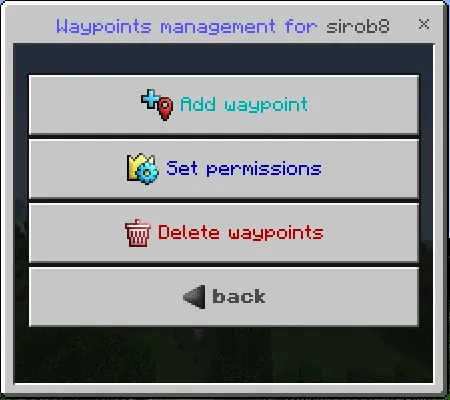
This menu allows you to perform various manipulations on the waypoints of the selected player, and also allows you to set certain "permissions" specifically for that player.
This menu contains the following sub-menus:
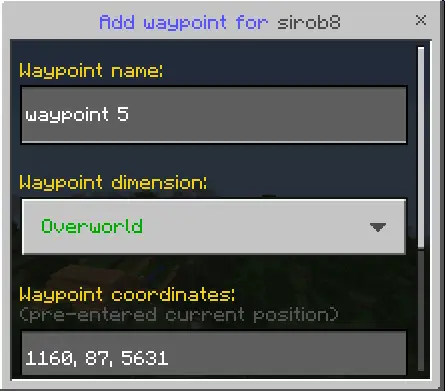
Instantly adds a new waypoint for the selected player.
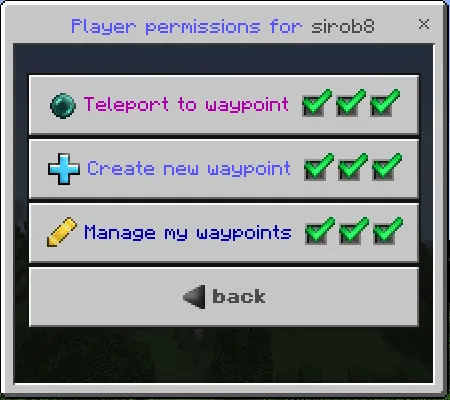
It allows you to set permissions for the selected player. The permissions changed here take precedence over the global permissions (which are in the addon config), and overwrite the global permissions for this player.
Unchanged permissions continue to follow global permissions. If the permission matches a global permission, it is marked as "(as in config)", and will follow the global permission.
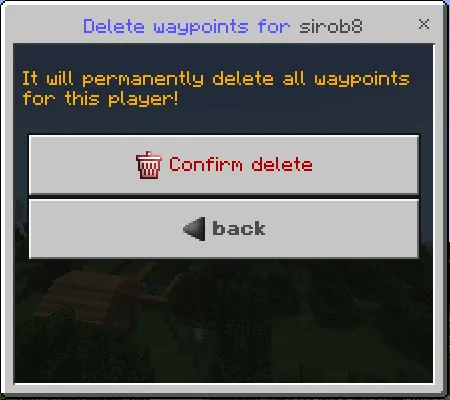
It allows you to delete all waypoints of this player in all dimensions at once.
And here you can completely control this waypoint: visit, rename, change coordinates and delete:
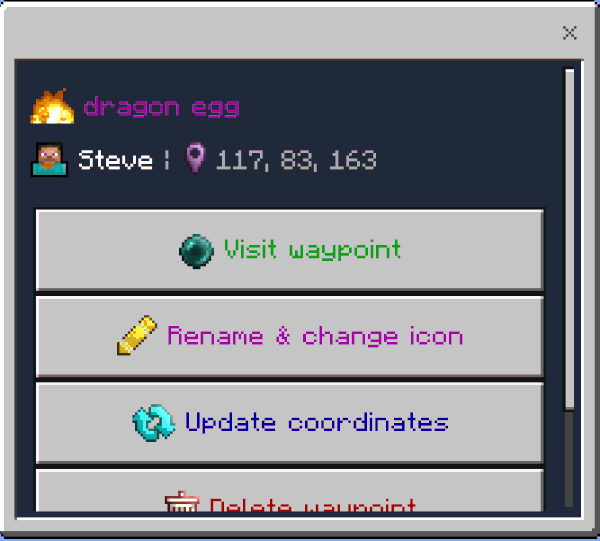
Also near the dimension icon you can see the coordinates of the waypoint.
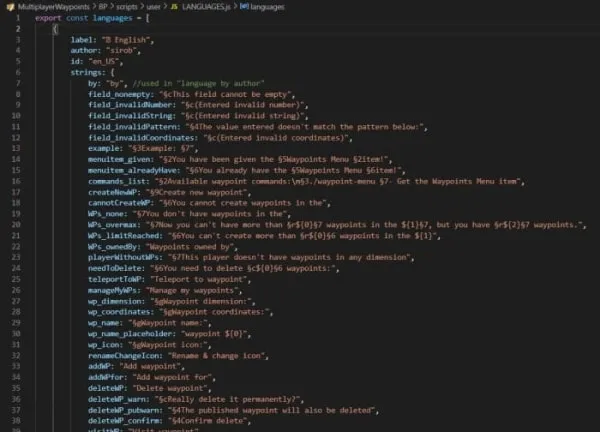
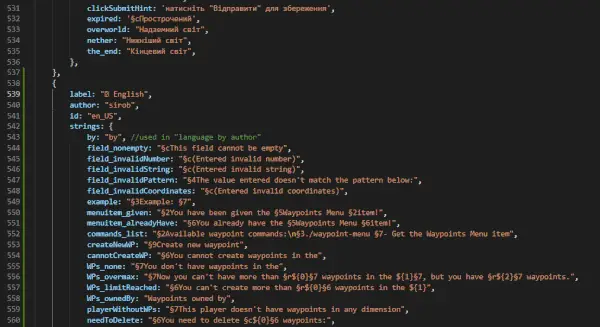
Open the downloaded BP pack using any archiver and open the file "scripts/user/LANGUAGES.js" preferably in a code editor:
You will see an array of all the languages that this addon uses. Each language has a list of strings:
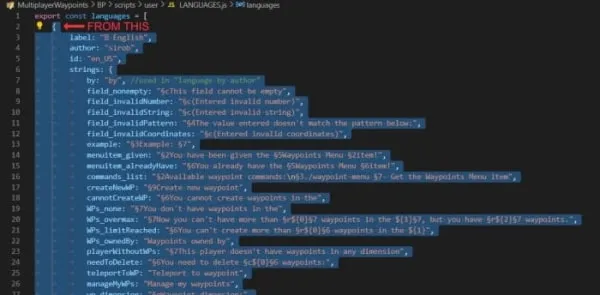
Select an object with English (or any other language you want to translate from):
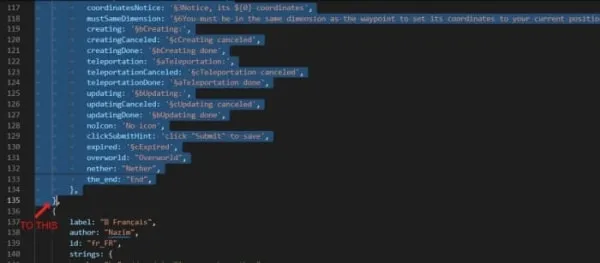
And copy the selected text. Then scroll to the end of the file, type a comma after the curly bracket, and paste:
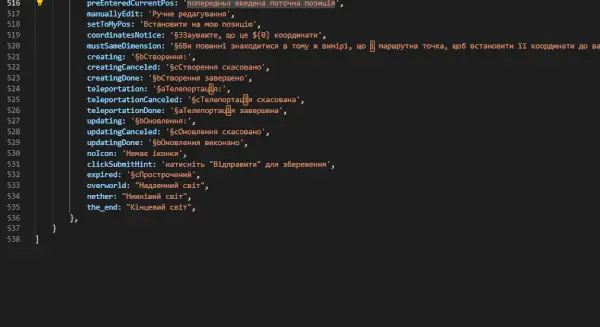
Finally, you can change any string in the new pasted object. Be sure to change id: "en_US" to the identifier of your new language. It can be any string, as long as it is unique for each language.
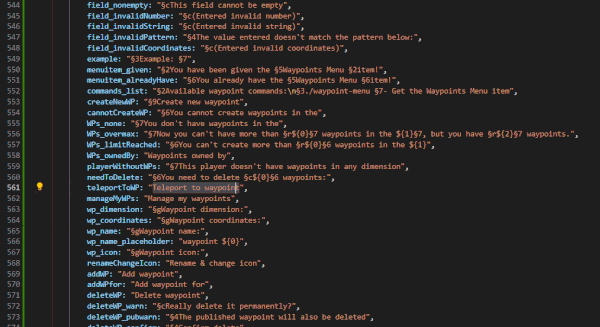
Then compress your modified BP folder into a zip archive with the extension .mcpack and let's import it into Minecraft! (first delete the previous bp pack from the behavior_packs folders which are located in games/com.mojang/ and in games/com.mojang/minecraftWorlds/youworld/)
Now you should have a new language that you created yourself!
【📦Download 𝗕𝗣】- required for the addon to work
【📦Download 𝗥𝗣】- required for the addon to work
❓ Does this addon work on realms? Download the world from your realm, enable the necessary experiments, add this addon to it, and upload it back to the realm. If it still doesn't work, then it's a realm bug.
❓ Will players preferences and waypoints be saved after updating this addon? Yes, of course! But just in case, create a copy of the world.
❓ Your addon doesn't work! Please perform all actions listed below:
- Make sure that the type of your Minecraft version is "release" (not beta or preview), and that the version matches the one indicated in the checklist above.
- Make sure that in the settings of your world, you have enabled all the experiments listed in the checklist above. If the world is uploaded to a server, check the server control panel for experiments. If they are not available there, download the world, import it into Minecraft, enable all the necessary experiments, and then upload it back to the server.
- Make sure that in the world settings, only one version of the addon is active in both "behavior packs" and "resource packs," and there are no duplicates or previous versions. If there is at least one duplicate or previous version active at the same time, the addon will not work. The same applies to the world that is uploaded to the server.
Solving this problem is not easy, so please carefully follow the steps below:
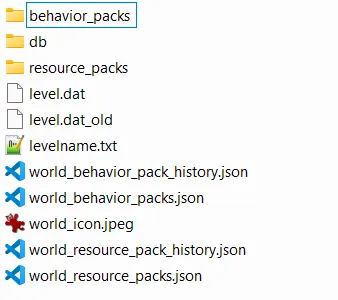
Download the world from your Realm/server, and open the world folder. You will see a list of files that looks like this:
Open the "behavior_packs" folder. You will see a list of folders that may have random names or numbers, and these folders represent the add-ons applied to the world. Your task is to delete all the folders that contain my add-on. If you're unsure which add-on is in each folder based on the names, you can open each folder and look for the "pack_icon.png" image to understand what add-on it is. If it is my add-on, then delete that folder.
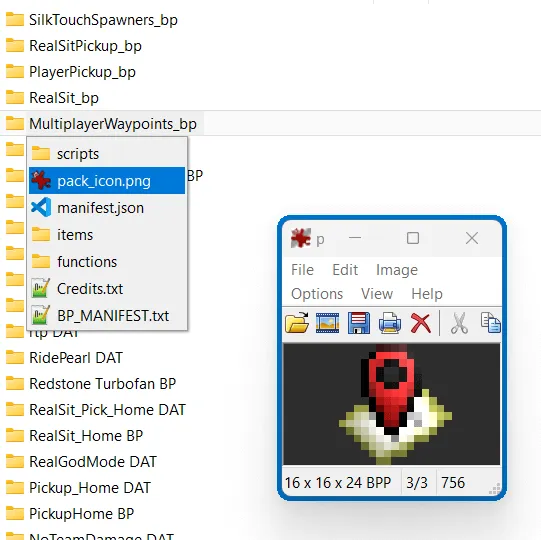
Once you have deleted all the folders of my add-on from the "behavior_packs" folder, repeat the same steps for the "resource_packs" folder. In other words, delete all the folders of my add-on from that folder as well.
Once you have deleted the folders of my add-on from both the "behavior_packs" and "resource_packs" folders, open the world in the Minecraft settings and take note of or write down the add-ons that are applied to this world. This is important because in the next step, you will be resetting the applied add-ons for the world. (Don't worry, the add-ons themselves won't disappear, you will be able to add them back to this world later)
Now delete these files in the world folder: (highlighted in blue)
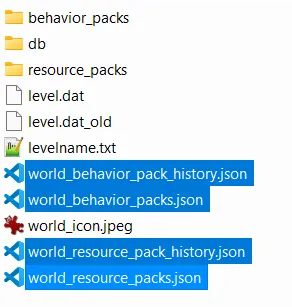
Now import the world into Minecraft, and in the world settings, re-add all the add-ons that were applied to this world. When adding my add-on, make sure it is the latest version and compatible with your version of Minecraft.
Once you have re-added all the add-ons, try entering the world in singleplayer. If my add-on is now working, upload this world to your Realm/server, making sure to remove the previous world from the slot.
❓ Your addon works in a local world but does not work on the server! Make sure that you have followed all the steps in the previous point. If you are using Aternos, try "turning off and on again" the experiment toggles, as there is a known issue where they sometimes do not activate on the first attempt. Also, ensure that your hosting provider supports script execution in addons (Beta APIs).
Updated on March 28
- The downloads section in the description has been updated to support instant file updates. Badges indicating the supported Minecraft version have been added.
╔═════【1.21.60 SUPPORT UPDATE — v2.3.12】═════╗
- 🎉 Now it supports 1.21.60!
╔═════【1.21.50 SUPPORT UPDATE — v2.3.11】═════╗
- 🎉 Now it supports 1.21.50!
╔═════【1.21.40 SUPPORT UPDATE — v2.3.10】═════╗
- 🎉 Now it supports 1.21.40!
╔═════【1.21.30 SUPPORT UPDATE — v2.3.9】═════╗
- 🎉 Now it supports 1.21.30!
╔═════【1.21.20 SUPPORT UPDATE — v2.3.8】═════╗
- 🎉 Now it supports 1.21.20!
╔═════【1.21.0 SUPPORT UPDATE — v2.3.7】═════╗
- 🎉 Now it supports 1.21.0!
- 🪲 The particles are now working again! Fixed a bug that caused all teleportation particles to be broken.
╔═════【1.20.80 SUPPORT UPDATE — v2.3.6】═════╗
- 🎉 Now it supports 1.20.80!
╔═════【1.20.70 SUPPORT UPDATE — v2.3.5】═════╗
- 🎉 Now it supports 1.20.70!
- 🌍 Français translation has been updated
╔═════【1.20.60 SUPPORT UPDATE — v2.3.4】═════╗
- 🎉 Now it supports 1.20.60!
- 🪲 Fixed a bug that caused it to be impossible to view the first published waypoint
- 🌍 The addon has been translated into a new language: Bahasa Indonesia
- 🌍 Chinese translation has been updated
╔═════【1.20.50 SUPPORT UPDATE — v2.3.3】═════╗
- 🎉 Now it supports 1.20.50!
- 🪲 Fixed a bug that caused it to be impossible to view the first published waypoint
- 🌍 The addon has been translated into a new language: Türkçe
╔═════【1.20.40 SUPPORT UPDATE — v2.3.2】═════╗
- 🎉 Now it supports 1.20.40!
- ⭐ Now the native .camera method is used instead of runCommand to reset the camera position during teleportation animation, which will slightly improve performance.
- ❓ Updated FAQ
╔═════【BUG FIX UPDATE — v2.3.1】═════╗
- 🪲Fixed a bug where the "Create New Waypoint" button could sometimes not work.
- 🪲 A bug has been fixed where, after the countdown expired, the camera would teleport to the waypoint without the player. When the player tried to move, the camera would teleport back to the player, making it impossible to visit the waypoint.
- 🌍 Updated Español translation
╔═════【TURBO UI UPDATE — v2.3.0】═════╗
- 🚀 The UI is now incredibly fast! The annoying opening and closing animations of the window have been removed, which has sped up the UI's performance!
- 🪟 Now you can see the chat, hotbar, scoreboard, and more when the menu is open! Opening the menu will no longer hide any elements on the screen, including the chat, hotbar, scoreboard sidebar, coordinates, and so on.
- 🐞Fixed a critical bug that was causing the "Create New Waypoint" button to break if a fee was set for creating a waypoint in the addon config.
- 🪲 Fixed a bug where the camera would sometimes get stuck when teleporting, preventing the player from moving.
- ♻️ The add-on has been refactored into a component-based UI system! Each menu is now a separate component in the code, making it simple to reuse them for creating new menus and speeding up future updates!
- ❓ Updated FAQ
╔═════【FEATURED WAYPOINTS UPDATE — v2.2.0】═════╗
- 🎉 Now it supports 1.20.30!
- 🚀 Featured waypoints have been added! Now the admin can create special public waypoints that are meant for important locations on your server (spawn, shop, etc.). Additionally, they have no expiration date, and you can configure a discount on the teleportation fee for each of them!
- 🆕 A new button "Manage featured waypoints" has been added to the Waypoints Control Panel menu, allowing you to create and manage them!
- 🆕 Added a new "Featured waypoints" button to the "Explore Public Waypoints" menu, allowing players to teleport to featured waypoints on your server!
- ⭐ Stability improvements! The addon now uses the playerSpawn event instead of playerJoin and /testfor @s checks to determine player spawn. This resolves any lag issues that may have occurred when numerous players joined your world simultaneously!
- 💰 Teleportation fees now work for public waypoints! An issue has been fixed where fees were not being charged to players when they teleported to any public waypoint.
- 🪲 Fixed a bug which prevented players from teleporting to their waypoints if the addon config had teleportation fee enabled in scoreboard mode, but the player did not have an identity in that scoreboard.
- 🌍 Updated Chinese and Português translations
- 🎨 Fixed bad contrast of "pre-entered current position" text
╔═══════【BLACKLIST UPDATE — v2.1.0】═══════╗
- 🚀 Added blacklist system for published waypoints! Now, you can view who has visited your published waypoints and when, and you can blacklist specific players to prevent them from visiting your waypoints! The blacklist is separate for each waypoint!
- 🚀 Added a new "Manage visitors" button, where the owner of published waypoints can see who has visited their waypoints, when they visited, and how many times!
- 📶 Now the addon supports almost all server hosting providers! The addon files no longer use Unicode characters, which solves all the issues with FTP clients and allows the addon to be used on virtually any server!
- ⭐ The order of the "Explore public waypoints" button has been changed, and now it appears after "Create new waypoint," which will greatly enhance usability!
- 🪲 The "mini ender pearl" icon has been updated, now without any blurriness!
- 📱 Updated ModBay post, added documentation for public waypoints, updated outdated screenshots, updated FAQ, refreshed headers design, and a new section has been added - "More guides about publishing system"!
- 🛠️ The "sirobfuscator" script has been updated to version 7.0.0! After a major code refactoring, it finally no longer uses Cyrillic characters in output file names!


