
Jayly's Cinematic Editor (V2.2.1)
 Go to files
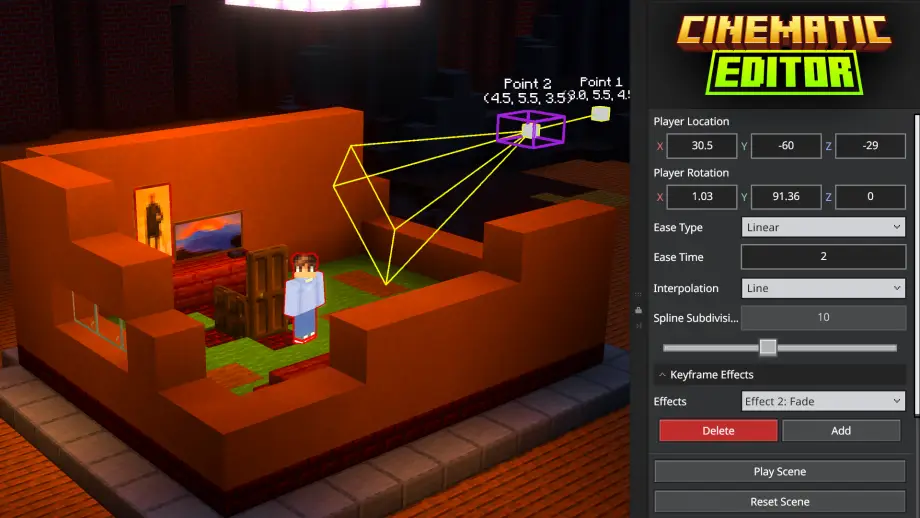
Jayly's Cinematic Editor controls your camera to change perspectives and design cinematic scenes within Minecraft. This tool is available as a standalone Minecraft Add-On, or a Minecraft Editor extension used within Minecraft Editor.
Cinematic Editor V2
Note: The Minecraft Cinematic Editor extension is currently available to the Windows version of Minecraft Bedrock Edition.
Note: This extension requires Minecraft Bedrock Editor in-game tool.
The Cinematic Editor got a major update with new features and improvements! If you're a Windows player, you might enjoy a more streamlined and powerful editing experience.
Cinematic Editor with 'Prizma Visuals' Vibrant Visuals Pack.
Download the Editor Extension here
The full wiki, video versions of Cinematic Editor and its installation tutorial are also available in the link above.
Features
- Ability to manage Cinematic Editor tool and interact with the Minecraft world simultaneously.
- Create and manage keyframes
- Adjust camera position and rotation
- Control camera transitions (easing)
- Control camera interpolation (linear and hermite)
- Add keyframe effects (fade in/out)
- Export scene for use in the Cinematic Runtime Add-On (Currently not supported for Cinematic Editor V2)
What's Next
Looking ahead, here's a list of features I wanted to include in future releases. No promises tho.
- Play multiple sequences one after the other until the scene is finished
- Change camera FOV support
- Export scene for use in the Cinematic Runtime Add-On
- Manage scene using Custom Commands API
- Record and replay Minecraft gameplay (e.g. similar to ReplayMod / Flashback capabilities)
Cinematic Runtime full Wiki + YouTube Guide
If you prefer to watch a video version of this tutorial and explore every feature in Cinematic Runtime Add-On, you can view it on the wiki, available here.
Creating a Scene
Start by running the following command: /function cinematic/editor
When executed, this form should appear when you have not created a scene:
This Cinematic Runtime screen shows a button named 'Create Scene', occurs when a scene is not created.
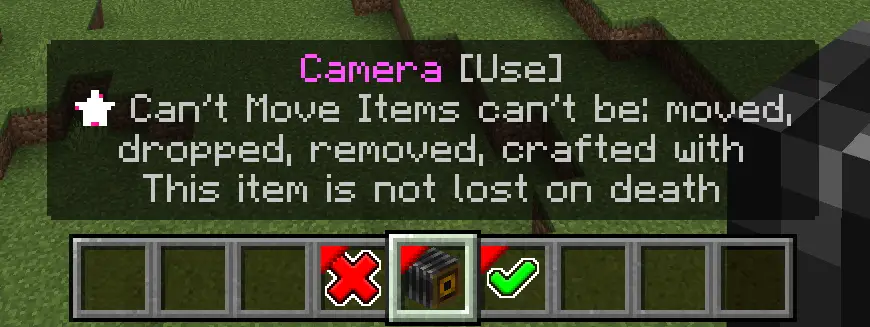
Scene Editor Mode
After pressing the create scene button, you will enter Scene Editor mode. There will be 3 items in your hotbar. The camera item creates a keyframe when it's used.
Create and Edit Keyframe
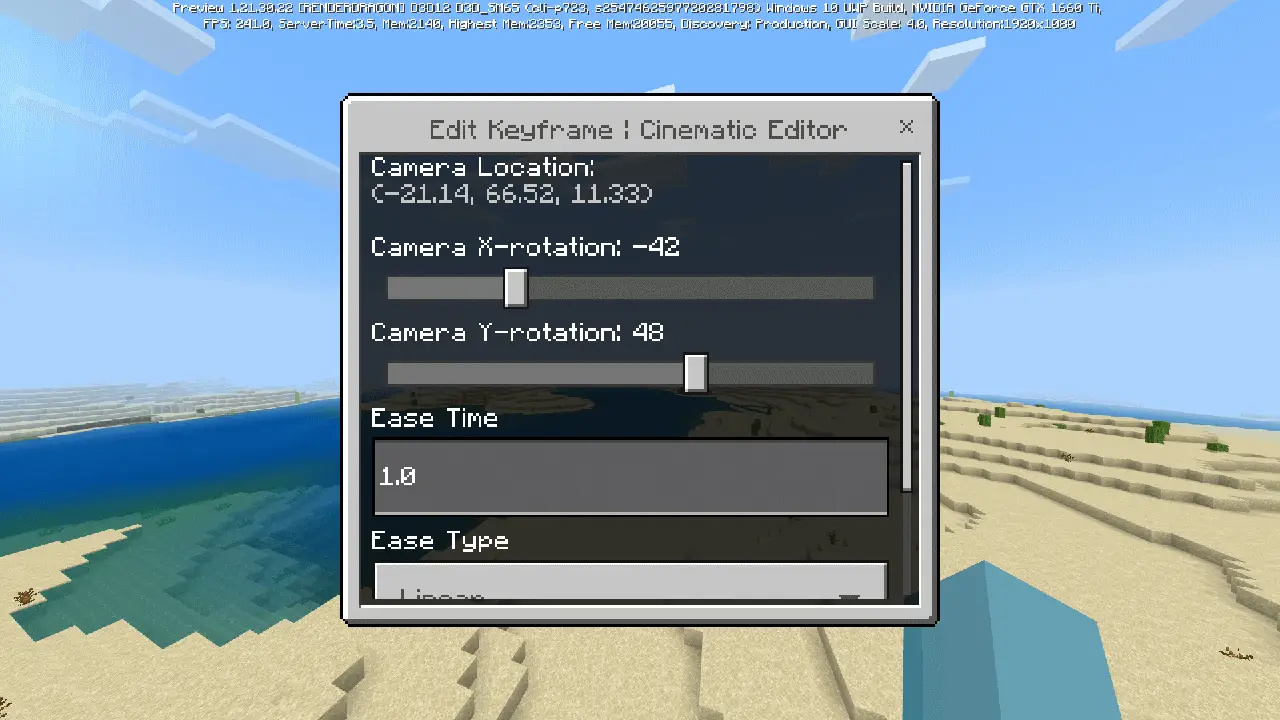
You then can create and edit a keyframe information using the keyframe edit screen, such as ease type and ease time of a keyframe of a scene.
Edit Existing Scene
After you finished creating a scene, you can run the function command again to modify your scene.
Remove a Keyframe from Scene
When you edit a scene, a new screen comes up and you can modify or remove a keyframe from a scene.
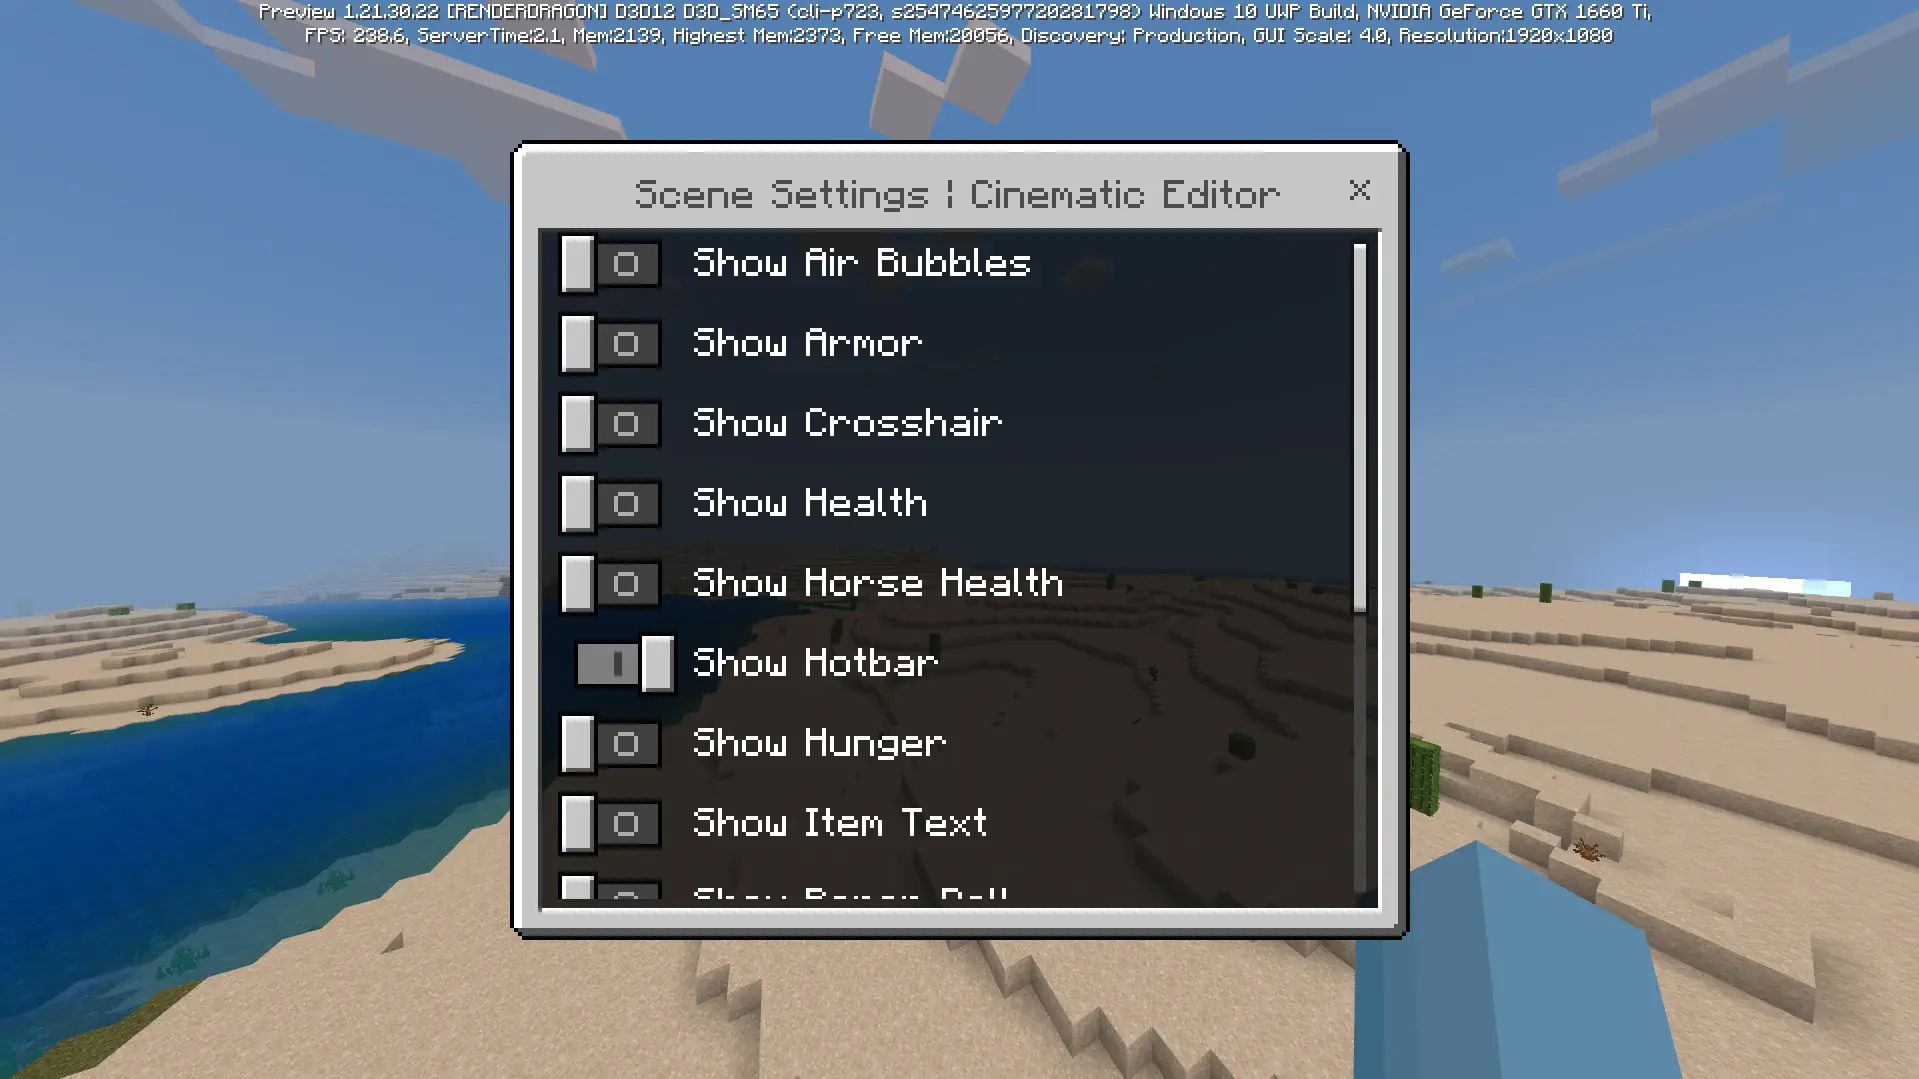
Play Scene Settings
This screen controls the visibility of some elements when playing a scene using the Runtime Add-On.
Installation
Here's a quick guide on how to install the Cinematic Editor extension and the Runtime Add-On.
First, download the latest release of the Cinematic Editor and Runtime below.
- Cinematic Editor V2: Download files
CinematicEditor_v2.x.x_WinBP.mcpackandCinematicEditor_v2.x.x_WinRP.mcpackto access Cinematic Editor new V2 features. - Cinematic Editor V1: Download files
CinematicEditor_v1.x.x_WinBP.mcpackandCinematicEditor_v1.x.x_WinRP.mcpackto access Cinematic Editor V1 features with Cinematic Runtime compatibility. - Cinematic Runtime: Download file
CinematicRuntime_v2.x.x_BP.mcpackandCinematicRuntime_v2.x.x_RP.mcpackto access Cinematic Runtime Add-On.
To use Cinematic Runtime, open the downloaded Cinematic Runtime's .mcpack files should import the packs.
To use Cinematic Editor, open Minecraft Editor on Windows and open the downloaded Cinematic Editor's .mcpack files.
You can launch it either directly from the Creator Tools tab in the Minecraft Launcher or by creating a custom desktop shortcut that uses the command minecraft:?Editor=true.
Updated on January 31, 2026
- Add Vibrant Visuals toggle in the Cinematic Editor panel
- Added ability to import and export scenes
- Fixed FOV issues with editor debug camera
- Update now supports Minecraft v1.21.130 or above
- Check the full changelog here: https://jaylydev.github.io/posts/cinematic-editor-changelog/#200


![Thumbnail: More Armor Weapons Tools and Swords Items Mod! – 𝗠𝗶𝗻𝗲𝗰𝗿𝗮𝗳𝘁 𝗙𝗼𝗿𝘁𝗶𝗳𝘆 𝗥𝗲𝘄𝗼𝗿𝗸𝗲𝗱 [v1.0.2] [New Mods New Addons Update!] [Compatible with any Addon!]](/uploads/posts/2025-02/b0534b5772_minecraft-fortify-cover.webp)